Loft Converter London Blog
What Is the Maximum Loft Conversion Size Allowed in the UK?
February 10, 2026
Understanding how big your loft conversion can be before planning permission becomes required is one of the most practical questions to answer early in the planning process. The rules are defined clearly under permitted development, but they have nuances that catch people out, particularly in London, where local restrictions layer on top of the national framework.
This guide explains the size limits clearly, what counts toward them, and what your options are if your proposed conversion exceeds them.
The permitted development volume limits
The national permitted development rules set specific volume limits for roof enlargements on dwelling houses in England. These are the baseline limits that apply before any local restrictions are considered.
For a terraced house, the maximum additional volume permitted under permitted development is 40 cubic metres. For a detached or semi detached house, the limit is 50 cubic metres.
These limits apply to the total additional volume created above the original roof of the house. They are not limits on the size of a single dormer or extension. They cover the cumulative total of all roof enlargements that have been made to the property since it was originally built.
This cumulative nature is one of the most important and most frequently misunderstood aspects of the volume limit. If a previous owner added a dormer or any other roof enlargement at any point, that volume counts toward your allowance. You may not have the full 40 or 50 cubic metres available even if you have never made any changes to the roof yourself.
What counts as additional volume
The additional volume is calculated as the difference between the volume of the original roof space and the volume of the enlarged roof space after the conversion.
The original roof space means the roof as it was when the house was first built, before any extensions or alterations. Not the roof as you found it when you bought the property. If the house was built in 1935 and a previous owner added a dormer in 1985, the original roof is still the 1935 configuration for the purposes of this calculation.
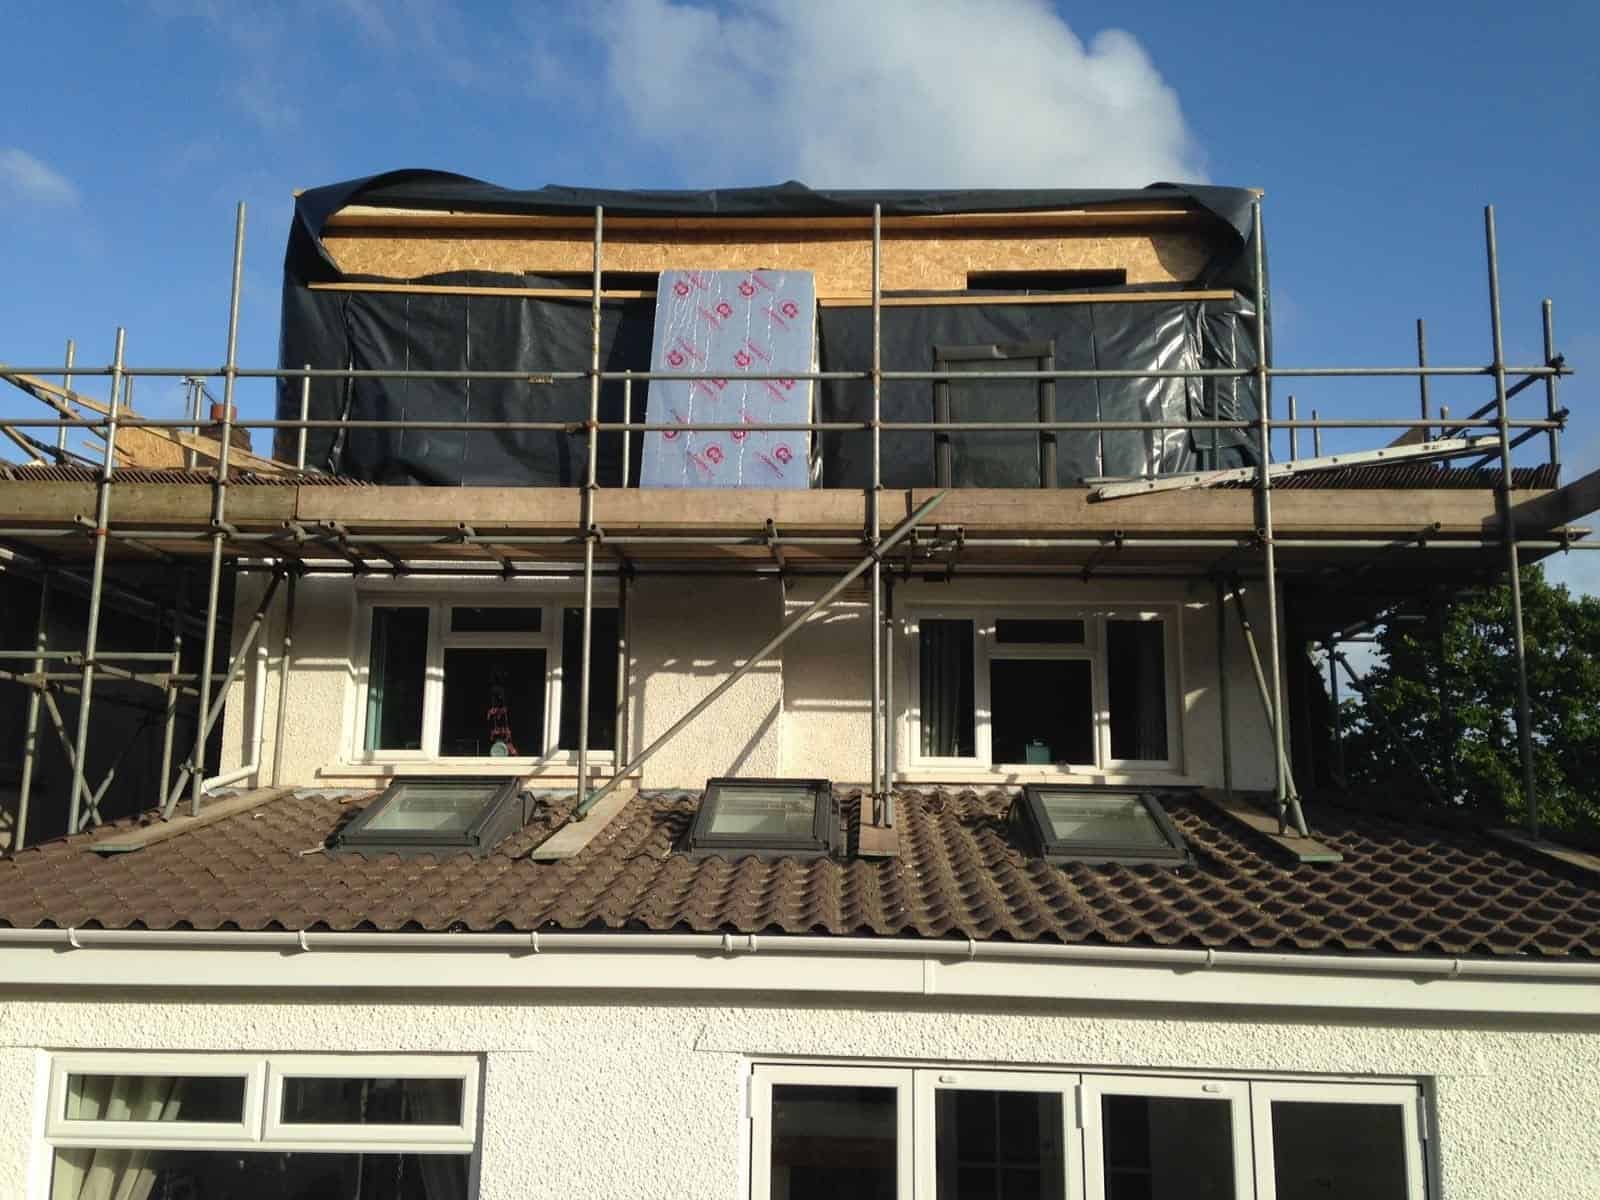
A rear dormer adds volume by projecting outward from the existing roof slope. The volume of that projection, from the outer face of the dormer back to the original roof slope, is the additional volume counted against the permitted development limit.
A Velux conversion that adds roof lights flush into the existing slope without projecting beyond it does not add any volume in the structural sense. Roof lights are treated separately under permitted development and are not counted against the volume limit, provided they do not protrude more than 150 millimetres beyond the plane of the roof slope.
A hip to gable conversion adds volume by extending the roof outward to replace the sloping hip end with a vertical gable wall. The volume added by this extension counts against the permitted development limit and can be substantial on a larger semi detached or detached home.
Calculating the precise volume of a proposed conversion requires the dimensions of the proposed works and some geometry. An architect, architectural technician, or structural engineer can calculate this accurately as part of their initial assessment. If you want to do a rough check yourself, the Planning Portal's interactive house guide provides useful guidance on how volume is assessed for different conversion types.
Why the limits exist
The volume limits are designed to strike a balance between allowing homeowners reasonable freedom to improve their homes and protecting the character of residential streets and neighbourhoods from overdevelopment.
A home that has had its roof dramatically enlarged can have a significantly different visual impact on the street compared to neighbouring properties, particularly where dormers are large or where the original roof profile has been substantially altered. The volume limits constrain how far this change can go under permitted development before requiring the scrutiny of a formal planning application.
In practice, for most standard London homes, the 40 or 50 cubic metre limit is sufficient to accommodate a well designed conversion without requiring a planning application. The limits become a constraint primarily on larger properties where a more ambitious conversion is planned, or where previous works have already used part of the allowance.
What the limits mean in practice
For most standard terraced and semi detached homes in London, the volume limits are generous enough to accommodate a practical rear dormer or L-shaped conversion without difficulty.
A standard rear dormer on a typical London terrace adds roughly 20 to 30 cubic metres of volume depending on its width, depth, and height. This sits comfortably within the 40 cubic metre limit for a terraced house, leaving some allowance remaining even after the conversion.
An L-shaped dormer on a Victorian terrace with a back addition adds more volume than a standard rear dormer because of the second dormer element. The combined volume of both elements can approach or exceed the 40 cubic metre limit on some properties, particularly larger terraces. This is worth checking carefully before assuming permitted development applies.
A hip to gable conversion on a semi detached home adds a meaningful volume at the hip end. Combined with a rear dormer, the total volume added can approach or exceed the 50 cubic metre limit on larger 1930s semis, particularly where both a hip to gable and a substantial rear dormer are proposed together.
On detached homes, the 50 cubic metre limit is more generous and in most cases allows for a substantial conversion without restriction. But on very large detached properties where an ambitious conversion is planned, the limit can still become relevant.
Height restrictions alongside the volume limits
Volume is not the only size constraint under permitted development. Height restrictions apply independently of the volume calculation.
Any roof enlargement must not exceed the height of the existing ridge line. This means the highest point of the conversion cannot be taller than the highest point of the existing roof. You cannot add volume upward beyond the ridge under permitted development regardless of whether the volume limit has been reached.
This height restriction has a direct practical implication for conversion design. It rules out any approach that would raise the ridge height, such as adding a mansard style pitched roof on top of a dormer that takes the overall height above the original ridge. Any such design requires full planning permission regardless of whether the volume limit would otherwise be met.
The height of any side extension or alteration is also restricted. No extension can be higher than the highest part of the existing roof, which in practice means dormers and other additions must sit below the ridge line throughout.
The original roof: why it matters so much
Because the volume limits apply to additional volume above the original roof configuration, understanding exactly what the original roof looked like is important for any property where previous alterations may have been made.
For a property bought recently with no visible alterations to the roof, the original configuration is typically clear. For a property with an existing dormer, a previously extended roof section, or alterations that were made without formal documentation, establishing exactly what the original roof looked like can require research.
Your local council's planning portal will show the planning history of the property, including any previous applications for roof alterations. Where previous works were carried out under permitted development without a formal application, there may be no council record of them, which can make establishing the original configuration more difficult.
In practice, planning officers assessing applications use the original as-built roof as the baseline, and any ambiguity about what the original roof looked like is generally resolved by reference to the original building plans if they are available, neighbouring properties of the same type, or older photographs of the property.
If you are buying a property with an existing loft conversion and are considering further works, getting clarity on the planning history and the remaining permitted development volume allowance before you proceed is important. A solicitor reviewing the property's legal pack and a planning consultant's assessment can both help establish the position.
When the volume limit is exceeded
If your proposed conversion exceeds the permitted development volume limit, full planning permission is required. This is not the end of the road. Many larger loft conversions in London proceed through the full planning application process.
A householder planning application for a loft conversion currently costs £258 in England. Professional costs associated with the application, including planning drawings and consultant fees, typically add £1,000 to £2,500 on top of this. The statutory determination period is eight weeks from validation, though in practice twelve weeks is a more realistic expectation in many London boroughs.
The planning assessment for a conversion that exceeds permitted development limits is not automatically more difficult than for one that sits within them. The council will assess the proposal against their local planning policies, the impact on neighbouring properties, and the effect on the character of the street and area. A well designed conversion that exceeds the volume limit by a modest amount and addresses potential amenity impacts on neighbours is often approved without difficulty.
Our planning permission timeline guide covers the full application process in detail including realistic timelines and costs at each stage.
Exceeding the limits in conservation areas
In a conservation area, the volume limits matter less than the planning requirement that applies regardless of volume. Within a designated conservation area, any roof enlargement that is visible from a highway requires full planning permission regardless of whether it would otherwise fall within the permitted development volume limits.
In other words, in a conservation area you may have a conversion that is small enough to meet the volume limits but still requires planning permission because of its location and visibility. The two requirements are independent of each other.
Our conservation area guide explains the full planning implications of conservation area status and what the application process typically involves for loft conversions in these areas.
Maximising your permitted development allowance
If you want to make the most of the permitted development volume allowance available to your property, there are design approaches that help.
A well proportioned rear dormer that is set back from the eaves and the sides of the roof, rather than running full width to the very edges, uses the volume allowance efficiently while typically having a lower visual impact than a full width dormer. Building control and planning officers look more favourably on proportionate additions, and designing within the visual norms for your street reduces the risk of objections from neighbours.
If the volume limit is a constraint, prioritising the parts of the conversion that add the most usable space per cubic metre of additional volume is a sensible approach. A well designed dormer that maximises headroom over the most usable part of the floor plan delivers more practical benefit than a less efficient design that uses the same volume allowance less well.
Working with an experienced architect or architectural technician who knows how to calculate volume accurately and design efficiently within the limits is the most reliable way to maximise what your permitted development allowance delivers. Our do you need an architect guide explains the role of different design professionals and when professional design input adds the most value.
Wales, Scotland, and Northern Ireland
The permitted development rules described in this guide apply to England. Wales, Scotland, and Northern Ireland each have their own planning frameworks with different permitted development provisions.
In Wales, the rules are broadly similar to England but have some differences in detail. Planning Permission Wales provides the relevant guidance for Welsh properties.
In Scotland, permitted development rights for loft conversions are defined under the Town and Country Planning (General Permitted Development) (Scotland) Amendment Order 2011. Planning and Architecture Scotland is the relevant reference for Scottish properties.
In Northern Ireland, a separate permitted development order applies. Planning NI provides guidance on what is permitted without an application in Northern Ireland.
This guide, and the wider content on this site, focuses on London and England. If your property is in Wales, Scotland, or Northern Ireland, the specific volume limits and conditions that apply may differ from those described here.
Checking the position for your specific property
Given the cumulative nature of the volume limits, the variation between property types, and the additional restrictions that apply in conservation areas and under Article 4 directions across London, checking the specific position for your property before you commit to any design is important.
The steps to take are straightforward. Check the planning history of the property on your local council's planning portal to identify any previous roof alterations. Check whether the property is in a conservation area using Magic Maps or the council portal. Check whether an Article 4 direction applies to your address. Confirm whether the property is listed on Historic England's National Heritage List.
Once you have that information, have your architect or engineer calculate the volume of the proposed conversion accurately to confirm whether it sits within the permitted development limits.
If everything is clear and the volume is within limits, consider applying for a Lawful Development Certificate to formalise the permitted development position. It costs £258 and provides written confirmation from the council that the works are lawful, which protects you at the point of sale and removes any ambiguity about the planning status of the conversion.
Our permitted development rules guide covers the full framework in detail, and our loft conversion costs page covers the full cost picture including planning application fees where required.
The straightforward summary
The maximum loft conversion size under permitted development in England is 40 cubic metres of additional volume for a terraced house and 50 cubic metres for a detached or semi detached house. These limits are cumulative, cover all roof enlargements since the property was originally built, and apply independently of the height restriction that prevents any addition from exceeding the original ridge line.
Most standard loft conversions on typical London homes sit comfortably within these limits. Larger conversions, combinations of hip to gable and rear dormer on bigger properties, and properties where previous works have used part of the allowance may approach or exceed the limits and require a planning application.
Knowing exactly how much permitted development volume is available to your property, and designing your conversion to make the most efficient use of it, is a straightforward step that avoids the complications and costs of an unnecessary planning application or, worse, an enforcement issue after the works are complete.
At Loft Converter London we check the permitted development position and calculate the available volume as one of the first steps on every project. Getting this right at the design stage costs nothing extra and prevents problems that are expensive to resolve later.
Our loft conversion types guide, building regulations guide, party wall agreements guide, and how long does a loft conversion take guide are all useful reading as you continue to build your understanding before speaking to anyone.
What Loft Conversions Fall Under Permitted Development?
January 30, 2026

Permitted development is one of the most useful things to understand before you start planning a loft conversion in London. It allows certain types of home improvement to proceed without a formal planning application, saving time, money, and the uncertainty of waiting for a council decision.
But permitted development comes with conditions, and London has more exceptions and local restrictions than most parts of the country. Understanding exactly what qualifies, and what does not, helps you plan your project with confidence and avoid the costly mistake of assuming permission is not needed when it actually is.
What does permitted development actually mean for loft conversions
Permitted development rights are granted by the government through the Town and Country Planning (General Permitted Development) (England) Order 2015, which sets out the specific types of works that can proceed without a planning application, provided they stay within defined limits.
For loft conversions, permitted development covers certain enlargements of the roof space of a dwelling house. The keyword is dwelling house. Flats and maisonettes do not benefit from the same permitted development rights as houses, which is one of the reasons converting a loft in a flat involves a more complex planning process. Our loft conversion in a London flat guide covers this in detail.
The permitted development rules define specific conditions relating to volume, height, materials, and the location of the works on the roof. Stay within all of those conditions and no planning application is needed. Exceed any one of them and full planning permission is required.
The volume limits
The volume limit is the most important permitted development condition for most loft conversions and the one most frequently misunderstood.
For a terraced house, the total volume added by any roof enlargement must not exceed 40 cubic metres. For a detached or semi detached house, the limit is 50 cubic metres. These limits apply to the total additional volume created above the original roof, not just the volume of a single dormer or extension.
The cumulative nature of this limit is often overlooked by homeowners. If a previous owner added a dormer at any point, that volume counts toward your permitted development allowance. The 40 or 50 cubic metre limit is for the lifetime of the building's permitted development use, not just for your current project.
Before you assume the full volume allowance is available, check the property's planning history. Your local council's planning portal will show any previous applications and permitted development works that have been formally recorded. Land Registry documents and the property's legal pack may also contain information about previous alterations.
If you are not sure how to calculate the volume of your proposed conversion, a structural engineer or architect can accurately determine it as part of their initial assessment. Our structural calculations guide explains what the engineer assesses and why involving them at the design stage is important.
The height restrictions
Any addition to the roof must not exceed the height of the existing ridge line. This means you cannot build upward beyond the highest point of your current roof under permitted development.
The materials used for any roof extension should also match the existing house in appearance. This does not mean identical, but it does mean significantly different cladding materials or roof coverings that contrast dramatically with the existing building are likely to take the project outside permitted development.
What faces the highway
This is one of the most practically important conditions for London homeowners.
Any enlargement that fronts a highway is not permitted development. In straightforward terms, a dormer on the front elevation of a house that faces the street almost always requires full planning permission. This is why front dormers are relatively uncommon in London compared to rear dormers, and why those that do exist have typically gone through a planning application.
A rear dormer, which faces the garden and is not visible from the street in most cases, is much more likely to qualify as permitted development. This is the most common type of loft conversion in London and, in most cases, can proceed without a planning application on eligible properties.
Side dormers face a mixed position. Whether they qualify for permitted development depends on whether they face a highway, which may be the case on a corner plot or an end terrace. On a mid terrace or standard semi detached home, a side dormer may not face a highway directly, but the specific geometry of the plot matters and this should be confirmed before assuming permitted development applies.
Roof lights and Velux conversions
Velux conversions, which add roof windows flush into the existing slope without altering the roofline, have the most straightforward permitted development position of any conversion type.
Roof lights can be installed under permitted development provided they do not protrude more than 150 millimetres beyond the plane of the existing roof slope, and they are not installed on a roof slope that faces and is visible from a highway.
For most London homes, rear-slope rooflights qualify for permitted development without question. Front-slope roof lights that are visible from the street require planning permission. This is why Velux conversions on the rear slope of a standard London terrace or semi are almost always permitted development, while equivalent works on the front elevation require an application.
Our Velux loft conversion guide covers when this conversion type works best and what the build involves.
Hip to gable conversions and permitted development
Hip to gable conversions have a less consistent permitted development position than standard rear dormers, and this is where many homeowners are caught out.
Under the national permitted development rules, a hip to gable conversion can qualify as permitted development provided it meets the volume limit, does not exceed the ridge height, and uses appropriate materials. But in practice, many London boroughs consider a hip to gable conversion to alter the visible roofline of the property in a way that goes beyond what permitted development intends, particularly where the hip end faces a highway or is visible from public space.
Some boroughs have taken enforcement action against hip to gable conversions carried out under assumed permitted development rights, which creates a risk that is worth taking seriously. The safest approach on a hip to gable conversion in London is to either apply for a Lawful Development Certificate to confirm permitted development status formally before work starts, or to make a full planning application to remove any ambiguity.
Our hip to gable loft conversion guide covers this planning consideration in more detail and what to check for your specific property and borough.
When permitted development does not apply at all
There are specific designations that remove or significantly restrict permitted development rights for loft conversions. London has more of these than most parts of England, and they affect a significant proportion of the capital's housing stock.
Conservation areas are the most widespread restriction in London. Within a designated conservation area, any enlargement of the roof that would be visible from a highway requires full planning permission. Roof lights on a rear slope that is not visible from a road may still qualify for permitted development within a conservation area, but any dormer or structural roof alteration that is visible from public space requires an application.
London has over 1,000 conservation areas spread across all 33 boroughs. Many homeowners do not know their property is within one until they start researching planning rules. You can check whether your property falls within a conservation area using Magic Maps, the government's planning designation mapping tool, or your local council's planning portal.
Our conservation area guide explains the full implications of conservation area status for loft conversions and the typical application process.
Article 4 directions are a further layer of restriction used by some London boroughs to remove permitted development rights in specific areas or streets, usually to protect the character of a neighbourhood. Article 4 directions are used extensively in inner London boroughs. Islington, Camden, Hackney, and Southwark all have Article 4 directions covering significant parts of their area, and some outer London boroughs use them in specific conservation areas or estates.
An Article 4 direction means that works which would otherwise be permitted development require a formal planning application. Checking whether an Article 4 direction applies to your specific address takes only a few minutes on your local council's planning portal and is an essential step before assuming permitted development is available to you.
Listed buildings are subject to a complete removal of permitted development rights. If your home is listed, no permitted development rights apply at all. Any structural work, including internal alterations, requires listed building consent in addition to any planning permission needed. You can check whether your property is listed on the Historic England National Heritage List for England.
Balconies, platforms, and raised terraces
One specific permitted development exclusion that catches people out when planning a loft conversion is the rule on balconies and raised platforms.
Any enlargement that incorporates a balcony, veranda, or raised platform is not permitted development, regardless of size. If you want a roof terrace or an external space accessible from the loft conversion, full planning permission is required regardless of whether the rest of the conversion would otherwise qualify.
This applies even where the raised area is very small. A single step out through a dormer window onto a small platform counts as a raised platform under the rules. If outdoor access from the loft is part of your plans, factor in a planning application from the outset.
Overhanging the outer wall
Any extension that overhangs the outer wall of the house is outside permitted development. This condition is relevant to certain dormer designs where the front face of the dormer extends beyond the line of the existing wall below, which is uncommon but worth being aware of when reviewing proposed designs.
The Lawful Development Certificate
Even when your project clearly qualifies for permitted development, applying for a Lawful Development Certificate from your local authority is worth serious consideration.
A Lawful Development Certificate is a formal written confirmation from the council that your proposed works are lawful under permitted development rules. It is not planning permission. It is a separate application that costs £258 in England and typically takes eight weeks to process.
The practical value becomes clear at the point of sale. When you sell the property, the buyer's solicitor will ask for evidence that the loft conversion was carried out lawfully. A completion certificate from building control confirms that the build complied with building regulations. A Lawful Development Certificate confirms the planning position was lawful. Together, they provide a clean paper trail that makes the conveyancing process straightforward.
Without a Lawful Development Certificate, you are relying on the permitted development rules having been correctly interpreted and applied, which can become a point of friction in a sale even when everything was genuinely done properly.
The Planning Portal provides a useful interactive guide to permitted development rules for householder projects including loft conversions, which is worth reviewing alongside your local council's specific guidance.
What to do before you assume permitted development applies
The most common and costly planning mistake on loft conversions in London is assuming permitted development applies without checking. Taking thirty minutes to verify the position for your specific property before you commit to design fees or contractor quotes is time very well spent.
Check whether your property is in a conservation area using Magic Maps or your local council's portal. Check whether an Article 4 direction applies to your address on the same portal. Check whether your property is listed on the Historic England register. Review the planning history of the property to understand whether previous works have used up part of your permitted development volume allowance.
If everything is clear, confirm with your architect or structural engineer that the proposed design remains within the volume and height limits before finalising the drawings. And consider applying for a Lawful Development Certificate once the design is confirmed, particularly if you plan to sell within the next few years.
Our planning permission timeline guide covers the full application process for cases where planning permission is needed, including realistic timelines and costs at each stage.
The full permitted development checklist
Before proceeding under permitted development, your loft conversion must satisfy all of the following conditions.
The property must be a dwelling house, not a flat or maisonette. The total volume added must not exceed 40 cubic metres for a terraced house or 50 cubic metres for a detached or semi-detached house, including any previous roof enlargements. The works must not exceed the height of the existing ridge line. Materials used must be similar in appearance to the existing house. No part of the works must extend beyond the outer wall of the house. No balcony, veranda, or raised platform must be created. No part of the works must front a highway. The property must not be in a conservation area where the works are visible from a highway. No Article 4 direction must apply to the property that removes the relevant permitted development rights. The property must not be listed.
If your project satisfies every condition on that list, permitted development applies and no planning application is needed. If it fails any one of them, a planning application is required.
Our loft conversion costs page covers the full cost picture including planning application fees and professional costs for cases where an application is needed. Our loft conversion types guide explains how different conversion types interact with permitted development rules in practice.
The straightforward summary
Most standard rear dormers and Velux conversions on non-listed London homes outside conservation areas will qualify for permitted development. But London has more exceptions than anywhere else in the country, and the consequences of getting it wrong range from an enforcement notice to a problem at the point of sale.
Check the specific rules that apply to your property before you proceed with anything. It costs nothing and takes very little time. If there is any doubt about whether permitted development applies, a Lawful Development Certificate or a pre-application enquiry with the local authority resolves that doubt for a modest cost and gives you certainty before you commit to the project.
At Loft Converter London, we check the planning position for every project as one of the first steps in our process. Understanding what is permitted before designs are developed prevents the expensive and frustrating situation of producing detailed drawings for a project that turns out to require planning permission.
If you are building your understanding of the full process, our building regulations guide, party wall agreements guide, do you need an architect guide, and how long does a loft conversion take guide are all useful next steps.
Can You Convert the Loft in a London Flat?
January 23, 2026
This question comes up regularly, and the honest answer is that it depends on several factors specific to your property and lease. Converting a loft into a flat is genuinely possible in some circumstances, but the legal and practical hurdles are more substantial than for a freehold house, and many flat owners discover early in the process that the conversion they had in mind is not straightforward at all.
Here is what you actually need to know before you spend time or money investigating further.
The fundamental difference between a flat and a house
When you own a freehold house, you own the building from the foundations to the ridge. The roof space is yours. The decision to convert it is yours to make, subject to planning rules and building regulations.
When you own a leasehold flat, which is how the overwhelming majority of London flats are owned, the situation is completely different. You own the right to occupy your flat for the term of the lease. The building itself, including the roof structure and the loft space above, is almost certainly owned by the freeholder.
This means that as a leaseholder, you do not automatically have the right to convert the loft, even if the loft space sits physically above your flat. You need the freeholder's permission, and in most cases you need to acquire the legal right to use that space before any conversion can proceed.
What your lease actually says
The starting point for any flat owner considering a loft conversion is reading the lease carefully. Not skimming it. Reading it properly, or having a solicitor read it on your behalf.
The lease will define exactly what you own and what rights you have over the building. It will specify what alterations you are permitted to make, what consent is required from the freeholder for structural works, and whether there are any provisions relating to the roof space or upper parts of the building.
Most standard residential leases in London explicitly require the freeholder's written consent for any structural alterations. Some leases go further and specifically prohibit alterations to the roof structure or external envelope of the building. Others are silent on the specific question of loft conversion, in which case the general alterations clause and the freeholder's ownership of the structure will still apply.
In almost every case, a leaseholder who proceeds with a loft conversion without the freeholder's consent is in breach of their lease. The consequences of that can include the freeholder taking legal action to require the works to be undone, which on a completed loft conversion is an extremely expensive outcome.
A solicitor with leasehold property experience should review your lease before you take any further steps. The Law Society provides a solicitor search tool that allows you to find practitioners with leasehold and property expertise.
The freeholder's position
Even if your lease does not explicitly prohibit a loft conversion, the freeholder owns the roof space you want to convert. They have no automatic obligation to grant you the right to use it or to consent to the works.
Some freeholders are cooperative and will engage constructively with leaseholders who want to convert the loft. Others are not interested or will only agree on terms that make the project financially unviable. The freeholder may want a premium for granting the right to use the loft space, which in London can be a significant sum depending on the value of the property and the area.
If the freeholder is a resident management company in which leaseholders hold shares, which is increasingly common in London purpose built blocks, the decision making process is different. The management company is effectively controlled by the leaseholders collectively, and a conversion proposal needs to go through whatever decision making process the company's articles require.
Engaging the freeholder or their managing agent early, before you commit to design fees or surveys, is the only way to understand whether a conversion is feasible for your specific situation.
Buying the lease of the loft space
In some cases, particularly where the loft space is accessible from a top floor flat and represents a clear opportunity to add value, the freeholder may be willing to sell or lease the loft space to the top floor leaseholder.
This involves negotiating a lease extension or a new lease that specifically includes the loft space, or in some cases purchasing the right to use the roof space through a formal legal agreement. The premium the freeholder charges for this reflects the value of the additional space being created, which in London can be substantial.
This route requires specialist legal advice and potentially a valuation of the loft space from a chartered surveyor. The Royal Institution of Chartered Surveyors provides a member search that allows you to find surveyors with leasehold valuation expertise.
The negotiation can take time. Several months is not unusual, and the legal costs involved in formalising the agreement add to the overall project budget before any construction work begins.
Collective enfranchisement and the right to manage
If leaseholders in a building collectively own the freehold through enfranchisement, the leaseholder of the top floor flat may be in a stronger position to negotiate access to the loft space, since the freeholder is effectively the collective of leaseholders rather than a separate third party.
But even in this situation the loft space is a shared asset of the freehold company, not automatically the property of the top floor leaseholder. The consent of the other shareholders is still required, and the process of allocating the loft space to one leaseholder needs to be handled carefully to protect the interests of all parties.
The Leasehold Advisory Service provides free guidance for leaseholders on a wide range of issues including alterations, enfranchisement, and the right to manage. It is a genuinely useful first resource before you engage paid legal advice.
Planning permission and building regulations still apply
Assuming the leasehold and freeholder questions are resolved in your favour, the planning and building regulations requirements are the same as for any other loft conversion.
Permitted development rights exist for the building as a whole, not for individual flats. For a purpose built flat in a block, permitted development for roof alterations is often more restricted than for a house. Many purpose built flat blocks do not benefit from permitted development for roof extensions at all, meaning full planning permission is required regardless of the size or type of conversion.
Conservation area restrictions, Article 4 directions, and local borough policies all apply in exactly the same way as they would for a house. In the inner London boroughs where purpose built flat blocks are most common, conservation area coverage is extensive and planning applications for roof alterations are assessed carefully.
Our permitted development rules guide explains the national framework and its limitations. Our conservation area guide covers the additional restrictions that affect properties in sensitive locations.
Building regulations apply without exception. Every loft conversion must be structurally sound, fire safe, properly insulated, and compliant with the ventilation and staircase requirements that apply to any habitable room. In a flat, fire safety requirements are particularly important because the escape route from the new loft room will pass through the existing flat and the common parts of the building, which creates specific design requirements that need to be addressed properly.
Our building regulations guide covers all of these requirements in detail.
The structural complexity of a flat loft conversion
Converting a loft above a flat presents structural challenges that are different from those in a house.
The floor between the existing flat ceiling and the loft space is a shared element of the building. Strengthening it for habitable room use involves work that affects the structure of the building as a whole, not just the top floor flat. The freeholder's structural engineer, not just your own, will need to be involved in assessing and approving any structural modifications.
Access for materials and steelwork in a flat building is often more challenging than in a house. Cranes or specialist lifting equipment may be required for structural elements that cannot be carried through the building's common parts.
Party wall considerations are also more complex in a flat building. Other flats in the building may be affected by the structural works, and the party wall or building structure between flats may trigger notice requirements beyond those that would apply in a simple terrace house conversion.
Our structural calculations guide explains what the structural engineer assesses on a loft conversion and why the complexity in a flat building is typically greater than in a straightforward house project.
The costs specific to flat loft conversions
The additional legal and professional costs involved in a flat loft conversion go beyond what a house conversion requires and need to be factored into the budget from the outset.
Solicitor fees for reviewing the lease, negotiating with the freeholder, and formalising any agreement over the loft space can run to £2,000 to £5,000 or more depending on the complexity of the situation and how cooperative the freeholder is.
The premium paid to the freeholder for the right to use the loft space varies enormously depending on the value of the property, the area, and the negotiation. In prime London locations this can be a very significant sum. Even in more moderately priced areas it is unlikely to be trivial.
Managing agent fees, freeholder's legal costs which you may be required to contribute to under the terms of the lease, and the cost of any structural engineer assessment commissioned by the freeholder are all additional items that add to the total before a single brick is moved.
Our loft conversion budgeting guide covers costs across all types of conversion, and while the specific additional costs of a flat conversion go beyond what that guide covers for houses, it provides a useful baseline for the construction cost elements that apply regardless of tenure.
Purpose built blocks versus converted houses
There is an important distinction between flats in purpose built blocks and flats in houses that have been converted into multiple dwellings.
In a purpose built block the loft space, if one exists at all, is typically a communal or service area that is clearly owned by the freeholder and used for building services, water tanks, and similar. Access to it as a private loft conversion is generally more difficult to achieve and less commonly pursued.
In a converted house, where a Victorian or Edwardian terrace has been divided into two or three flats, the loft space above the top floor flat is more analogous to the loft of a house and the physical opportunity for conversion is clearer. These conversions are more commonly attempted and more commonly achieved, though the leasehold legal questions still apply in the same way.
For a top floor flat in a converted Victorian terrace in London, where the loft space above is genuinely accessible and the freeholder is cooperative, the physical conversion is essentially the same as a rear dormer or Velux conversion on a house. The planning, building regulations, structural, and construction requirements are all equivalent. It is the legal and leasehold framework that makes it different, not the building work itself.
When is it worth pursuing?
A flat loft conversion is worth pursuing seriously when several conditions are met together.
The freeholder is cooperative or is a resident management company where you have influence over the decision. The lease does not contain provisions that make the project legally impossible. The loft space above the flat is genuinely accessible and has adequate dimensions to create a useful room. The planning context allows for the conversion without insurmountable restrictions. And the value added by the conversion justifies the additional legal, professional, and freeholder costs on top of the build cost.
When these conditions align, a flat loft conversion in London can be an excellent investment. Top floor flats that include a converted loft room command a significant premium over equivalent flats without one, and in many London locations the value uplift is substantial.
When these conditions do not all align, the project may not be worth pursuing regardless of how attractive it seems on paper. Discovering that the freeholder wants an unaffordable premium or that the lease contains a prohibition on roof alterations after spending money on surveys and drawings is a waste of resources that proper legal advice at the outset would have avoided.
The straightforward summary
Converting the loft in a London flat is possible but it is more legally complex and more expensive in professional costs than the equivalent conversion on a freehold house. The leasehold framework means you need the freeholder's agreement, and in most cases you need to acquire the legal right to use the space before any work can proceed.
Start with your lease. Get a solicitor with leasehold experience to review it. Engage the freeholder early to understand their position. Only once those steps have given you a clear picture of what is legally possible does it make sense to invest in surveys, design drawings, or planning advice.
The homeowners who successfully convert flats in London are the ones who navigate the legal questions carefully at the outset rather than discovering them as obstacles halfway through the process.
At Loft Converter London we have experience working with flat owners on loft conversion projects and understand the specific requirements and challenges involved. If you own a top floor flat in London and want to understand whether a loft conversion is feasible for your property, we are happy to talk through the practical and process questions with you from the start.
Our loft conversion costs page, planning permission timeline guide, building regulations guide, and party wall agreements guide are all useful reading as you build your understanding of what is involved before taking any further steps.
Loft Conversion Cost in London: 2026 Guide
January 10, 2026

If you are planning a loft conversion in London and want to understand what it actually costs, this guide gives you realistic figures for 2026. Not ballpark estimates that bear little relation to what builders actually quote, but honest numbers based on what London homeowners are paying right now for different types of conversion.
Costs have moved over the past few years. Materials prices have settled after the volatility of the post-pandemic period, but remain higher than pre-2020 levels. Labour costs in London continue to rise. And the additional professional fees, surveys, and approvals that sit alongside every project add more to the total than most people expect.
Here is the full picture.
What drives the cost of a loft conversion in London
Before getting into specific numbers, understanding what actually drives the cost helps you make sense of why quotes vary so much between projects and between contractors.
The type of conversion is the single biggest cost driver. A Velux conversion that keeps the roof structure intact costs significantly less than a dormer that extends it, which in turn costs less than a hip to gable conversion that rebuilds a substantial part of the roof. The structural complexity involved in each type determines how much material, time, and skilled labour is required.
The size of the conversion matters directly. A larger dormer means more structure, more roofing, more internal volume to insulate, plaster, and finish. Every additional square metre adds cost across multiple trades.
The specification of the finish has a larger impact than most people realise. The difference between a mid range and high end finish on flooring, windows, bathroom fittings, joinery, and decoration can easily be £10,000 to £20,000 on the same structural build.
The condition of the existing building creates variation that is harder to predict. Older London homes sometimes have structural conditions that are not visible until the roof is opened. Undersized joists, deteriorated timbers, and improperly executed roof modifications all add to costs when discovered on site.
And London-specific factors, including labour rates that are higher than the national average, the logistics of working on tight urban sites, the cost of waste disposal, and parking restrictions that affect material deliveries, all push costs higher than equivalent work elsewhere in the country.
Velux loft conversion cost in London 2026
A Velux loft conversion keeps the existing roofline intact and adds roof windows flush with the slope. It is the most affordable conversion type and the fastest to build.
For a standard London home in 2026, a fully finished Velux conversion typically costs between £22,000 and £38,000. This covers structural floor strengthening, a new compliant staircase, insulation between and below the rafters, roof windows, first- and second-fix electrics, plastering, and basic decoration.
The lower end of this range reflects a smaller, simpler project on a straightforward London terrace with no complications. The upper end reflects a larger space, higher-specification windows, a more complex staircase, and a higher-quality internal finish.
Adding an ensuite bathroom to a Velux conversion, which is only practical where the floor area is sufficient, typically adds £8,000 to £14,000 to the overall cost, depending on the specification and the extent of the plumbing work.
Our Velux loft conversion guide explains when this type works well and when a dormer is a better investment for your specific home.
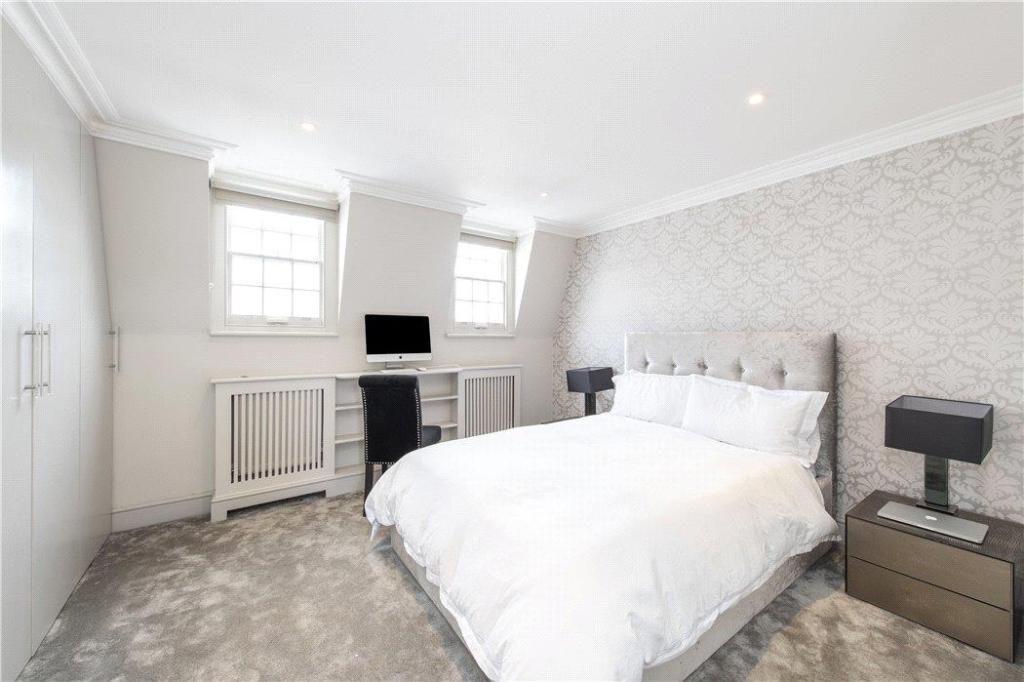
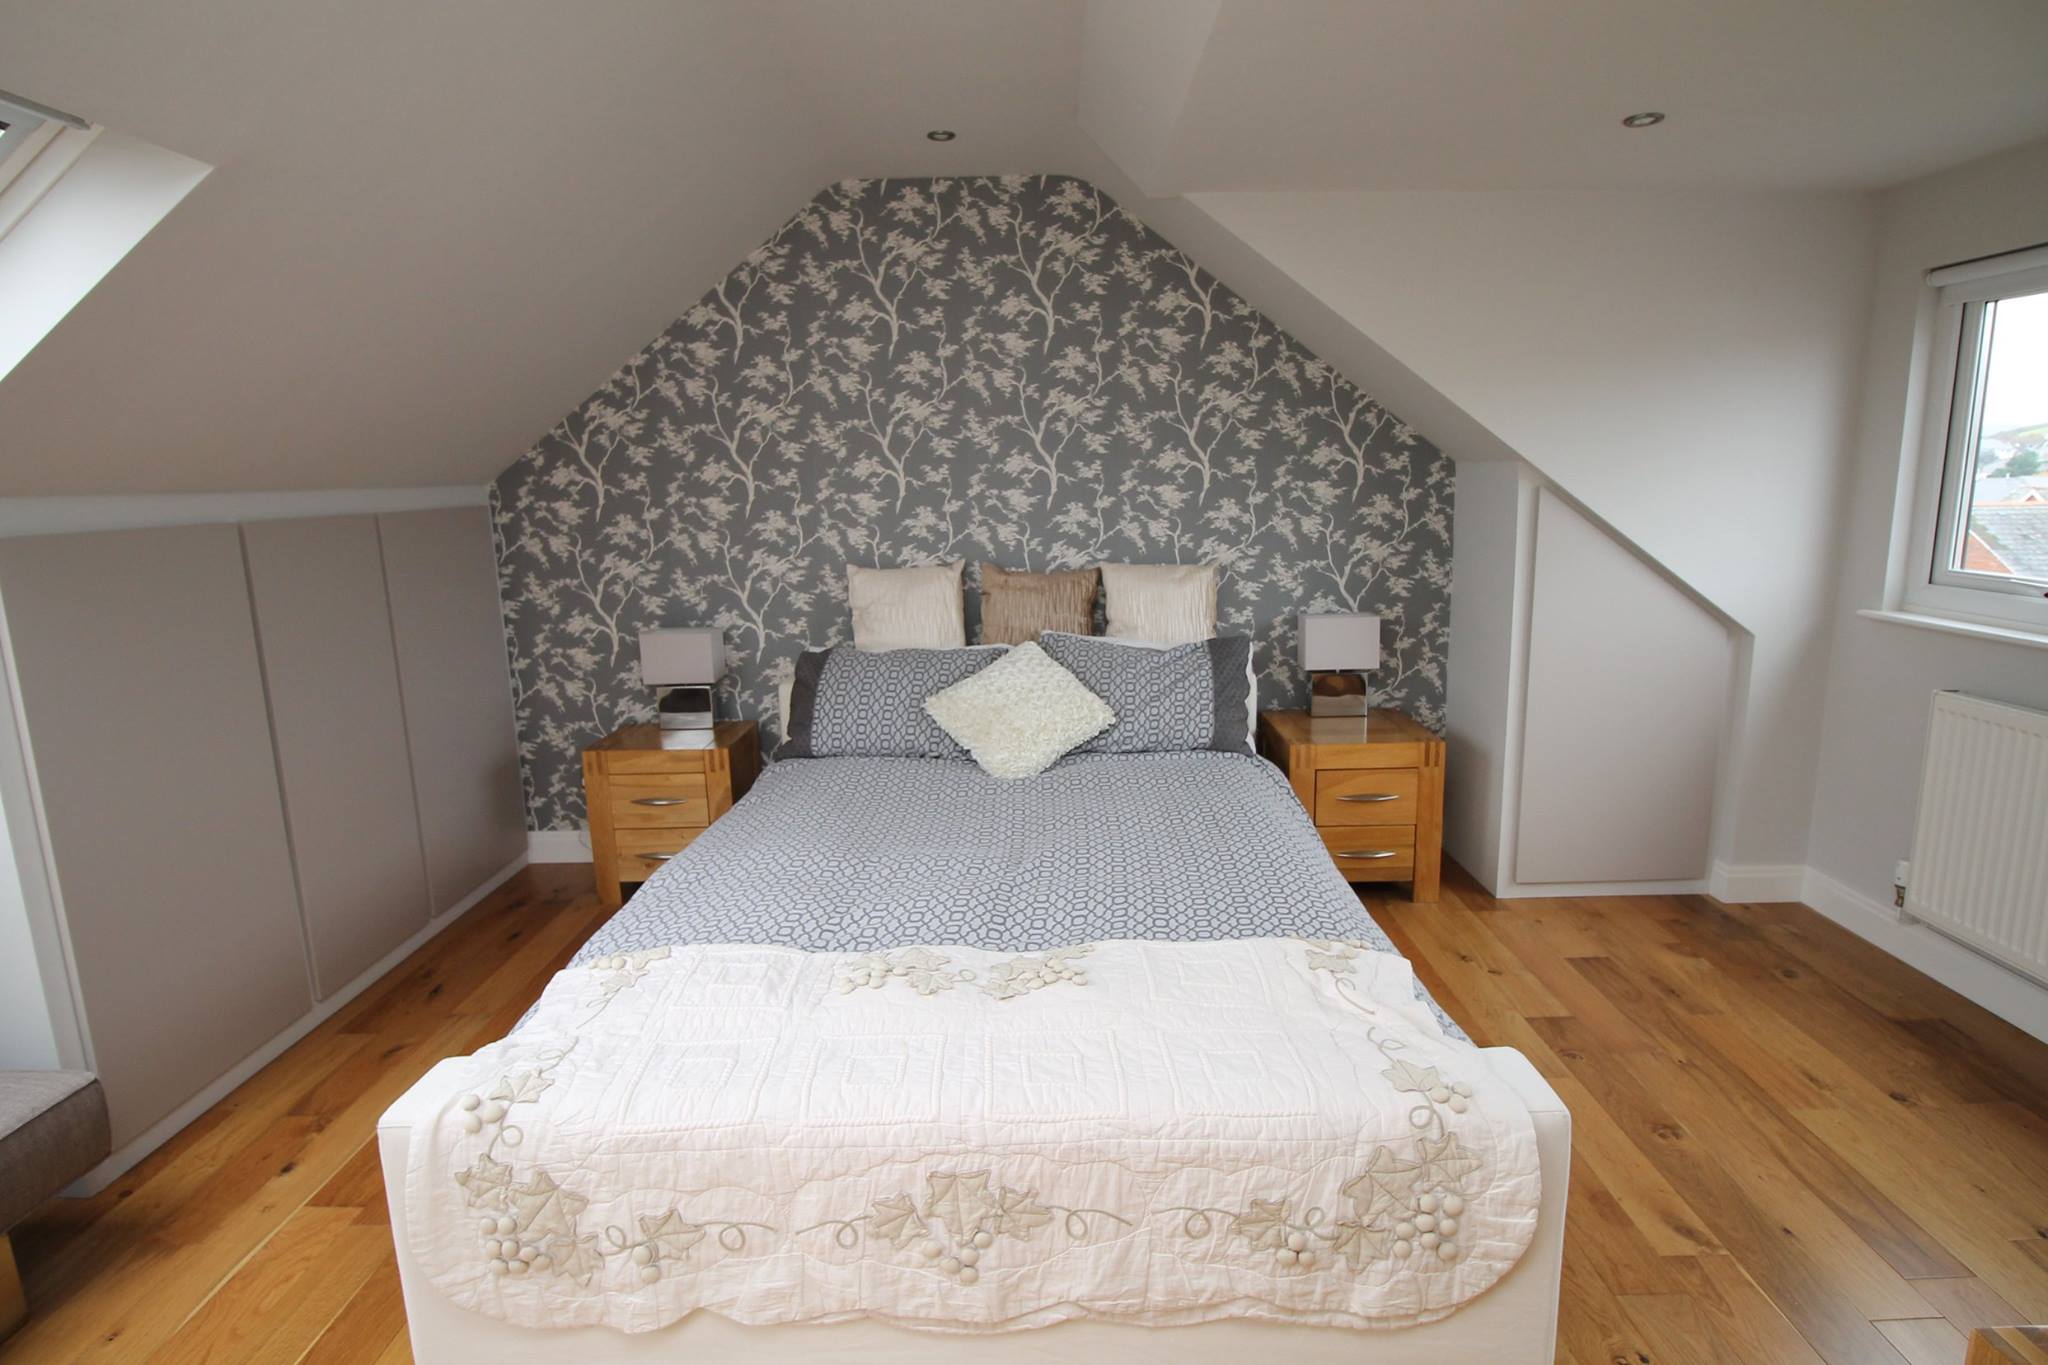
Rear dormer loft conversion cost in London 2026
A rear dormer is the most popular loft conversion type in London. It projects outward from the existing roof slope to create full headroom and usable floor space that the existing roof shape would not allow.
A standard rear dormer on a London terrace or semi detached home in 2026 typically costs between £38,000 and £62,000 fully finished. This covers the structural dormer build, roofing and weatherproofing, new staircase, insulation, windows, plastering, electrics, and basic decoration.
A rear dormer with an ensuite bathroom, which is the most common specification for a master bedroom conversion, typically costs between £48,000 and £75,000 fully finished. The ensuite adds plumbing, tiling, sanitaryware, and ventilation to the standard room fit-out.
A larger or wider rear dormer, or one with a higher specification finish throughout, sits at the upper end of this range. A more modest dormer on a smaller property with a straightforward brief sits toward the lower end.
Our dormer loft conversion guide covers the full cost breakdown, what is and is not typically included in builder quotes, and how to compare quotes meaningfully.
L-shaped loft conversion cost in London 2026
An L-shaped conversion combines a rear dormer on the main roof with a second dormer over the back addition, creating a larger and more versatile floor plan than a single dormer alone. It is the conversion of choice for Victorian and Edwardian terraces with a back addition.
An L-shaped loft conversion in London in 2026 typically costs between £48,000 and £72,000 fully finished for the shell and basic fit-out. With a well-specified ensuite bathroom, the total typically sits between £58,000 and £85,000.
The higher cost compared to a standard rear dormer reflects the additional structure required for the back addition dormer, the more complex roofing work at the junction between the two elements, and the greater internal volume to finish.
Our L-shaped loft conversion guide explains how this conversion type works, which homes it suits, and the structural details that make it more complex than a standard rear dormer.
Hip to gable loft conversion cost in London 2026
A hip-to-gable conversion replaces the sloping hip end of a hipped roof with a vertical gable wall extending to the ridge line. It is most common on 1930s semi detached and detached homes in outer London.
A hip to gable conversion on its own in 2026 typically costs between £42,000 and £68,000 fully finished. Most homeowners combine it with a rear dormer at the same time, creating the largest possible usable floor area. The combined hip to gable and rear dormer typically costs between £58,000 and £82,000 fully finished.
With a well-specified master bedroom ensuite, the total for a combined hip-to-gable and rear dormer ranges from £68,000 to £95,000 in most London locations.
Our hip to gable loft conversion guide covers the structural complexity of this conversion type and why the combined approach with a rear dormer delivers the strongest return on investment for homes with hipped roofs.
Mansard loft conversion cost in London 2026
A mansard conversion rebuilds the rear roof slope as a near-vertical wall with a shallow-pitched roof at the top. It creates the maximum possible internal volume of any conversion type and is most commonly seen on Victorian and Edwardian properties in inner London.
A mansard conversion in London in 2026 typically costs between £65,000 and £95,000, fully finished, with higher-specification projects on larger properties exceeding £100,000. The higher cost reflects the extent of roof rebuilding involved, the fact that mansard conversions almost always require full planning permission, and the greater volume of internal work required.
Mansard conversions are not the right choice for every home. They make most sense on inner London terraces where a hip to gable option is not available and the scale of the building suits the more substantial roof alteration.
The additional costs that sit outside the build quote
This is where most homeowners are caught out. The contractor's build quote covers the construction work. It does not automatically include the significant range of additional professional fees and statutory costs that are involved in every loft conversion.
Structural engineer fees in London in 2026 typically run between £600 and £1,800, depending on the complexity of the project. This covers the site assessment, structural calculations, and drawings required for building regulations. Our structural calculations guide explains what the structural engineer does and why their involvement from the earliest stage is essential.
Architectural or architectural technician fees for drawing preparation typically run between £1,200 and £3,500 for a standard loft conversion package covering building regulations and planning drawings where required. Our do you need an architect guide explains the different options and what each one involves.
Building control fees for a standard loft conversion in London typically range from £800 to £1,400, depending on the local authority and the size of the project. This covers the plan check and all site inspections through to the completion certificate.
Party wall surveyor fees depend entirely on whether neighbours consent or dissent. If all neighbours consent, costs are minimal, typically under £500 for agreement preparation. If neighbours appoint their own surveyors, you pay their fees too, which can add £1,000 to £1,500 per neighbour. On a mid-terrace with two neighbours both appointing surveyors, party wall costs alone can reach £3,000 to £4,000. Our party wall agreements guide covers the full process and what to budget for.
Planning application fees in England in 2026 are £258 for a householder application. Professional costs associated with a planning application, including planning drawings and consultant fees if required, typically add £800-£2,000 to this. Our planning permission timeline guide covers when planning permission is needed and what the process involves.
Scaffold costs vary depending on the size of the property and the duration of the project. Some contractors include scaffold in their quote. Many do not. A scaffold for a standard London terrace loft conversion typically costs between £1,500 and £3,000.
VAT at 20% applies to the build cost and most professional fees. Make sure you know whether every quote you receive includes or excludes VAT before you compare figures. On a £55,000 build quote, VAT adds £11,000. The difference between a VAT inclusive and VAT exclusive quote is not a small rounding error.
The Planning Portal provides useful guidance on planning fees and the application process, and GOV.UK building regulations guidance covers the regulatory framework that applies to every conversion.
Contingency: the budget line most people skip
A contingency allowance is mandatory for a loft conversion in an older London home. It is a realistic acknowledgement that older buildings contain surprises that are not visible until the roof is opened and the structure is exposed.
The most common unexpected costs on London loft conversions include additional structural remediation when existing timbers are found to be undersized or damaged, asbestos removal in properties built before the mid-1980s, where asbestos-containing materials may be present in the roof structure, and additional plumbing or electrical work required to bring existing services up to a standard that connects properly to the new conversion.
A realistic contingency for a London loft conversion is 15% of the total build cost. On a £60,000 project that means holding £9,000 in reserve. This is not money you expect to spend. It is money you need to have available if the unexpected occurs, which, on a meaningful proportion of London loft conversions, it does.
The HomeOwners Alliance provides practical guidance on managing building projects and budgeting for contingencies that is worth reading before you start.
Total realistic budgets by conversion type in 2026
Pulling all of this together, here are realistic all-in budgets for each conversion type in London in 2026. These figures include the build cost, all professional fees, building control, a reasonable allowance for party wall costs, VAT, and a 15% contingency.
A Velux conversion with a single room and no ensuite has a realistic all-in budget of £32,000 to £52,000. With a modest ensuite, allow £42,000 to £62,000.
A rear dormer with a bedroom and an ensuite has a realistic all-in budget of £62,000 to £95,000 depending on size and specification.
An L-shaped dormer with bedroom and ensuite has a realistic all-in budget of £72,000 to £105,000.
A hip-to-gable with a rear dormer and ensuite has a realistic all-in budget of £82,000 to £118,000.
A mansard conversion with bedroom and ensuite has a realistic all-in budget of £90,000 to £135,000.
These are honest numbers for London in 2026. They will surprise people who have been working from the headline build costs shown on comparison websites or from quotes that exclude VAT and professional fees. But they reflect what homeowners who have done this recently are actually spending.
Value added versus cost: the London calculation
The reason loft conversions remain popular in London despite these costs is that the value they add consistently exceeds what they cost to build.
A well-executed rear dormer creating a bedroom and ensuite typically adds 15% to 20% to the value of a London property. A hip to gable with rear dormer typically adds 20% to 25%. On a London home worth £700,000 that is between £105,000 and £175,000 in added value.
Even at the upper end of realistic all-in costs, the return on investment is compelling in London. The capital's combination of high property values, strong buyer demand for larger family homes, and significant transaction costs that make moving expensive all combine to make loft conversions one of the most financially rational home improvements available to London homeowners.
Nationwide Building Society's house price data and Rightmove's property trends both provide useful context on London property values by area and property type, which helps you calculate the specific return on investment for your home.
Our loft conversion vs moving house guide runs through the full financial comparison between converting and moving, which consistently favours converting for homeowners who are happy in their location and have a suitable roof.
Getting accurate quotes in 2026
The most reliable way to get accurate quotes is to have proper drawings prepared before you approach contractors. Builders quoting from a design brief or a verbal description cannot give you a reliable number. Builders quoting from detailed architectural and structural drawings can.
Three quotes from experienced London loft conversion specialists, all working from the same drawings, gives you a meaningful basis for comparison. Make sure every quote is itemised and specifies clearly what is and is not included. Confirm whether VAT is included in every quote before you compare figures.
Be wary of quotes that are significantly below the others. As we cover in our most common loft conversion mistakes guide, the cheapest quote is rarely the best value and often reflects scope gaps, specification reductions, or a contractor who will make up the margin through variations once work is underway.
The Royal Institution of Chartered Surveyors provides guidance on finding qualified surveyors and cost consultants who can provide independent cost advice if you want professional validation of the quotes you receive.
The straightforward summary
Loft conversions in London in 2026 cost more than most online guides suggest once you account for all professional fees, VAT, and a realistic contingency. But they also add more value than most people expect, and the return on investment in London remains strong across all conversion types.
Understanding the full cost picture before you start, rather than discovering additional costs as the project progresses, is the foundation of a project that delivers what you expected within a budget you can manage.
At Loft Converter London, we are transparent about costs from the first conversation. We provide fully itemised quotes that include everything required to complete your project to a high standard, with no surprises added once work is underway. If you want to understand what a loft conversion would realistically cost for your specific home, we are happy to start that conversation.
Our loft conversion types guide, building regulations guide, permitted development rules guide, and party wall agreements guide are all useful resources for building your understanding of what is involved before you speak to anyone.
Are Loft Conversions Popular in North West London?
December 15, 2025
North West London is one of the most active areas in the capital for loft conversions, and it is easy to see why. The housing stock across areas like Barnet, Brent, Harrow, Camden, and parts of Ealing is dominated by exactly the type of properties that convert well. Semi-detached and detached homes from the 1930s, large Victorian and Edwardian terraces, and substantial Edwardian semis all lend themselves naturally to loft conversions that add genuine space and meaningful value.
Add to that the property values across North West London, which make the return on investment from a well-executed conversion particularly strong, and you have a combination of factors that make this one of the busiest areas in London for this type of work.
The housing stock that makes North West London ideal
The reason loft conversions are so popular in North West London comes down to the specific type of homes that dominate the area.
The interwar suburban expansion of the 1920s and 1930s produced large numbers of semi-detached homes across Barnet, Harrow, Brent, and the outer parts of Camden. These homes typically have hipped roofs, generous ridge heights, and loft spaces that respond extremely well to hip to gable conversions combined with rear dormers. The result is often a substantial master bedroom suite that transforms how the property functions for a growing family.
Victorian and Edwardian terraces are concentrated in the inner parts of North West London, particularly across Camden, parts of Brent, and the conservation areas of Barnet. These properties, with their steep-pitched gable-ended roofs, are natural candidates for rear dormers and L-shaped conversions. Many have back additions that create the specific geometry that makes an L-shaped conversion possible, delivering the largest possible loft floor area within the existing roof footprint.
Detached homes, which are more common in North West London than in most other parts of the capital, offer the most flexibility of all. Detached properties can accommodate hip to gable conversions on both end elevations, full-width rear dormers, and, in some cases, combinations of conversion types that create genuinely large additional floor areas.
Property values and return on investment
Property values across North West London make the financial case for loft conversions particularly compelling.
In areas like Hampstead, Highgate, and the more sought-after parts of Barnet, average property values are well above the London median. A well-executed loft conversion adding a master bedroom and ensuite can add between 20% and 25% to a property's value in these locations. On a home worth £900,000, that is £180,000 to £225,000 in added value for a conversion that costs between £55,000 and £80,000 to build.
Even in more moderately priced parts of North West London, such as Harrow, Wembley, and outer Brent, the value uplift from a quality loft conversion consistently outperforms the build cost. The demand for family homes with four or more bedrooms in good school catchment areas is strong and persistent, and buyers pay a premium for the extra bedroom and bathroom that a loft conversion provides.
Our loft conversion vs moving house guide runs through the full financial comparison between converting and moving to a bigger property, which is particularly relevant in North West London where the stamp duty and transaction costs of upsizing are substantial.
Planning rules across North West London boroughs
North West London spans several boroughs, and the planning rules that affect loft conversions vary between them. Understanding the specific rules for your borough before you start planning is important.
The London Borough of Barnet covers a large area of North West London including East Barnet, Finchley, Golders Green, Hendon, and Mill Hill. Most residential properties in Barnet sit outside conservation areas and benefit from standard national permitted development rights. A rear dormer on a standard terrace or semi-detached home in most parts of Barnet will qualify for permitted development provided it meets the volume and height limits. Barnet does have conservation areas, particularly around the historic centres of East Barnet and Hadley, where stricter rules apply.
The London Borough of Brent includes Wembley, Kilburn, Willesden, and Cricklewood. Brent has a number of conservation areas, particularly in the south of the borough, closer to the boundary with Camden, and Article 4 directions that restrict permitted development in certain streets. Checking your specific address on Brent Council's planning portal before assuming permitted development applies is always worth doing.
The London Borough of Harrow covers Harrow on the Hill, Pinner, Stanmore, and Wealdstone among others. Harrow has relatively fewer conservation area restrictions than inner London boroughs, and most standard loft conversions on the dominant 1930s semi-detached stock proceed under permitted development. Harrow on the Hill village is a notable exception with stricter conservation controls.
The London Borough of Camden covers the inner parts of North West London including Hampstead, Belsize Park, Chalk Farm, and Kentish Town. Camden is one of the most restrictive London boroughs for planning purposes. It has extensive conservation area coverage and Article 4 directions across large parts of the borough. Loft conversions in Camden frequently require full planning permission rather than permitted development, and the council's conservation officers apply the rules rigorously. Engaging with Camden's planning department early and getting professional design advice is particularly important in this borough.
Camden Council's planning portal provides detailed information about conservation areas, Article 4 directions, and local planning policies relevant to loft conversions.
Our permitted development rules guide explains the national framework that applies across all boroughs, and our conservation area guide covers the additional restrictions that apply in sensitive locations like much of Camden.
The most popular conversion types in North West London
The dominant housing type in each part of North West London shapes which conversion types are most commonly built.
Hip to gable conversions combined with rear dormers are the most popular choice across the 1930s semi detached stock that dominates Barnet, Harrow, and Brent. These properties have hip roofs, making a hip-to-gable conversion the most space-efficient option, and the combination with a rear dormer creates a substantially larger and more valuable loft than a dormer alone.
Our hip-to-gable loft conversion guide covers this conversion type in detail, including costs, planning considerations, and the structural work involved.
Rear dormers and L-shaped conversions are the most common choice on the Victorian and Edwardian terraces of inner North West London. These properties have gable-ended roofs that do not benefit from a hip to gable conversion, but their steep pitch and often generous ridge height make them excellent candidates for rear dormers and L-shaped conversions that create large, well-lit loft rooms.
Our L-shaped loft conversion guide explains why this conversion type works so well on Victorian and Edwardian terraces and what it involves in terms of cost, structure, and planning.
Velux conversions are popular across North West London where budget is the primary consideration or where the existing loft already has excellent natural height. Many 1930s semis in Barnet and Harrow have ridge heights that make a Velux conversion a genuinely viable option, particularly for a study or single bedroom rather than a master suite.
Our Velux loft conversion guide covers when this type works well and when a dormer is the better investment.
Conservation areas and listed buildings in North West London
North West London has a varied landscape of conservation areas. Camden's extensive designations are well known and significantly affect what is permissible on residential properties across much of the inner borough. But other North West London boroughs also have conservation areas that are worth being aware of.
Hampstead Garden Suburb, which straddles the boundary between Barnet and Camden, is one of the most strictly controlled residential areas in London. It is a designated conservation area with specific design guidance, and the Hampstead Garden Suburb Trust has additional oversight powers over external alterations. Loft conversions in Hampstead Garden Suburb require full planning permission, sympathetic design, and careful engagement with both the local authority and the Trust before any work proceeds.
Hampstead Garden Suburb Trust publishes detailed guidance on acceptable roof alterations and extensions, essential reading before pursuing a loft conversion in this area.
Pinner village in Harrow, Stanmore town centre, and parts of Finchley in Barnet all have conservation area designations that restrict what permitted development allows. Golders Green and parts of Hendon have specific streetscape characteristics that local policy seeks to protect.
If your property is listed, which a small but significant number of North West London homes are, the rules are more demanding still. Listed building consent is required for any structural alterations, regardless of whether planning permission is needed, and the design must preserve the special character of the building.
Historic England's National Heritage List allows you to check whether your property is listed before you proceed with any plans.
The loft conversion process in North West London
The process for a loft conversion in North West London follows the same stages as anywhere else in London, but the specific timeline and requirements vary depending on which borough you are in and whether planning permission is needed.
For a standard permitted development conversion in Barnet or Harrow, the overall timeline from appointing a designer to moving into the finished room is typically five to seven months. For a conversion requiring full planning permission in Camden or a conservation area application elsewhere in the borough, seven to ten months is more realistic.
Building regulations apply to every conversion regardless of borough or planning status. Party wall notices are required wherever work affects or is close to a shared wall. The structural engineer assessment and calculations are a fundamental part of every project.
Our how long does a loft conversion take guide covers the realistic timeline for each stage of the process in detail.
Finding the right contractor in North West London
North West London is well served by loft conversion specialists, but the variation in quality and experience between contractors is significant. Choosing the right contractor matters enormously and the guidance that applies across London applies here equally.
Get three properly itemised quotes. Check insurance and accreditation. Ask for references from completed projects in the area and follow them up. Look for a contractor who has specific experience with your conversion type and your borough's planning requirements.
The Federation of Master Builders member search allows you to find vetted contractors in specific areas of London. The TrustMark scheme provides another route to finding government endorsed tradespeople who have met quality and trading standards.
Our most common loft conversion mistakes guide covers the contractor selection errors that most frequently cause problems on loft conversion projects and what to look for when evaluating quotes and contractors.
What North West London homeowners typically achieve
The results achievable through a well-executed loft conversion in North West London are genuinely impressive, given the housing stock available.
A 1930s semi-detached home in Barnet or Harrow that starts with a hipped loft and limited usable space can typically gain a 30 to 45 square metre master bedroom suite through a hip-to-gable with a rear dormer conversion. A Victorian terrace in inner North West London can gain a similarly generous L-shaped loft room. And even a more modest Velux conversion on a property with good natural ridge height creates a useful additional room at a cost hard to match with any other type of home improvement.
The combination of North West London property values, the suitability of the dominant housing types for conversion, and the strong demand from buyers for homes with extra bedrooms makes loft conversions one of the most financially rational home improvements available to homeowners in this part of London.
The straightforward summary
Loft conversions are popular in North West London because the housing stock is well-suited, the property values make the return on investment compelling, and the demand for larger family homes in the area is consistently strong.
The specific rules, costs, and conversion types that make sense depend on your borough, your property type, and what you are trying to achieve. Getting these factors right requires local knowledge and professional input from the design stage.
At Loft Converter London, we work extensively across North West London and understand the specific characteristics of the housing stock, the planning requirements of each borough, and the design approaches that work best for the properties in this part of the capital. If you are considering a loft conversion in North West London and want to understand what is possible for your home, we would be happy to start that conversation.
Our loft conversion costs page, loft conversion types guide, and building regulations guide are useful starting points as you continue to build your understanding before speaking to anyone.
What Are the Most Common Loft Conversion Mistakes?
November 20, 2025
A loft conversion is one of the biggest investments a London homeowner makes. Most go well. But a meaningful number run into problems that were entirely avoidable, and the pattern of mistakes that cause those problems tends to repeat itself across projects.
Understanding what goes wrong, and why, is one of the most useful things you can do before you start.
Choosing the cheapest quote
This is the most common and most costly mistake on loft conversions in London. The temptation to go with the lowest price is understandable when quotes can vary by £15,000 or more on the same project. But the lowest quote is almost never the best value.
Cheap quotes are cheap for a reason. They typically reflect one or more of the following: materials being substituted for lower quality alternatives, labour being underpriced because experience is lacking, items being omitted from the scope that will be charged as extras once work is underway, or corners being cut on the things that are hardest to see once the walls are plastered and the roof is covered over.
The things that get cut on a cheap loft conversion are often the things that matter most. Inadequate structural steel. Insufficient insulation depth. Poor waterproofing at the dormer junction. Substandard fire door installation. These are not aesthetic failures that you can fix later. They are safety and compliance failures that can cost significantly more to remediate than the saving made by choosing the cheaper contractor in the first place.
Get three properly itemised quotes. Make sure each one covers the same scope. Understand what is and is not included before you compare the numbers. The Federation of Master Builders maintains a directory of vetted contractors and provides guidance on what a proper building contract should include, which is a useful reference when evaluating quotes.
Not checking whether a contractor is properly insured and accredited
Appointing a contractor without checking their insurance and accreditation is a risk that exposes you to significant financial liability if something goes wrong.
A reputable loft conversion contractor should carry public liability insurance, employers liability insurance, and ideally a structural warranty or latent defects insurance that covers the building for ten years after completion. Ask for evidence of these before you sign a contract. A contractor who is reluctant to provide this information is not a contractor you should be working with.
Membership of a recognised trade body is not a guarantee of quality but it is a reasonable indicator that a contractor has met minimum standards and has access to a dispute resolution process if things go wrong. The National Federation of Builders and the Federation of Master Builders are both recognised bodies with member directories and codes of conduct.
Skipping the structural engineer
Some homeowners, and some less scrupulous contractors, try to proceed without appointing a structural engineer, relying instead on the contractor's own judgment about what the structure needs.
This is a serious mistake. A structural engineer is not just a box ticking exercise for building regulations. They are the person who confirms that the floor can carry the loads it will be subjected to, that the steel beams are the right size and in the right positions, and that the existing structure is sound enough to proceed without remedial work.
Without proper structural calculations, you have no way of knowing whether the building is safe. Building control will require structural calculations as part of the approval process, but an engineer who is engaged properly from the design stage adds far more value than one who is brought in at the last minute to produce numbers that justify decisions already made.
Our structural calculations guide explains what the structural engineer assesses and why their involvement from the earliest stage is fundamental to a safe and compliant conversion.
Serving party wall notices too late
Party wall notices have a mandatory two month notice period. This is fixed by law and cannot be shortened regardless of how urgent your project feels or how accommodating your neighbour is.
The mistake almost everyone makes is leaving party wall notices until the build is about to start. By that point, the two month notice period pushes the start date back by two months, or in a worst case scenario where the neighbour dissents and surveyors need to be appointed and an award agreed, potentially longer.
Serving notice at the same time drawings are being prepared, which is typically two to three months before you plan to start on site, means the notice period runs concurrently with the design and approvals process rather than adding to it.
Our party wall agreements guide covers the full process and the timelines involved.
Underestimating the total budget
Headline build quotes for loft conversions rarely tell the whole financial story. The additional costs that sit outside the build quote are real, predictable, and consistently underestimated by homeowners who are planning their first conversion.
Structural engineer fees, building control fees, architect or architectural technician fees, party wall surveyor fees, scaffolding if not included in the build quote, and VAT if not clearly stated all add to the total. In London these additional costs typically run between £5,000 and £12,000 on top of the build quote depending on the project type and complexity.
Then there is contingency. A realistic contingency allowance for a loft conversion in an older London home is 15% of the build cost. Unforeseen structural conditions, additional works that become apparent once the roof is opened, and variations to the original scope all draw on this reserve. Building it in from the start is not pessimism. It is honest budgeting.
Our loft conversion budgeting guide covers all of these costs in detail so you can build a realistic total budget before you commit to anything.
Getting the staircase wrong
The staircase is one of the most consequential design decisions in a loft conversion and one of the most commonly handled poorly. It affects building regulations compliance, the usable floor area in the loft, and how much space is lost on the floor below.
The most common mistake is not thinking about the staircase until the rest of the design is fixed, then trying to fit it into whatever space remains. A staircase that does not meet building regulations will not get sign off. A staircase that works technically but lands in the wrong position in the loft ruins the floor plan. And a staircase that takes too much from the floor below destroys a room that was previously useful.
The staircase position needs to be the first design decision, not the last. Work out where it can go on the floor below, what that means for the room it takes space from, and where it arrives in the loft before anything else is fixed. An experienced architect or designer who has solved this problem many times on similar properties will reach the right answer faster and with fewer compromises than one who treats it as a secondary consideration.
Ignoring fire safety requirements
Fire safety requirements for loft conversions are not optional, and they are more demanding than many homeowners and some contractors appreciate. Adding a habitable room at the top of a two storey house creates a three storey building, and the fire safety requirements for a three storey dwelling are meaningfully stricter than for a two storey one.
A protected escape route from the loft down to the ground floor exit is required. In most cases this means fire doors on all rooms that open onto the staircase on every floor. Mains wired interlinked smoke alarms on every floor. And the staircase itself being enclosed rather than open to the living areas.
The London Fire Brigade publishes specific guidance on fire safety in loft conversions that is worth reading before you start. Building control will assess fire safety compliance during inspections, but understanding the requirements from the outset means they are designed in rather than retrofitted at extra cost.
Choosing the wrong conversion type for the home
Not every conversion type suits every home, and choosing the wrong one wastes money or delivers a disappointing result.
A Velux conversion on a home with insufficient ridge height creates a cramped, unusable space. A rear dormer on a home with a hipped roof misses the opportunity to unlock the space that a hip to gable conversion would create. A conversion designed without proper thought about how the room will function produces a technically compliant space that nobody wants to spend time in.
The right conversion type for your home depends on the roof type, the existing ridge height, the floor plan of the house below, the planning constraints of your area, and what you actually need the space for. Getting this decision right requires an honest assessment of all of these factors before committing to a design direction.
Our loft conversion types guide covers the main options and what each one suits, and our loft suitability guide helps you assess your specific home before approaching anyone.
Not getting building regulations sign off
Building regulations completion certificates are required for every loft conversion. They are not an optional administrative step and they cannot be backdated or obtained retrospectively without significant cost and complication.
A loft conversion without building regulations sign off is a liability that will come to light when you sell the property. The buyer's solicitor will ask for the completion certificate. Without it, the sale can fall through or you will be required to take out indemnity insurance, which covers legal risk but does not confirm the building is safe.
Some contractors, particularly those working at the cheaper end of the market, are careless about managing the building control process. They miss inspection stages, fail to get the right sign offs at the right times, and deliver a finished project without the completion certificate that confirms it is compliant.
Ask your contractor explicitly about their building control process before you appoint them. How do they manage inspection stages? Who is responsible for liaising with the building control body? What happens if an inspection raises an issue? A contractor with a clear, confident answer to these questions has done this properly before.
Overlooking insulation quality
Insulation in a loft conversion affects comfort, energy bills, and building regulations compliance. It is also one of the things that is hardest to check once the walls and ceilings are plastered, which makes it a tempting area for contractors to cut corners.
Inadequate insulation depth, gaps around structural elements where cold bridges form, and missing vapour control layers all create problems that are expensive to fix after the fact. An inadequately insulated loft room will be cold in winter and overheated in summer regardless of how well it is decorated.
The Insulation Manufacturers Association provides useful guidance on insulation standards and what to look for when specifying insulation for a loft conversion. Making sure your drawings specify insulation to the required standard, and asking your building control inspector specifically about insulation at the relevant inspection stage, are the two most effective checks available to you.
Designing without thinking about natural light
A loft bedroom or living space that is dark feels oppressive regardless of how well it is finished. Natural light in a loft conversion is not just a design preference. It affects how the space feels to live in every day and it affects the value the conversion adds to the property.
The mistake is treating windows as an afterthought rather than a fundamental design element. How many roof lights? Where are they positioned relative to the bed and the desk? Do they provide cross ventilation or just light? What direction do they face and how does that affect solar gain in summer?
These decisions need to be made at the design stage when they can be designed in properly, not at the fit out stage when the structural openings are already fixed. Velux has a useful inspiration section on their website specifically for loft conversion bedroom ideas, including guidance on window placement and the effect of different configurations on how the space feels.
Rushing the design stage
The design stage is where the most important decisions are made and where mistakes are cheapest to fix. Changes made on paper cost nothing. Changes made on site, after structural elements have been built, cost significantly.
Rushing the design to get on site faster is one of the most common causes of expensive mid-build variations. An incomplete or poorly considered design leaves decisions to be made under time pressure during the build, when the right answer is harder to find and the cost of implementing it is higher.
Take the time to get the design right. Work through the staircase position, the window configuration, the ensuite layout, and the storage design before drawings are finalised. Ask your designer to walk you through every decision and make sure you understand the implications of each one. The extra weeks spent on a thorough design process pay back many times over during the build.
Not reading the contract properly
A building contract is a legal document that defines what you are paying for, what the programme is, what happens when things go wrong, and what the process is for managing variations and disputes. Not reading it properly before signing is a mistake that leaves you exposed.
Key things to check include the scope of works and what is explicitly excluded, the payment schedule and whether it is linked to stage completions, the process for agreeing variations and how they are priced, the defects liability period and what it covers, and the dispute resolution process if disagreements arise.
The JCT Minor Works Building Contract is a widely used standard form for residential building projects in the UK and provides a fair and well understood framework for both parties. A contractor who insists on using only their own bespoke contract terms and resists any standard form is worth approaching with caution.
The straightforward summary
Most loft conversion mistakes are predictable and preventable. They cluster around the same areas: choosing contractors on price alone, skipping professional input at the design and structural stages, leaving party wall notices too late, underestimating the full budget, and rushing decisions that need proper thought.
The homeowners who avoid these mistakes are not the ones who are luckier or more experienced. They are the ones who take the time to understand what is involved before they commit, appoint the right professionals, and treat each stage of the process with the attention it deserves.
At Loft Converter London we have seen the consequences of these mistakes on projects that come to us for remediation, and we build our process specifically to prevent them from happening on the projects we manage from the start. Getting it right first time is always less expensive than fixing it afterward.
If you are at the early stages of planning, our loft conversion costs page, permitted development rules guide, and how long does a loft conversion take guide are useful starting points before you speak to anyone.
Can You Live in Your Home During a Loft Conversion?
November 3, 2025

This is one of the most practical questions people ask before committing to a loft conversion. The short answer is yes, most families in London stay in their home throughout a loft conversion. But it is worth being honest about what that actually involves before you decide.
The honest reality
A loft conversion is one of the least disruptive types of home improvement in terms of impact on daily living. The work is happening above the existing living space, the ground floor and first floor remain largely intact and usable throughout, and the most disruptive phase, when the roof is being opened up and the structure is being built, typically lasts only two to three weeks.
That said, living through any building project involves noise, dust, tradespeople coming and going, and a degree of disruption to your daily routine. Being realistic about this before you start means you can plan around it rather than being surprised by it.
The most disruptive phase
The structural phase at the beginning of the build is when things are loudest, most disruptive, and most weather-dependent. This is when the existing roof is opened up, steel beams are installed, and the new dormer frame or gable wall is constructed.
During this phase, there will be significant noise from cutting, drilling, and general structural work. Dust from ceiling joints can find its way into the rooms below more than people expect, particularly in older London homes where construction is not airtight. And there will be periods where the roof is partially open, during which time the weather matters and the building feels less secure than usual.
This phase typically lasts 2 to 3 weeks for a standard rear dormer. For a more complex conversion, such as a hip-to-gable with a rear dormer, it can take 3 to 4 weeks. After the structure is weathertight and the roof is closed up again, the internal fit out phase is considerably quieter and less intrusive.
The staircase installation
One of the more genuinely disruptive moments in a loft conversion is installing the new staircase. This involves cutting an opening in the ceiling of the room below and building the stair structure down into the existing floor plan.
The room where the staircase opening is being cut will be unusable for a day or two during this work, and the dust and disruption in that area is significant. If the staircase is being installed in a bedroom, that bedroom will need to be cleared and vacated for that period.
Planning around this is straightforward if you know it is coming. Moving furniture out of the affected room before this stage of the work begins, and having alternative sleeping arrangements for a night or two if needed, is all that is typically required.
Dust management
Dust is the most persistent source of complaint from homeowners living through a loft conversion, and it is worth addressing directly.
Dust from structural work, particularly cutting into the existing ceiling and roof structure, travels farther and is harder to contain than most people expect. A good builder will hang dust sheets at the staircase and at the opening to the loft to limit how much construction dust migrates into the living areas below, but some migration is unavoidable in an older home.
Covering furniture in the rooms directly below the works with dust sheets before the structural phase begins is sensible preparation. Removing soft furnishings like cushions and rugs from rooms below the works for the duration of the structural phase is also worth doing. These are things you can organise yourself before work starts, and they make a meaningful difference to the cleaning required afterwards.
Air purifiers running in the rooms below during the structural phase help with fine dust particles that the dust sheets cannot catch. This is a modest investment that makes living through the structural phase noticeably more comfortable, particularly for anyone in the household with respiratory sensitivity.
Noise and working hours
Building work in a residential area in London is governed by the Control of Pollution Act, which allows noisy construction work between 8am and 6pm Monday to Friday and 8am to 1pm on Saturdays. Most builders in London work within these hours, though some are more considerate about minimising noise at the boundaries of these periods than others.
If you work from home, the noise during the structural phase is the most challenging part of living through a conversion. Power tools, hammering, and the general sounds of construction are not compatible with calls or concentrated work. Planning around this by working from a different location during the loudest phases, typically the first two to three weeks, is a practical solution if your work situation allows it.
If you have young children who nap during the day, the noise during the structural phase will disrupt that routine. Again, being aware of this before it happens and planning alternative arrangements for the loudest days makes it manageable rather than stressful.
Access and security
During the build, tradespeople will need access to your home regularly. On a typical build day the main contractor and subcontractors will arrive in the morning and be on site until the end of the working day.
Establish clear expectations with your contractor before work starts about how access is managed, how the site is secured at the end of each day, and who has keys or access codes to the property. A good contractor will have clear procedures for this and will communicate their daily programme so you know when to expect people on site.
The building site itself, which, on a loft conversion, is primarily the loft space and the external scaffolding, should be secured at the end of each working day. External scaffolding, in particular, should have anti-climb measures in place, and the scaffold access point should be secured when the site is not occupied. Your contractor is responsible for site security and you should raise any concerns about this directly with them if something does not look right.
Living with scaffolding
External scaffolding is required for most loft conversions in London, both for safe working access during the structural phase and for the installation of roof windows and external cladding on the dormer.
The scaffolding will partially obscure windows on the upper floors of the house and can make the home feel darker during the weeks it is in place. On narrow London terraces where the scaffolding wraps around the rear of the property, it can also make the garden feel unusable during this period.
Scaffolding is typically in place for six to ten weeks on a standard conversion. The structural phase requires it from the start. The scaffold is often kept up through the roofing and external cladding work before being struck once the external envelope is complete and the internal fit out is underway.
If you have children who use the garden regularly, being without it for six to ten weeks is worth factoring into your plans. Starting a loft conversion in spring or early summer means the scaffold period is more likely to overlap with good weather, which is the most frustrating timing for garden access. There is no perfect time of year to avoid this, but being aware of it before you start means you can plan around it.
The internal fit-out phase
Once the structure is weathertight and the scaffold starts to come down, the internal fit out phase is considerably more liveable. Plastering, first-fix electrics and plumbing, second-fix, tiling, and decoration are all quieter and less dusty than the structural phase.
During this phase, the main disruption is tradespeople moving through the house to access the loft space and the occasional delivery of materials. The rooms below the conversion are largely unaffected and daily life returns to something close to normal.
The most disruptive elements of the fit out phase are the bathroom tiling if an ensuite is included, which involves cutting tiles and generates fine dust, and any making good work on the floors below where the staircase has been installed.
When temporary relocation might make sense
For the majority of London loft conversions, staying in the property throughout is practical and most families manage it without significant hardship. But there are specific situations where temporary relocation is worth considering.
If the household includes someone with a serious respiratory condition, asthma, or dust allergy, the structural phase generates enough fine particulate matter to make staying in the property genuinely problematic. In this situation relocating for two to three weeks during the structural phase is the sensible choice.
If you are a full time home worker whose income depends on uninterrupted concentration, and working from alternative locations is not practical for your role, the noise during the structural phase may make it more cost effective to stay elsewhere for the loudest two to three weeks than to lose working time.
If the conversion is combined with other significant works elsewhere in the house, such as a kitchen renovation or a bathroom refit on the floor below, the combined disruption may make the property uncomfortable to live in for an extended period.
In these situations, staying with family or friends during the worst weeks, or renting temporary accommodation for a short period, is a rational response. The cost of two to three weeks of alternative accommodation is modest in the context of the overall project budget and is worth weighing against the disruption of staying.
Preparing your household before work starts
The practical preparation you do before work begins makes a significant difference to how liveable the project is.
Clear the loft space completely before the contractor starts. Everything stored in the loft needs to come down and find a temporary home elsewhere in the house or in storage. A loft full of boxes and furniture when the contractor arrives on day one slows the start of the project and adds cost.
Move furniture away from walls and ceilings in rooms directly below the works. The ceiling below the loft, particularly over the landing and the top floor bedrooms, will experience vibration and some movement during the structural phase. Items on top of wardrobes or on high shelves in these rooms can fall. Clear these areas before work starts.
Discuss dust management with your contractor explicitly before work begins. Ask what measures they will put in place to limit dust migration into the living areas. A contractor who has a clear answer to this question has given it thought. One who seems uncertain or dismissive about it is a warning sign.
Establish a clear communication arrangement with your site manager or main point of contact on the build. Knowing who to call when you have a question or concern, and that calls will be answered promptly, makes living through the project considerably less stressful.
The children and pets question
Young children and pets both need specific consideration during a loft conversion.
Children need to understand that the building site above them is out of bounds. The loft space during construction is not safe for children to access and the scaffolding is not a play structure. Clear boundaries, communicated simply and repeatedly, are all that is needed for most children. A contractor who is professional about site security will also have physical barriers in place that make unauthorised access difficult.
Dogs tend to find the noise and presence of strangers stressful. If you have a dog that is anxious around unfamiliar people or loud noise, planning where the dog will be during working hours is worth thinking through before work starts. Some dogs adapt quickly to the routine of tradespeople arriving each day. Others do not, and having them stay with someone or in day care during the structural phase may be kinder for the animal and less stressful for the household.
Cats are largely self-managing in this respect and will find their own distance from the disruption as needed.
The straightforward summary
Yes, you can live in your home during a loft conversion, and most London families do. The build is primarily happening above the existing living space, the most disruptive phase lasts two to three weeks, and after that, the project becomes considerably more manageable.
The keys to making it work are honest preparation before work starts, clear communication with your contractor throughout, and realistic expectations about what living through a building project actually involves. It is not a comfortable experience in the way that everyday life is comfortable, but it is manageable, and the result at the end of it makes it worthwhile.
At Loft Converter London, we take the disruption to our clients seriously and manage every site with that in mind. That means proper dust protection, clear daily communication, respectful working practices, and a programme that moves efficiently through each phase to minimise how long the disruption lasts. A well-run project is a more liveable project, and we think about that from the first day on site.
If you are still at the planning stage, our loft conversion costs page, how long does a loft conversion take guide, and loft conversion types guide are useful next steps before you commit to anything.
How Long Does a Loft Conversion Take in London?
October 1, 2025
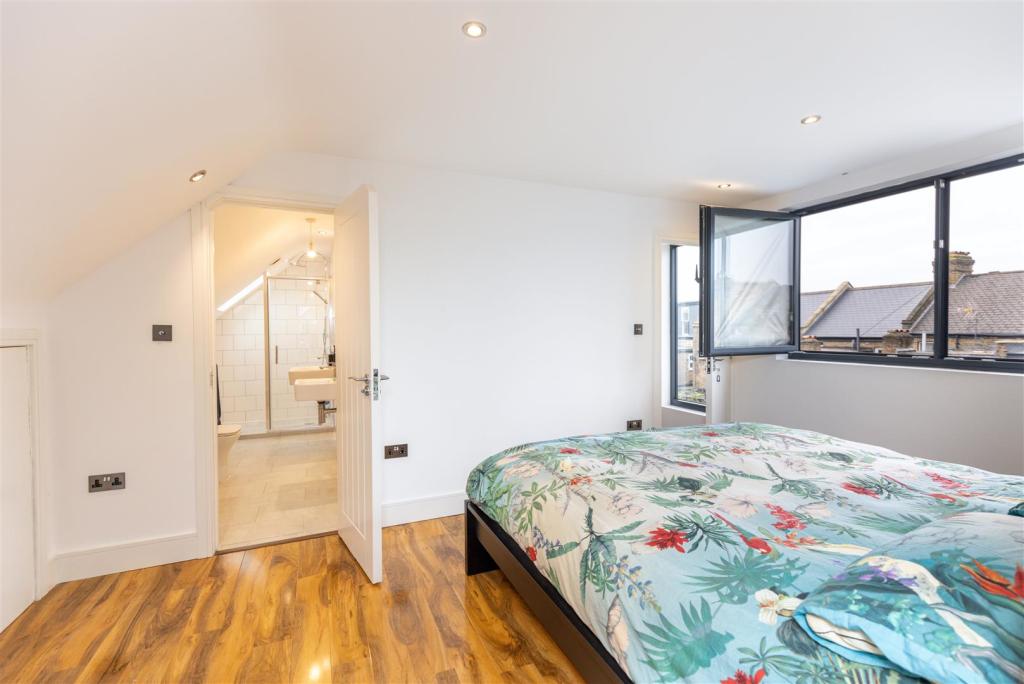
Build time is one of the first practical questions people ask when they start planning a loft conversion. The honest answer is that it depends on the type of conversion, the complexity of the project, and how well the preparation work is done before anyone sets foot on site.
This guide gives you realistic timelines for each stage of the process, from the first conversations through to moving into the finished room.
The full timeline, not just the build
Most people think about loft conversion timelines in terms of how long builders are on site. But the time on site is only one part of the overall programme. The preparation work that happens before the build starts, getting drawings done, approvals in place, and contractors appointed, typically takes longer than the build itself.
Understanding the full end to end timeline helps you plan properly and avoid the frustration of thinking a project is six weeks away when it is actually six months away.
Stage one: design and drawings
Before any planning or building regulations application can be made, drawings need to be produced. An architect or architectural technician needs to measure the existing building, develop the design, and produce the drawings required for submission.
For a straightforward rear dormer on a standard London terrace, this typically takes four to six weeks from appointment to drawings being ready. For a more complex project, a hip to gable conversion, a conservation area application, or a conversion that involves significant changes to the floor below, allow six to eight weeks or more.
The structural engineer needs to be involved at this stage too. Their initial site visit and preliminary assessment feeds into the design before drawings are finalised. Trying to rush this stage creates problems later when structural issues that should have been resolved on paper have to be worked out on site.
Our do you need an architect guide explains the roles of different design professionals and how the design stage works in practice.
Stage two: planning permission if required
Most loft conversions in London do not need planning permission. If yours falls under permitted development you can skip this stage entirely, though applying for a Lawful Development Certificate as a record of permitted development compliance adds around eight weeks and is worth considering if you plan to sell in the near future.
If planning permission is required, the statutory determination period is eight weeks from validation of a complete application. In practice, with preparation time, validation, and the assessment period, allow ten to fourteen weeks from submitting drawings to receiving a decision. Conservation area applications and anything that goes to committee can take longer.
Our planning permission timeline guide covers the full application process in detail including what each stage involves and where delays typically occur.
Stage three: building regulations
Building regulations approval can run in parallel with planning rather than after it, which is one of the most effective ways to compress the overall timeline. There is no requirement to wait for planning permission before submitting a building regulations application.
A building notice or full plans application submitted to building control at the same time as the planning application means that by the time planning permission arrives, building regulations may already be approved or close to it.
Full plans approval, where detailed drawings are submitted and checked before work starts, typically takes four to six weeks. A building notice, where you notify building control and they inspect during the build rather than approving drawings upfront, can be submitted closer to the start of works but carries more risk of issues being identified on site rather than resolved on paper.
Our building regulations guide explains both routes and the practical implications of each.
Stage four: party wall notices
If your conversion triggers the Party Wall Act, which most loft conversions on London terraced and semi detached homes do, notices need to be served on neighbours before work starts. The minimum notice period is two months for most party wall works.
This is one of the most common causes of project delays and it is entirely avoidable with proper planning. Serve notice as early as possible, ideally at the same time drawings are being prepared, so the two month period runs concurrently with the design and approvals process rather than adding to it.
If your neighbour dissents and surveyors need to be appointed and an award agreed, add a further four to eight weeks to the timeline. On a project that is otherwise well prepared, a late party wall notice is the single most preventable source of delay.
Our party wall agreements guide covers the full process including timelines and what happens when neighbours dissent.
Stage five: contractor appointment
Once approvals are in place and party wall matters are in hand, you need to appoint a contractor. Getting quotes, comparing them properly, checking references, and agreeing a contract takes time and should not be rushed.
Allow two to four weeks to get three properly itemised quotes from experienced loft conversion specialists. If you are using a design and build company the process is somewhat different but the principle of not rushing the appointment decision still applies.
The contractor's start date depends on their availability, which in London for good loft conversion specialists is often four to eight weeks from appointment. Factor this into your programme. A contractor who can start immediately is sometimes a sign that they are not as busy as the best firms, which are usually booked ahead.
Stage six: the build itself
This is where most people's timeline expectations sit, so here are realistic figures by conversion type.
A Velux loft conversion is the fastest build of any conversion type. Because the roof structure is not being altered, the work is simpler and the programme is shorter. A standard Velux conversion on a London terrace typically takes six to eight weeks from start to a finished, usable room.
A rear dormer on a standard London terrace typically takes eight to twelve weeks. The structural phase, where the roof is opened up and the dormer frame is built, takes two to three weeks and is the most weather sensitive part of the programme. Once the structure is weathertight the internal fit out proceeds steadily.
An L-shaped dormer takes longer because there is more structure to build and the junction between the two dormer elements requires careful execution. Allow ten to fourteen weeks for a standard L-shaped conversion on a Victorian terrace.
A hip to gable conversion alone typically takes ten to twelve weeks. Combined with a rear dormer, which is the most common approach on 1930s semi detached homes, allow twelve to sixteen weeks for a well run project.
A mansard conversion is the most structurally complex type and typically takes sixteen to twenty weeks. The extent of roof rebuilding involved and the greater volume of internal finishing work both contribute to the longer programme.
These timelines assume a well prepared project with drawings and approvals in place before work starts, a competent contractor managing the programme properly, and no significant unforeseen structural issues arising during the build.
What can extend the build timeline
Several things extend the on site programme beyond the estimates above, and being aware of them helps you plan and build contingency into your expectations.
Unforeseen structural conditions are the most common cause of build delays. Once the roof is opened up, the structural engineer may identify existing timbers that need remedial treatment, connections that need strengthening, or conditions that were not visible during the initial assessment. Resolving these takes time and involves additional design work and materials on top of the original programme.
Weather affects the structural phase more than any other part of the build. A week of sustained rain while the roof is partially open can delay the programme and in the worst cases cause damage to the internal structure below. Good builders manage this risk carefully but cannot eliminate it entirely.
Material delays have become more of a factor in recent years. Structural steel, specialist roofing materials, and certain window types can have lead times of several weeks. A well organised contractor orders materials ahead of when they are needed on site so that delivery delays do not translate directly into programme delays.
Decisions made slowly by the client during the build can also extend the programme. Choices about bathroom fittings, flooring, internal joinery, and decoration that are not made in advance of when the contractor needs them can cause the programme to stall while the contractor waits for direction. Making these decisions before work starts, not during it, keeps the programme moving.
What a realistic end to end timeline looks like
Putting all of this together, here is what the full programme looks like from deciding to proceed to moving into the finished room.
For a permitted development rear dormer on a standard London terrace with no complications, a realistic end to end timeline is as follows. Design and drawings take four to six weeks. Building regulations running in parallel takes four to six weeks. Party wall notices run concurrently and take eight to ten weeks including the notice period and any award process. Contractor appointment and mobilisation takes three to five weeks after approvals are in place. The build itself takes eight to twelve weeks.
From the point of appointing a designer to moving into the finished room, the realistic timeline for a straightforward rear dormer is five to seven months. For more complex conversions or those requiring planning permission, seven to ten months is a more accurate expectation.
These timelines surprise many people who expect to be in a finished loft room within a few months of deciding to proceed. The preparation work takes time and cannot be effectively compressed without creating problems later. Understanding this upfront leads to a much smoother experience than discovering it halfway through.
Tips for keeping the project on programme
The most reliable way to keep a loft conversion on programme is to do as much preparation work as possible before work starts on site.
Appoint your design team early and give them clear, complete information about what you want from the conversion. Indecision at the design stage slows everything down and creates incomplete drawings that cause problems during building regulations assessment and on site.
Serve party wall notices as early as possible. The two month notice period is fixed by law and cannot be shortened regardless of how urgent your project feels. Getting this started while drawings are being prepared is the single most effective thing you can do to keep the overall programme tight.
Run building regulations and planning in parallel wherever possible. The two processes are entirely independent of each other and there is no reason to wait for one before starting the other.
Make finish decisions before work starts. Tiles, flooring, bathroom fittings, internal doors, and joinery specifications all need to be confirmed before the contractor needs them on site. Creating a schedule of all finish decisions and working through them methodically before the build starts prevents the most common source of mid-build delays.
Build contingency into your timeline expectations. Even a well run project with good preparation encounters minor delays. Expecting the best case scenario and being surprised by a two week delay is more stressful than expecting a realistic timeline and finishing on programme.
The straightforward summary
A loft conversion in London takes longer from start to finish than most people initially expect. The build itself is only part of the programme. Design, approvals, party wall notices, and contractor appointment all add time before anyone picks up a tool.
For a straightforward rear dormer, five to seven months from start to finish is realistic. For more complex conversions or those requiring planning permission, seven to ten months is a more accurate expectation. Building these timelines into your planning from the start leads to a much smoother experience than discovering them as surprises along the way.
At Loft Converter London we manage the full programme from initial design through to completion, keeping every stage on track and making sure preparation work is done properly before the build begins. A well prepared project runs more smoothly, finishes closer to programme, and costs less in the end than one that rushes the early stages and pays for it on site.
If you are building your understanding of what the full process involves, our loft conversion costs page, building regulations guide, and party wall agreements guide are useful next steps.
Loft Bathroom Design Ideas for Small Spaces
September 22, 2025
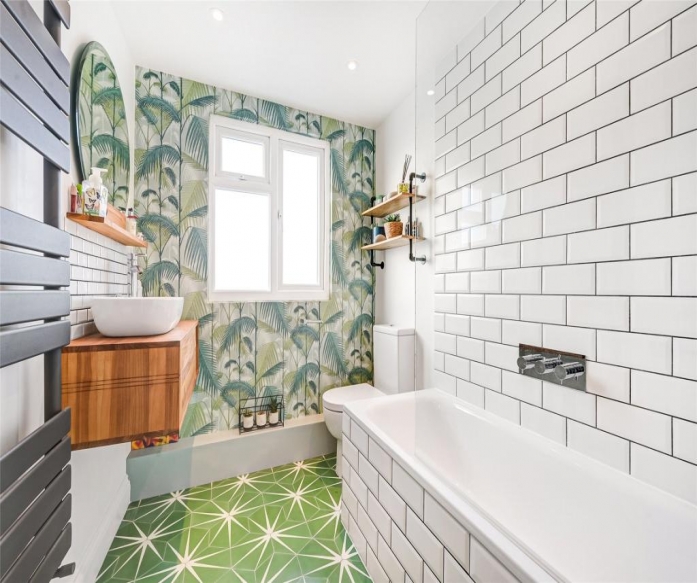
A loft bathroom is one of the most challenging spaces to design well. You are working with a limited floor area, varying ceiling heights, sloping walls, and the structural constraints of a conversion that was probably not originally planned around an ensuite. But a well-designed loft bathroom can also be one of the most characterful rooms in the house, and getting it right makes a significant difference to how the whole conversion feels.
This guide covers practical ideas and approaches that work specifically in small loft bathroom spaces, along with honest advice on what to prioritise and what to avoid.
Understanding the constraints before you design
Before thinking about tiles and fixtures, understand what you are actually working with. The available headroom at different points in the bathroom is the most important factor in deciding what goes where.
A shower needs a minimum of 2 metres of clear height at the shower head, ideally more. A toilet and basin are more forgiving and can sit comfortably under lower sections of the ceiling. A bath requires a long flat section of floor with adequate headroom for getting in and out, which in many small loft bathrooms is simply not achievable without compromising the rest of the space.
Map the ceiling height at every point in the proposed bathroom before you finalise the layout. Mark where the two metre line falls, where one metre eight falls, and where the ceiling drops below comfortable standing height. Those measurements will define your layout more than any design preference.
The RIBA Find an Architect tool is useful if you want professional help working through a challenging loft bathroom layout before committing to any structural changes.
Shower over bath or shower only
This is the first practical decision for most small loft bathrooms, and the answer is usually shower only.
A bath requires significant floor area, a long enough flat ceiling section to use it comfortably, and a structural floor that can take the weight of a full bath, plus water, plus occupant. In a small loft bathroom where floor area is at a premium and ceiling height varies, a well designed shower enclosure will always serve the space better.
A walk-in shower without a tray or screen is one of the cleanest solutions in a small loft bathroom. Wet-room-style waterproofing to the floor and lower walls removes the visual barrier of a shower tray and screen, making the room feel larger and the design feel more deliberate. The sloping floor required for drainage can be designed to follow the natural fall of the space, which in some loft configurations works very naturally.
If a bath is genuinely required, a freestanding bath positioned under the highest section of the ceiling with a handheld shower is the most practical approach. But be honest about whether a bath will actually be used regularly or whether a well designed shower is the more realistic fit for how the bathroom will function day to day.
Bathstore and Victorian Plumbing both have extensive ranges of compact shower enclosures and wet room drainage systems suitable for small loft bathrooms, with useful online planning tools that let you explore different configurations.
Making the layout work
In a small loft bathroom, the layout needs to be resolved at the design stage with the same rigour as the structural design. A poorly considered layout creates a bathroom that is frustrating to use, regardless of how well it is finished.
The toilet position is often the most constrained decision because the waste pipe needs a clear fall to the soil stack, which limits where it can go without significant additional plumbing work. Positioning the toilet close to the existing soil stack location reduces cost and avoids the need for a macerator pump, which adds noise and maintenance requirements.
A wall-hung toilet is worth considering in a small loft bathroom. It frees up floor space, makes cleaning easier, and looks cleaner than a close coupled floor standing unit. The cistern sits concealed within a slim duct or false wall, which adds a small amount of depth to one wall while saving floor space.
A compact basin mounted on a vanity unit rather than a pedestal keeps the floor clear and provides the storage that a small bathroom desperately needs for toiletries, towels, and cleaning products. Wall-mounted vanity units with storage above and below the basin are particularly efficient in tight spaces.
Crosswater produces a well-regarded range of compact bathroom furniture specifically designed for smaller spaces, including slim-depth vanity units and wall-hung storage that work well in loft conversions where depth is limited.
Shower design for loft bathrooms
The shower enclosure or wet room area is the centrepiece of most loft bathrooms and deserves careful thought for both design and function.
A frameless glass panel rather than a full enclosure is one of the most effective ways to make a small loft shower feel larger. A single fixed glass panel with an open entry keeps sightlines clear and avoids the visual clutter of a framed screen with multiple panels. In a wet room configuration with proper waterproofing throughout, a single glass deflector screen is sometimes all that is needed to keep water contained.
The position of the shower head relative to the ceiling height matters practically. A fixed overhead rain shower needs at least two metres of clearance above the shower tray or wet room floor. If the ceiling drops below that at the shower head position, a wall-mounted shower arm that angles the head downward and inward is a simple solution that avoids the headroom problem without compromising the shower experience.
Thermostatic shower valves are worth specifying over manual mixer valves in any new bathroom. They maintain a constant water temperature regardless of what else is happening in the household plumbing, which is both more comfortable and safer. The Hansgrohe Ecostat range and Mira showers both offer good quality thermostatic options across different price points.
Natural light in a loft bathroom
A loft bathroom with natural light feels dramatically better than one without. If the layout allows, a roof light above the shower or bath area transforms the space from a functional box into something genuinely pleasant.
Roof windows manufactured specifically for wet room environments are available from Velux and other manufacturers. These use laminated inner panes and sealed-unit constructions that handle the humidity of a bathroom environment without the condensation and seal failure issues that standard roof windows can experience in wet areas.
Privacy is an obvious consideration with a roof light in a bathroom. Obscured glass is available as a standard option from most roof window manufacturers and addresses privacy concerns effectively. Alternatively, a roof light positioned over the shower rather than the WC or vanity area provides natural light where it is most impactful while limiting any privacy concern.
If a roof light is not possible due to the roof structure or budget, a well-lit bathroom using layered artificial lighting can still feel bright and pleasant. Mirror-fronted storage units that reflect light back into the space, combined with well-positioned downlights and a heated mirror or mirror with integrated LED surround, go a long way toward compensating for the absence of natural light.
Tiles and surfaces
Tile choice in a small loft bathroom significantly affects how the space feels. The general principle is that fewer grout lines make a space feel larger, which points toward larger format tiles rather than small mosaic or brick formats.
Large format porcelain tiles, 600 by 600 millimetres or larger, used consistently across the floor and walls create a clean, expansive feel that makes a small bathroom read as more generous than it is. Carrying the same tile from floor to wall without a break is particularly effective in a wet room configuration where the floor and lower walls are all part of the waterproofed envelope.
Light-coloured tiles reflect light, making the space feel brighter. Greys, whites, and warm stone tones all work well. Very dark tiles can look dramatic in a loft bathroom with good natural light, but can feel oppressive in a small space that relies primarily on artificial lighting.
Slip resistance on the floor tile matters in a wet room. A tile that looks beautiful but becomes dangerously slippery when wet is not suitable for a shower floor, regardless of how good it looks on the showroom floor. Check the R rating of any floor tile before specifying it for a wet room application. R10 is the minimum for a domestic wet room floor.
Mandarin Stone and Tile Giant both offer extensive ranges of large-format tiles suitable for small loft bathrooms, with helpful in-store and online planning advice.
Storage solutions
Storage in a small loft bathroom needs to be built in from the start. There is rarely enough space for freestanding furniture, and adding it as an afterthought results in a cluttered, cramped space.
The eaves sections on either side of the bathroom, where the ceiling slopes down toward the outer wall, are natural storage locations. Built-in recessed shelving or a custom storage unit designed to fit the exact profile of the eaves cavity uses space that would otherwise be dead and keeps the main floor area clear.
Recessed niches in the shower wall are among the most useful details in any loft bathroom. A niche built into the structural wall behind the shower tiles provides a permanent shelf for shampoo, soap, and shower products without requiring a separate shower caddy that collects mould and gets knocked over. Two niches at different heights, one at hand level and one slightly higher, cover most practical requirements.
A mirror with integrated storage behind it, above the basin, is another efficient solution. The mirror provides the functional surface needed at the basin while the storage behind it keeps the vanity area clear of toiletry bottles and everyday clutter. Roper Rhodes produces a good range of mirrored bathroom cabinets, including options with integrated lighting that work well in compact spaces.
Heating and ventilation
A loft bathroom that is not properly heated and ventilated will develop condensation problems that lead to mould, tile grout deterioration, and eventually structural damage if moisture gets into the building fabric.
Mechanical extract ventilation is a building regulations requirement for any bathroom without an openable window providing adequate natural ventilation. In a loft bathroom, the duct run to the outside may be longer than in a standard bathroom, which affects the required fan specification. An undersized fan that cannot overcome the resistance of a long duct run will not adequately ventilate the space, regardless of how long the duct run is.
A humidity-sensitive fan that runs automatically when moisture levels exceed a set threshold is more effective than a fan wired to the light switch, which often does not run long enough to clear the space properly after a shower. Vent Axia and Manrose both produce good quality humidity-controlled extractor fans at accessible price points.
A heated towel rail on the bathroom regulations circuit provides both warmth and a practical place to dry towels, which in a small bathroom without good natural airflow matters more than in a standard bathroom. A chrome ladder-style heated towel rail in a slim profile fits neatly on a narrow wall section and adds warmth without dominating the space.
Underfloor heating beneath the tile is a popular addition in loft bathrooms and works well with the large-format tiled floors that suit the space. Electric underfloor heating rather than wet system underfloor heating is typically the most practical choice in a loft bathroom where installing pipework through the existing floor structure adds significant complexity.
Waterproofing
Waterproofing in a loft bathroom is more critical than in a ground or first-floor bathroom because any water ingress through the floor structure has a long way to travel before it causes visible damage, by which time significant harm may already have been done.
A tanked wet room floor, where the waterproofing membrane is applied to the entire floor and lower wall surfaces before tiling, is the correct approach for any wet room style loft bathroom. This is not an area to cut costs. A properly tanked wet room using a quality system such as Wedi or Schluter Kerdi will last the life of the building without issues. A poorly waterproofed wet room will cause expensive damage within a few years.
The waterproofing system should be installed by someone who has done it before and understands the specific details at junctions, corners, and penetrations. These are the points where failures happen. Ask your builder specifically about their experience with wet-room waterproofing and the system they use before work starts.
Plumbing and waste
Getting the plumbing right in a loft bathroom avoids costly problems that are hard to fix once the tiles are down.
Waste pipes need a minimum fall toward the soil stack to drain properly. In a loft conversion where the waste has to travel down through the building to reach the stack, maintaining adequate fall throughout can require raising the shower tray or wet room floor slightly, which affects the finished floor height and the headroom calculation at the shower.
Hot water pressure at loft level is sometimes lower than on lower floors, particularly in older London homes with gravity-fed hot water systems. This can affect shower performance significantly. A shower pump or an unvented hot water cylinder upgrade may be required to achieve adequate pressure at the top of the building. Your plumber should assess the existing system before specifying the shower valve and confirm whether any upgrade is needed.
The straightforward summary
Designing a loft bathroom well in a small space comes down to honest planning before creative decisions. Understand the ceiling heights first. Fix the layout based on what is structurally and plumbing-wise practical. Design storage in from the start. Ensure proper waterproofing, adequate ventilation, and appropriate heating before considering tiles and fittings.
The loft bathrooms that work best are those where these practical decisions were carefully made at the design stage, not discovered as problems during or after the build. A small bathroom that is well planned, properly built, and thoughtfully finished will feel better to use every day than a large bathroom that was designed without thinking through how it actually functions.
At Loft Converter London, we treat the bathroom design as an integral part of the conversion design, not a separate afterthought. Getting the layout, services, and structure right together from the start is what creates a loft bathroom that works properly for years without issues.
If you are still planning your conversion, our loft conversion costs page, how to design the perfect loft bedroom guide, and building regulations guide are useful next steps before you finalise any decisions.
How to Design the Perfect Loft Bedroom
August 17, 2025
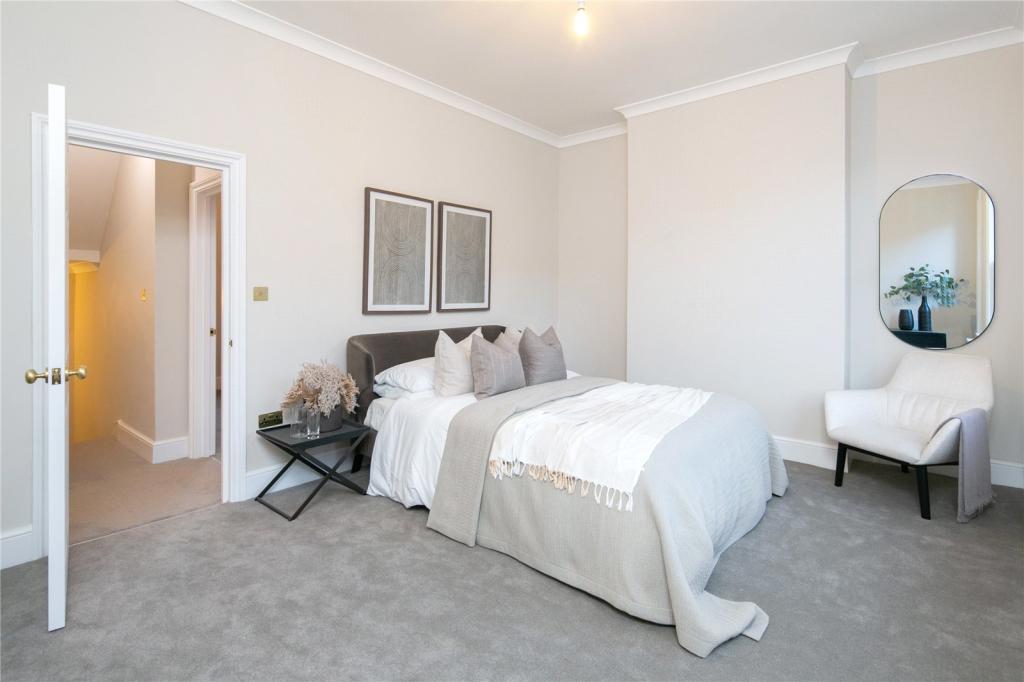
A loft bedroom is one of the most rewarding spaces to design in a London home. It sits apart from the rest of the house, often has interesting angles and roof lines, and with the right approach can feel genuinely special rather than just functional.
But loft bedrooms also come with specific design challenges that standard bedrooms do not. Low eaves, sloping ceilings, awkward corners, and limited wall space all need to be worked through carefully. Get the design right from the start and the room becomes the best in the house. Get it wrong and it feels cramped, poorly lit, and frustrating to live in.
Here is a practical guide to designing a loft bedroom that genuinely works.
Start with the layout before anything else
The single most important design decision in a loft bedroom is where the bed goes. Everything else follows from that.
The bed needs a position where the ceiling height above it is adequate. Lying in bed and feeling the ceiling too close overhead is uncomfortable and claustrophobic. Ideally the ceiling above the bed should be at least 1.8 metres, and higher is better. In a dormer conversion the central section of the room has full height throughout, which is usually where the bed sits naturally.
Once the bed position is fixed, work outward from there. Where can storage go without eating into the circulation space? Where does natural light fall in the morning and evening? Where is the door arriving from the staircase, and does it create a sensible flow into the room?
Sketch the layout on paper before committing to any built-in furniture or storage. A simple floor plan to scale will reveal quickly whether a proposed layout works or creates problems. If you are working with an architect or architectural technician this is a conversation to have at the design stage before the conversion is built, not after. Our do you need an architect guide explains how design professionals can add value at this stage and what to expect from the process.
Make the most of the sloping ceiling
Sloping ceilings are the defining characteristic of most loft bedrooms and they are an asset, not just a constraint. The trick is working with them rather than fighting them.
Low eaves areas, where the ceiling slopes down toward the edges of the room, are unsuitable for standing but perfectly suited for storage, seating, or a desk. Built-in wardrobes that follow the roofline are one of the most practical and visually satisfying solutions in a loft bedroom. They use space that would otherwise be wasted and create a clean, integrated look that works better than freestanding furniture pushed awkwardly against a sloping wall.
A window seat or reading nook built into a low eaves area is another popular approach that turns an architectural constraint into a feature. Low platforms with cushions and built-in shelving on either side create a cosy, purposeful space from what might otherwise be a dead corner.
The RIBA Find an Architect tool is useful if you want to find a designer with specific experience in residential loft spaces who can help you develop these ideas properly for your specific room.
Natural light is everything
A loft bedroom lives or dies by its natural light. Get it right and the room feels bright, airy, and connected to the outside. Get it wrong and it feels dark and oppressive regardless of how well it is decorated.
Dormer windows that face the garden provide excellent forward-facing light that feels natural and comfortable. Roof lights set into the slope complement this with overhead light that changes beautifully through the day and brings in sky views that no vertical window can match.
For bedrooms, the position of roof lights relative to the bed matters. A roof light directly over the bed lets in early morning sun, which wakes sleepers naturally but may not be welcome in summer. Positioning roof lights to one side of the bed, or specifying blackout blinds from the outset, gives you control over light levels without sacrificing the benefit of the window.
Velux offers a well organised range of roof window options including blackout, dim-out, and solar control blinds that are worth looking at during the specification stage. Their room visualiser tool also lets you explore how different window configurations affect the feel of the space before anything is built.
On north facing slopes where direct sunlight is limited, roof lights can still bring in good diffused daylight. South and west facing slopes get strong direct sun and solar control glazing is worth specifying to prevent the room from overheating in summer.
Storage: plan it in, do not add it later
Storage in a loft bedroom needs to be designed in from the start. The irregular geometry of the space makes freestanding furniture a poor fit in most cases, and trying to retrofit storage into a finished loft bedroom is expensive and often disappointing.
Built-in wardrobes that follow the eaves line are the most space efficient solution. They can be designed to use every centimetre of height up to the point where the slope meets the floor, with hanging rails, shelving, and drawers configured to the specific dimensions of the eaves cavity.
A well designed built-in wardrobe in a loft bedroom will typically store as much as a conventional wardrobe in a standard bedroom while occupying space that could not be used for anything else. This is one of the genuinely clever aspects of loft bedroom design when it is done properly.
For a master bedroom with generous floor area, a dedicated dressing area in one of the eaves sections is worth considering. This separates the sleeping and dressing functions cleanly and creates a room that feels more considered and more luxurious than a standard bedroom with a wardrobe against the wall.
Neville Johnson and Hammonds Furniture both specialise in fitted bedroom furniture and have specific experience designing storage solutions for loft conversions with sloping ceilings and irregular shapes.
Ensuite design in a loft bedroom
Most people converting their loft into a master bedroom want an ensuite. Getting this right requires careful thought about position, layout, and the practical requirements of fitting a bathroom in a space where headroom varies.
The ensuite needs to be positioned where the ceiling height is sufficient for the specific fittings. A shower needs at least 2 metres of headroom at the shower head position. A toilet and basin need adequate height but are more flexible. The most common approach is to position the ensuite under the lower eaves section where headroom is insufficient for standing, using the space for the toilet and vanity, with the shower positioned where the ceiling is higher.
Ventilation is critical in a loft ensuite. Mechanical extract ventilation ducted to the outside is a building regulations requirement, and in a loft space where the duct run may be longer than in a standard bathroom, specifying an appropriately powerful fan is important. A poorly ventilated loft ensuite creates condensation problems that are expensive to fix after the fact.
Natural light in the ensuite makes a significant difference to how the room feels. A roof light above the shower is one of the most effective and most popular solutions, and Velux and other manufacturers produce roof windows specifically designed for wet room environments. The Velux integra range includes solar and electric opening options that work well in bathroom positions where manual operation is awkward.
Our dormer loft conversion guide covers how ensuites are typically integrated into dormer conversions and what to budget for the bathroom element specifically.
Heating and ventilation
Loft bedrooms can be uncomfortably hot in summer and cold in winter if heating and ventilation are not thought through properly. The thermal performance of the conversion is the foundation, but how the room is heated and ventilated day to day matters just as much.
Most loft conversions in London are heated by extending the existing central heating system with radiators in the loft. This works well for winter warmth but does nothing about summer overheating, which is a real issue on south and west facing loft bedrooms with significant roof light glazing.
Opening roof lights provide natural ventilation and help manage heat buildup on warm days. Positioning at least one opening roof light to allow cross ventilation, where air can enter through one window and exit through another, significantly improves summer comfort.
Electric underfloor heating under a tiled ensuite floor is a popular addition that provides warmth at floor level without requiring additional radiators in a space where wall space for radiators may be limited.
For high specification conversions, a mechanical ventilation with heat recovery system provides continuous background ventilation while recovering heat from outgoing air. It is more expensive to install than a simple radiator and opening windows solution but creates a more comfortable and energy efficient room year round. MVHR units from manufacturers such as Zehnder are worth researching if this level of specification is relevant to your project.
Flooring choices
Flooring in a loft bedroom affects both the feel of the room and the structural requirements of the floor beneath it.
Engineered timber is one of the most popular choices for loft bedrooms. It is warm underfoot, looks good, and is dimensionally stable in the temperature and humidity variations that loft spaces experience. Solid timber is also used but is more susceptible to movement in environments that warm and cool significantly through the day.
Carpet is warmer and quieter than hard flooring but requires careful specification in a space that may experience some degree of temperature cycling. Good quality carpet with a proper underlay performs well in loft bedrooms and is often the preferred choice for comfort.
Tiles are typically reserved for the ensuite rather than the bedroom itself, where the hardness and coldness underfoot work against the comfort expected in a sleeping space.
Whatever flooring is chosen, make sure it is installed after the structural floor has been properly completed and signed off by building control. Fitting flooring over a floor that has not been formally inspected creates problems at the sign off stage. Our building regulations guide explains the inspection process and what happens at each stage of the build.
Colour, light, and the feel of the room
Loft bedrooms benefit from a considered approach to colour that works with the angles and proportions of the space rather than against them.
Light colours open up the room and make sloping ceilings feel less imposing. White or off-white ceilings throughout, including on the sloping sections, create a clean and airy feel that works well in most loft bedrooms. Darker colours on the sloping ceiling sections can create a cocooning effect that feels deliberately intimate, but this works best in rooms with good natural light rather than those that rely entirely on artificial lighting.
Painting the walls and ceiling the same colour throughout, treating the entire irregular envelope as a single surface, is a contemporary approach that flattens the angles and creates a calm, unified feel. It works particularly well in rooms with interesting architectural shapes where contrast between wall and ceiling colour would draw attention to every awkward junction.
Farrow and Ball have a useful room-by-room colour guide that includes specific advice for rooms with sloping ceilings and unusual proportions. Their sample service lets you test colours in the actual space before committing, which is worth doing in a loft where the light quality is different from a standard room.
Lighting design
Artificial lighting in a loft bedroom deserves specific attention because the geometry of the space makes standard ceiling mounted fittings less effective than in a regular room.
A central ceiling rose in the middle of a sloping ceiling provides uneven light distribution and creates shadows in the eaves sections. Recessed downlights positioned along the flat section of the ceiling, combined with wall lights at low level and bedside lighting, provide much better coverage and more flexibility.
Lighting on a dimmer circuit throughout is worth specifying from the start. The ability to adjust light levels from bright and functional for getting dressed to low and relaxed for winding down makes a meaningful difference to how the room feels in daily use.
If the conversion includes a roof light directly above, a shading solution that incorporates electric blackout blinds makes the room functional as a sleeping space year round. Manually operated blinds on a roof light that is not easily reached are frustrating in practice. Specify electric operation from the outset and control them from a bedside switch or a smartphone app.
The straightforward summary
Designing a loft bedroom well comes down to working with the geometry of the space from the start rather than treating it as a standard room with an awkward ceiling. Fix the bed position first, design storage in rather than adding it later, get the natural light right, and think carefully about heating, ventilation, and how the room will actually be used day to day.
The rooms that work best are the ones where these decisions were made at the design stage, before the conversion was built, not retrofitted afterward. An experienced designer who understands loft spaces will help you avoid the most common mistakes and create a room that feels genuinely considered rather than improvised.
At Loft Converter London we think about how each loft bedroom will actually live before we finalise any drawings. The structural decisions and the design decisions are connected, and getting both right at the same time is what creates a conversion that exceeds expectations rather than just meeting the minimum brief.
If you are still at the planning stage, our loft conversion types guide, loft conversion costs page, and do you need an architect guide are useful next steps before you start making detailed design decisions.
What are the Best Loft Conversion Types for 1930s Houses in London?
July 29, 2025
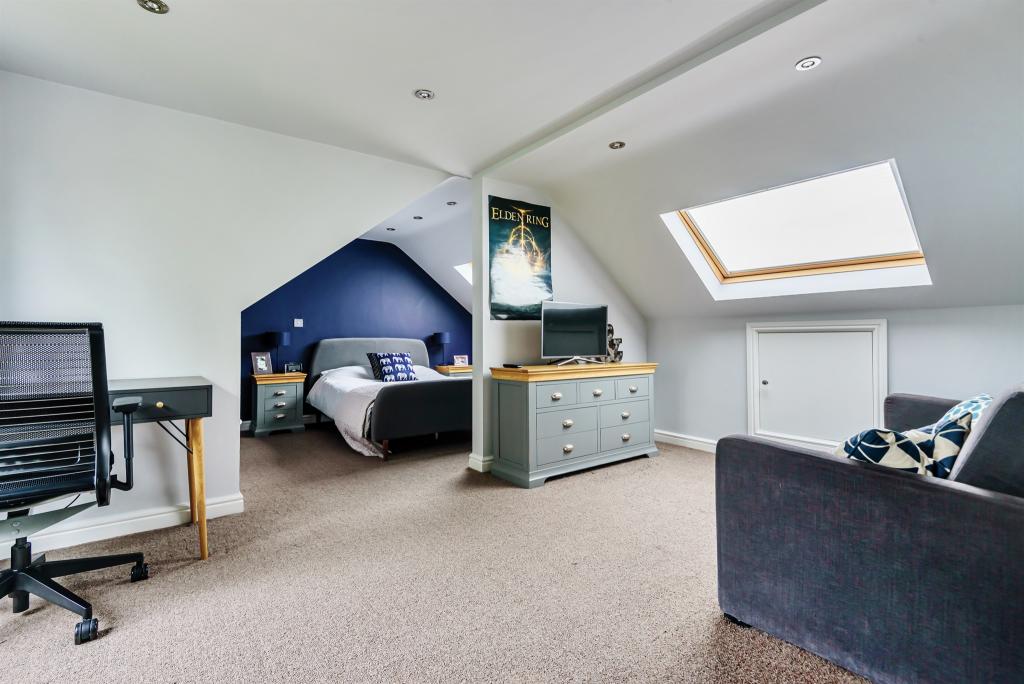
1930s houses make up a significant proportion of London's housing stock, particularly in outer south, east, and west London. They are well-built, generously proportioned by London standards, and, in most cases, have loft spaces that convert extremely well.
But 1930s houses have specific characteristics that affect which conversion types work best, what planning rules apply, and what the structural work involves. Understanding those characteristics before you start planning will help you make better decisions and avoid the surprises that catch people out.
What makes 1930s houses different
Before getting into conversion types, it is worth understanding what sets 1930s houses apart structurally and architecturally.
Most 1930s London homes are semi-detached or detached, built in the interwar suburban expansion that spread out from the inner city along new arterial roads and underground lines. They tend to have hipped roofs rather than the gable-ended roofs common on Victorian and Edwardian terraces. The roof pitch is typically around 40 to 45 degrees, which is steep enough to create a reasonable loft space but often not as generous as the steeper-pitched roofs on older stock.
The back addition that defines the Victorian and Edwardian terraces is largely absent from 1930s homes. Instead, you typically have a more rectangular footprint with a hipped roof on both the main body of the house and sometimes over a rear projection.
The walls are usually cavity construction, which was becoming standard by this period, and the timber frame is generally sound in well-maintained properties.
One characteristic that matters specifically for loft conversions is the presence of a hipped roof on the side or sides of the property. This is what opens up the hip to gable option that is not available on gable-ended Victorian terraces, and it is often the most important single factor in deciding which conversion type makes the most sense.
Hip to gable conversion: the most popular choice
For most semi-detached 1930s houses in London, a hip-to-gable conversion combined with a rear dormer is the strongest option available. It is popular for good reason.
The hipped end of a 1930s semi-detached roof slopes inward from the party wall side, eating into the loft space and creating awkward triangular corners that are largely unusable. A hip-to-gable conversion removes that sloping end and replaces it with a vertical gable wall extending to the ridge, transforming the shape of the loft from an awkward wedge into a proper rectangular room.
Combined with a rear dormer that adds full headroom across the back of the roof, the result is a loft room that is genuinely generous, well-proportioned, and large enough to accommodate a master bedroom with an ensuite comfortably.
The combined hip to gable and rear dormer is the single most transformative conversion available to 1930s semi-detached homes. It creates the largest possible usable floor area within the existing roof footprint and consistently delivers the strongest return on investment of any option available to these properties.
Our hip to gable loft conversion guide covers the specific costs, structural requirements, and planning considerations for this conversion type in detail. Our hip to gable vs dormer guide compares the two approaches directly, if you want to understand the trade-offs before deciding.
Rear dormer only: the more affordable alternative
Not every homeowner wants or needs the full hip-to-gable treatment, and a rear dormer alone is a perfectly viable option on many 1930s houses.
If the existing loft already has a reasonable ridge height and the triangular corners created by the hipped end are not a critical issue for the intended use of the room, a rear dormer alone can create a usable bedroom or study without the additional cost and complexity of the hip-to-gable element.
The rear dormer provides full headroom across the back portion of the loft and delivers the natural light and ventilation a habitable room requires. In a 1930s semi-detached home with a reasonably steep roof pitch, the floor area within the dormer alone is often sufficient for a single bedroom with a modest ensuite.
The decision between a rear dormer alone and a hip-to-gable combined with a rear dormer comes down to three questions. How much usable space do you actually need? What is your budget? And how important is maximising the value added to the property?
If the answers point toward more space, a higher budget, and the strongest return, go for the combined approach. If a single room is sufficient and budget is the primary constraint, a rear dormer alone delivers good value on a 1930s house.
Our dormer loft conversion guide covers costs, planning, and structural requirements for rear dormers in detail.
Velux conversion: when it works on a 1930s house
A Velux conversion keeps the existing roofline intact and adds roof windows flush with the slope. It is the most affordable conversion type and the least disruptive to build.
For a 1930s house, a Velux conversion can work well, but only if the existing ridge height is sufficient. The 40 to 45 degree pitch common on 1930s homes creates a reasonable loft space in many properties, but the ridge height is often lower than on the steeper-pitched Victorian and Edwardian terraces.
Before committing to a Velux conversion on a 1930s house, measure the ridge height carefully. If the internal height from the strengthened floor level to the underside of the ridge is at least 2.2 metres, a Velux conversion will create a usable room. If it is below that, the space will feel cramped, and a dormer is a better investment even at a higher cost.
The other consideration specific to 1930s houses is that the hipped ends of the roof mean the Velux conversion creates a room that narrows toward each end. Even if the central ridge height is adequate, the usable floor area may be more limited than it appears from the outside because the sloping hip ends cut into the space on both sides.
A Velux conversion on a 1930s semi-detached home often works best as a study or single bedroom rather than a master bedroom suite, simply because the irregular shape of the room makes it harder to fit larger furniture and a bathroom in the space available.
Our Velux loft conversion guide explains in detail when this conversion type works well and when it is likely to disappoint, which is worth reading before ruling out or committing to this option.
What about mansard conversions?
A mansard conversion involves rebuilding the entire rear roof slope as a near-vertical wall with a shallow-pitched roof at the top. It creates the maximum possible internal volume of any conversion type and is commonly seen on inner London period properties.
On a 1930s house, a mansard is technically possible, but rarely the most practical or cost-effective choice. Mansard conversions are significantly more expensive than dormers or hip-to-gable conversions, typically starting at £60,000 and often exceeding £80,000 fully finished. They almost always require full planning permission regardless of location. And the architectural character of a mansard sits more naturally with the Victorian and Edwardian terraces of inner London than with the suburban semi-detached aesthetic of most 1930s housing.
For a 1930s house where the goal is maximising space and value, a hip-to-gable with a rear dormer almost always delivers a better outcome at a lower cost than a mansard. Mansard conversions make more sense on inner London terraces where a hip to gable option is not available and the scale of the building suits the more dramatic roof alteration.
Planning permission on 1930s houses
Most 1930s houses in London are outside conservation areas, so standard national permitted development rules apply without the additional restrictions that affect older inner London stock.
A rear dormer on a 1930s semi-detached home typically qualifies for permitted development provided it meets the volume limit of 50 cubic metres for a detached or semi-detached property and does not exceed the ridge height or project beyond the outer wall.
Hip-to-gable conversions on 1930s homes are where the planning position becomes less predictable. Some London boroughs accept hip to gable conversions as permitted development on semi-detached homes. Others require a full planning application because the alteration is visible from the street or highway.
This variation between boroughs means you cannot assume either way without checking. Your local planning authority's portal will show whether permitted development applies and whether any Article 4 directions affect your street. A quick pre-application enquiry with the planning department is worth the modest cost if there is any doubt.
Our permitted development rules guide explains the framework in detail. Our planning permission timeline guide outlines what the application process entails if one is required.
Structural considerations specific to 1930s houses
The structural characteristics of 1930s houses create specific considerations for loft conversions that are worth understanding before you appoint an engineer or start getting builder quotes.
The existing floor joists in the loft are almost certainly not adequate for a habitable room. This is true of virtually all pre-1980s London homes, regardless of construction type. New joists will need to be installed alongside the existing structure to bring the floor up to building regulations standard for a habitable room.
The roof timbers in many 1930s homes are in reasonable condition, provided the roof has been maintained, but some properties of this age have timbers affected by moisture over the decades. A structural engineer will assess the condition of existing timbers during their initial visit and identify any that require remedial treatment before the conversion proceeds.
Steel beams are almost always required on a hip to gable conversion to carry the extended ridge and transfer loads to the new gable wall and the structure below. On a rear dormer, they are commonly required around the dormer opening. The engineer will specify the size and position of each beam based on the calculated loads specific to your building.
Access for steelwork installation in a 1930s semi-detached home is sometimes more challenging than in a terrace because the side access that exists in a terrace is often absent. Craneage or other lifting solutions may be required to get large beams into position, which adds to both cost and programme. An experienced builder will factor this in from the start rather than discovering it on site.
Our structural calculations guide explains what the structural engineer assesses and why involving them before drawings are finalised saves time and money across the whole project.
Party wall considerations on semi detached 1930s homes
On a semi-detached 1930s house, the party wall sits on one side only. Any work that affects or is close to that shared wall requires party wall notices to be served on the neighbour before work starts.
A rear dormer that sits away from the party wall may not trigger party wall obligations, depending on how close it gets to the boundary. A hip to gable conversion that involves structural work on or near the party wall almost certainly will.
The hip end of a semi-detached 1930s roof does not directly involve the party wall in the same way as on a terrace, but the structural reorganisation required to build the new gable wall and extend the ridge can still bring work close enough to the shared wall to trigger the Act.
Your structural engineer's drawings will show clearly whether party wall notices are required. Serve them early. On a semi-detached home with one neighbour, the process is simpler than on a mid-terrace, but the same basic rules and timelines apply.
Our party wall agreements guide explains the full process including what happens if your neighbour dissents and what the surveyor fees are likely to be.
What a 1930s loft conversion typically costs
The cost depends significantly on which conversion type you choose.
A Velux conversion on a 1930s house typically costs between £20,000 and £35,000 fully finished. A rear dormer alone typically costs between £35,000 and £55,000. A hip to gable with a rear dormer typically costs between £55,000 and £80,000 fully finished.
These figures include the structural work, staircase, insulation, windows, plastering, electrics, and basic decoration. What they do not include are the additional professional fees and costs that sit alongside any loft conversion project.
Our loft conversion budgeting guide covers everything from structural engineer fees and building control to party wall costs and contingency allowances, giving you a realistic total budget to work with before you start approaching builders.
How much value does a loft conversion add to a 1930s house?
1930s semi-detached homes in London respond well to loft conversions in terms of value. Buyers in the areas where these homes are most common, outer south London, east London, and suburbs served by the underground network, actively look for the extra bedroom and bathroom that a loft conversion provides.
A rear dormer creating a bedroom and ensuite typically adds between 15% and 20% to the value of a 1930s semi-detached home. A hip-to-gable with a rear dormer typically adds between 20% and 25%, reflecting the larger, more generous space it creates.
On a 1930s semi detached home worth £550,000, that is between £82,500 and £137,500 in added value depending on the conversion type. Even at the upper end of build costs, the return is strong.
The condition and quality of the finish matter. A well-designed, properly finished conversion with good natural light, a functional ensuite, and adequate storage will always outperform a basic conversion with the same floor area. At Loft Converter London, we work with every client to ensure the design and specification match the intended use and the value outcome they are seeking.
The straightforward summary
For most 1930s semi detached houses in London, a hip to gable conversion combined with a rear dormer is the best option available. It creates the largest usable space, delivers the strongest return on investment, and transforms the roof from an awkward hipped structure into a proper, generous loft room.
A rear dormer alone is a good alternative where budget is the primary constraint or where a single room is sufficient for the intended use. A Velux conversion works on 1930s homes with adequate ridge height but is limited by the irregular shape that the hipped roof creates inside the loft.
The starting point for any 1930s loft conversion is a structural engineer's assessment of the existing roof space to confirm ridge height, floor structure, and timber condition before you commit to any design direction or builder quotes.
At Loft Converter London, we have extensive experience converting 1930s homes across London and understand the specific structural, planning, and design considerations that these properties present. If you are thinking about converting your 1930s loft and want to understand what is possible for your specific home, we are happy to start that conversation.
Our loft conversion costs page, hip to gable vs dormer guide, and permitted development rules guide are useful next steps as you continue to build your understanding.
What Is an L-Shaped Loft Conversion?
June 6, 2025
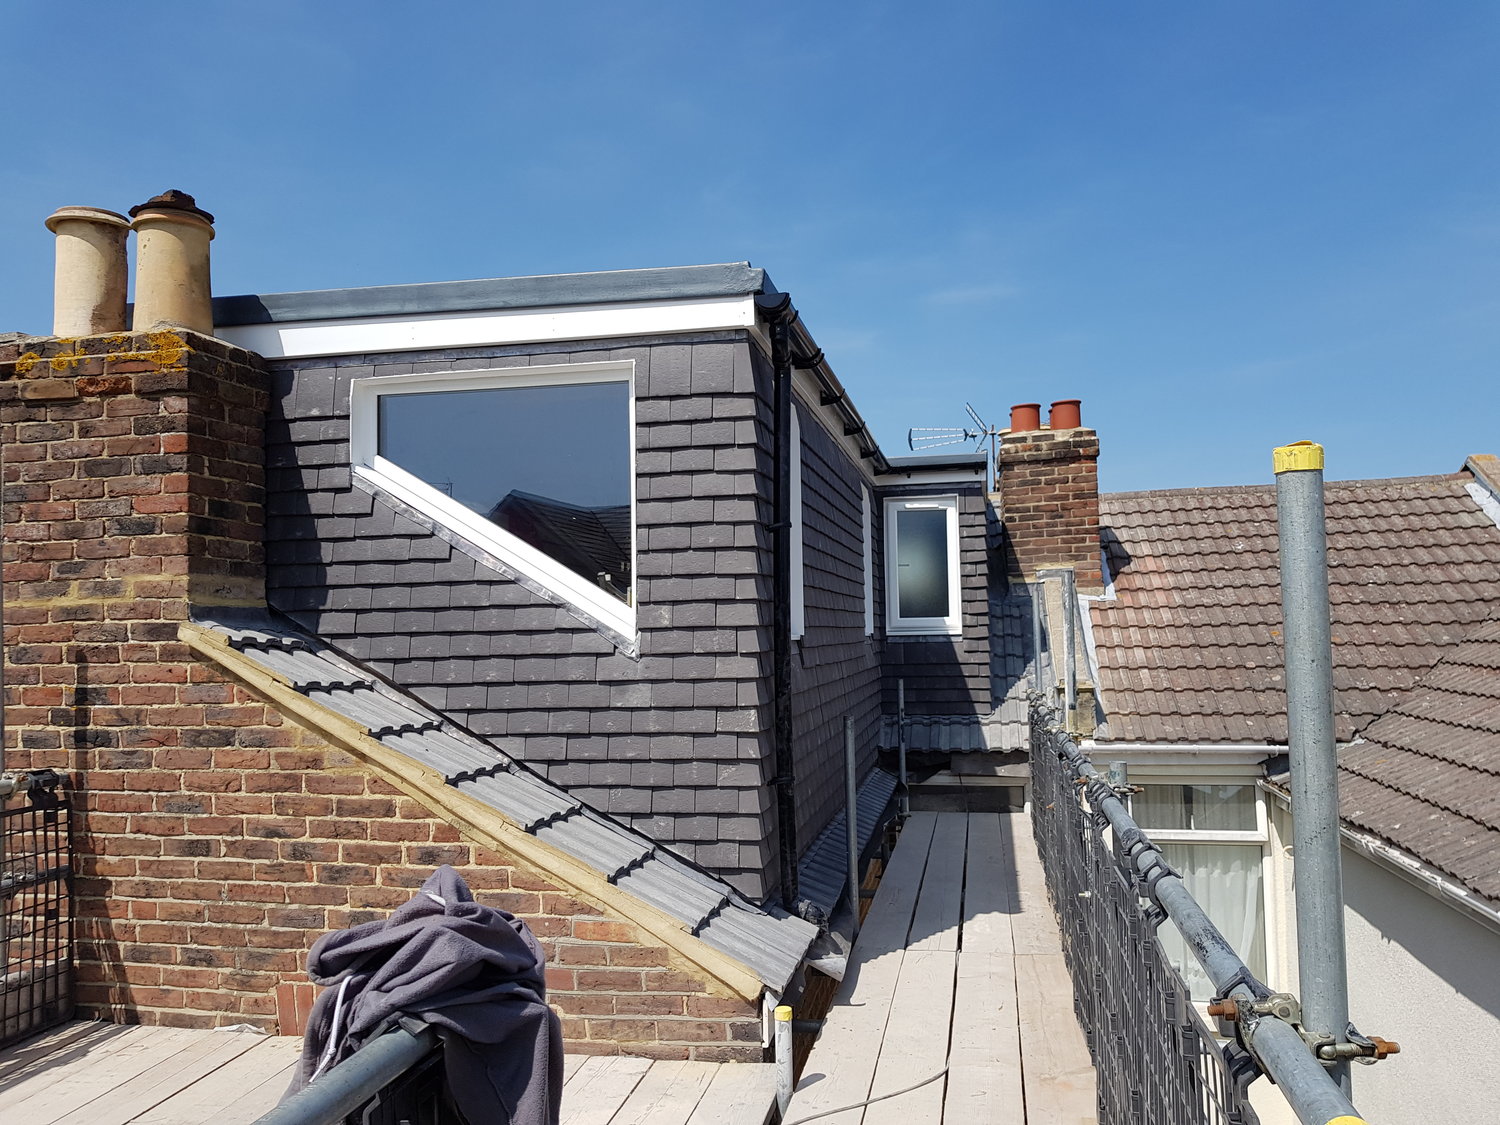
If you live in a Victorian or Edwardian terraced house in London, there is a good chance you have heard the term L-shaped loft conversion. It is one of the most popular conversion types in the capital, and for good reason. But it is also one of the most misunderstood in terms of what it actually involves, what it costs, and which homes it suits.
This guide explains everything clearly so you can decide whether it is the right option for your home.
What an L-shaped loft conversion actually is
An L-shaped loft conversion combines two dormers built at right angles to each other, creating a footprint that forms an L shape when viewed from above. In most cases this means a main rear dormer running across the back of the house combined with a smaller dormer extending over the back addition, which is the lower rear extension that sits behind the main body of many Victorian and Edwardian terraces.
The result is a significantly larger and more versatile loft space than a single rear dormer alone would create. Instead of one rectangular room across the back of the main roof, you get an L-shaped floor plan that opens up genuine possibilities for a master bedroom with ensuite, a bedroom with separate dressing area, or even two separate rooms depending on the size of the property.
The back addition element is what makes this conversion type specific to Victorian and Edwardian terraces. These homes were typically built with a lower rear outrigger, sometimes called a back addition or back return, which originally housed the kitchen, scullery, and outside toilet. The roof of this outrigger sits lower than the main roof and at a right angle to it, which is exactly what creates the opportunity for an L-shaped conversion.
Why it works so well on Victorian and Edwardian terraces
The geometry of the typical Victorian terrace in London is almost perfectly suited to an L-shaped conversion. The back addition creates a natural second dormer position at right angles to the main rear dormer, and the combined floor area of both elements is typically larger than what a single dormer could achieve on the same property.
Many of these homes have a back addition that already extends one storey. The loft conversion brings the upper level of the back addition up to match the main loft space, effectively creating a continuous upper floor across the rear of the property where previously there was a step down.
The L-shape also works well structurally because the two dormers support each other at the junction, which simplifies certain aspects of the structural design compared to some other approaches.
If you are not sure whether your home has a back addition that suits this conversion type, look at the rear of your property from the garden. If there is a lower roofed section at the back that runs at right angles to the main house, you almost certainly have the right configuration for an L-shaped conversion. Our loft suitability guide explains what to look for when assessing whether your home is a good candidate for different conversion types.
How much space does it create?
This is where the L-shaped conversion really justifies its popularity in London.
A single rear dormer on a standard London terrace typically creates between 15 and 25 square metres of usable floor space. An L-shaped conversion on the same property typically creates between 30 and 50 square metres, depending on the size of the main roof and the back addition.
That is a meaningful difference. It is the difference between fitting a single bedroom with limited space to spare and fitting a proper master bedroom with a well proportioned ensuite and potentially a dressing area or study space alongside it.
For many London families who need more than one additional room, an L-shaped conversion can sometimes accommodate two bedrooms and a bathroom within the same loft space, which on a mid terrace represents a genuinely transformative increase in the usable area of the home.
What does an L-shaped loft conversion cost in London?
An L-shaped loft conversion in London typically costs between £45,000 and £70,000 fully finished. The range reflects differences in the size of the property, the specification of the finish, and the complexity of the structural work at the junction between the two dormer elements.
The higher cost compared to a standard rear dormer reflects the additional structure required for the back addition dormer, the more complex roofing work at the internal corner where the two dormers meet, and the greater internal volume that needs insulating, plastering, and finishing.
The internal corner junction, sometimes called the valley, is one of the most technically demanding parts of an L-shaped conversion from a weatherproofing perspective. Getting this detail right is critical because a poorly executed valley junction is a common source of water ingress on loft conversions. An experienced builder who has done this many times will handle it correctly. An inexperienced one may not.
Our loft conversion budgeting guide covers the full cost picture including the additional professional fees, party wall costs, building control, and other expenses that sit alongside the build quote on any London loft conversion.
Planning permission and permitted development
Most L-shaped loft conversions on Victorian and Edwardian terraces in London qualify for permitted development, which means no formal planning application is required. The two dormer elements are treated together as a single conversion for the purposes of the volume calculation, and provided the total volume added does not exceed 40 cubic metres for a terraced home the permitted development rules are satisfied.
As with any loft conversion, conservation area designations, Article 4 directions, and local borough policies can affect whether permitted development applies to your specific property. Inner London boroughs with extensive conservation area coverage, such as Islington, Camden, and Hackney, require particularly careful checking before assuming permitted development is available.
The materials used on the exterior of both dormer elements need to be similar in appearance to the existing house under permitted development rules. In practice this means matching or complementing the existing brick and roof covering rather than introducing a dramatically different external finish.
Our permitted development rules guide explains the full framework and the specific conditions that need to be met, and our conservation area guide covers the additional restrictions that apply in sensitive locations.
Building regulations and structural considerations
Building regulations apply to an L-shaped conversion in exactly the same way as any other type. The floor structure needs to be assessed and strengthened to meet habitable room standards. Fire safety measures including protected escape routes and interlinked smoke alarms are required. The staircase must comply with the specified dimensions. Insulation must meet current thermal performance standards.
The structural complexity of an L-shaped conversion is somewhat greater than a standard rear dormer because of the junction between the two elements. Steel beams are almost always required, both to carry the loads around the dormer openings and to handle the structural requirements at the corner where the two dormers meet.
A structural engineer needs to assess the existing building and produce calculations specific to the L-shaped configuration. This is not a job for a generic residential structural engineer who rarely works on loft conversions. You want someone with direct experience of this conversion type who understands the specific load paths and structural details involved.
Our structural calculations guide explains what the structural engineer assesses and why having the right engineer involved from the start is fundamental to a safe and compliant build. Our building regulations guide covers the full requirements and the inspection process.
The staircase in an L-shaped conversion
The staircase position is worth thinking about carefully on an L-shaped conversion because the larger floor area creates more options but also more decisions.
The staircase needs to arrive in a position that serves the whole L-shaped floor plan efficiently without eating into the most valuable parts of the space. On some properties it works best positioned in the main dormer section. On others, arriving through the back addition element makes more sense depending on the layout of the first floor below.
Getting the staircase position right requires thinking about the floor below as well as the loft itself. Where can the staircase fit on the first floor without destroying a bedroom or creating an awkward dead corridor? Which position on the first floor corresponds to the best arrival point in the loft?
These are design questions that benefit from proper architectural input. An experienced architect or architectural technician who has worked on many Victorian terraces will have seen these challenges before and know how to resolve them. Our do you need an architect guide explains the role of design professionals on a loft conversion and when proper design input pays for itself.
How much value does an L-shaped conversion add?
An L-shaped loft conversion consistently delivers some of the strongest returns of any conversion type in London. The combination of generous floor area, full headroom throughout, and the ability to accommodate a master bedroom and ensuite creates exactly the kind of space that London buyers pay a premium for.
Most agents and surveyors report that a well built L-shaped conversion adds between 20% and 25% to the value of a Victorian or Edwardian terrace in London. On a £700,000 home that is £140,000 to £175,000 in added value.
Even at the upper end of build costs, the return on investment is compelling. And when you compare the total cost of an L-shaped conversion against the cost of moving to a bigger home in London, the conversion almost always wins financially. Our loft conversion vs moving house guide runs through that comparison in detail.
The key to achieving the upper end of that value range is quality of finish and functionality of layout. A well designed L-shaped conversion with a generous master bedroom, a properly proportioned ensuite, and good natural light will add more value than a poorly designed one with the same floor area. Design matters, and it is worth investing in getting it right.
Common mistakes to avoid
There are a few specific mistakes that come up repeatedly on L-shaped conversions that are worth knowing about before you start.
Underestimating the valley junction detail is the most consequential. The internal corner where the two dormers meet requires careful waterproofing and detailing. Cut corners here and water ingress is the result, often not immediately obvious but causing damage over time. Ask your builder specifically about their experience with this detail and how they approach it.
Positioning the staircase without properly thinking through the first floor layout is another common problem. It seems straightforward to find a position on the first floor but getting it wrong means losing a bedroom, creating an awkward landing, or arriving in the wrong part of the loft entirely. Work this out on paper before anything else.
Specifying windows without considering solar gain is worth mentioning specifically for L-shaped conversions because the back addition dormer often faces a different direction to the main rear dormer, and one of them may catch more direct sun than expected. Solar control glazing on south or west facing windows is a modest additional cost that makes a meaningful difference to comfort in summer.
And finally, not getting a party wall notice served early enough. On a mid terrace with neighbours on both sides, an L-shaped conversion will almost certainly trigger party wall obligations on both sides. Leaving this until the last minute delays the project and creates unnecessary stress. Our party wall agreements guide explains the process, the timelines, and what to budget for.
Is an L-shaped conversion right for your home?
The honest answer is that if you live in a Victorian or Edwardian terraced house in London with a back addition, an L-shaped conversion should be near the top of your list to consider. It creates more space than any other conversion type available to these homes, it adds the strongest value, and it suits the geometry of the building naturally.
The questions to resolve before committing are whether the existing roof heights on both the main roof and the back addition are sufficient, whether the first floor layout can accommodate a staircase in a sensible position, and whether your budget stretches to the higher cost compared to a standard rear dormer.
A structural engineer assessment of the existing roof space and a preliminary design exercise to work out the staircase position will answer all three questions before you spend significant money on drawings or builder quotes.
The straightforward summary
An L-shaped loft conversion combines a rear dormer on the main roof with a second dormer over the back addition, creating an L-shaped floor plan that is larger and more versatile than a standard rear dormer alone.
It is the conversion of choice for Victorian and Edwardian terraces in London, delivering the most usable space, the strongest value uplift, and the best return on investment of any conversion type available to these homes. It costs more than a standard dormer and involves more structural complexity, but for the right home the numbers make a compelling case.
At Loft Converter London we have completed many L-shaped conversions across London and understand the specific details that make the difference between a conversion that works brilliantly and one that disappoints. If you are thinking about an L-shaped conversion and want to understand what it would involve for your specific home, we are happy to talk it through from the start.
Our loft conversion costs page, loft conversion types guide, and hip to gable vs dormer guide are useful next steps if you want to keep building your understanding before speaking to anyone.
What Is a Velux Loft Conversion and When Does It Work Best?
May 15, 2025
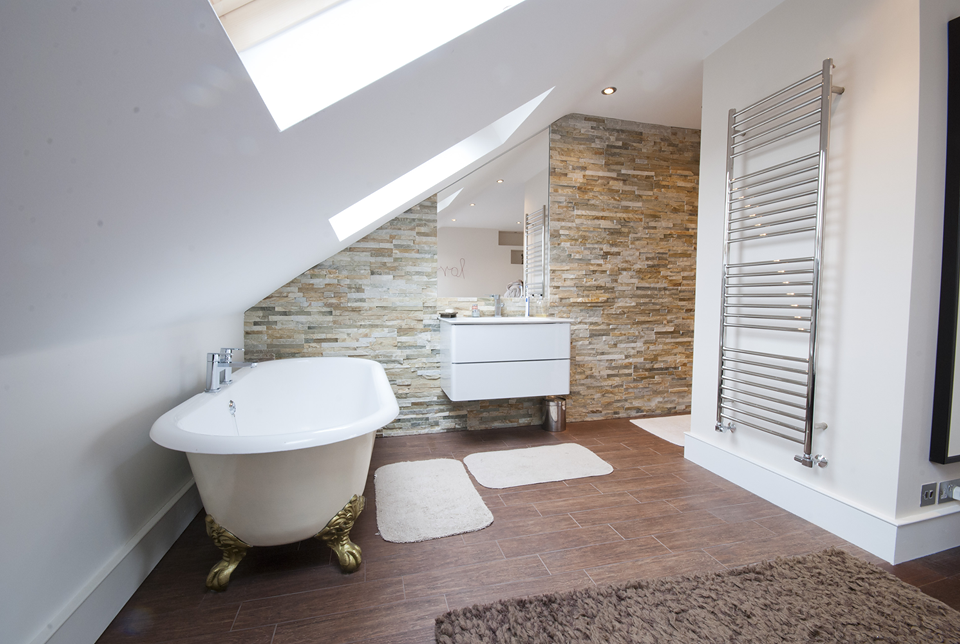
If you have heard of the term 'Velux loft conversion' and are not entirely sure what it means or whether it suits your home, this guide covers everything you need to know. It is one of the most straightforward and affordable ways to convert a loft, but it only works well in specific circumstances.
Understanding when it is the right choice and when it is not will save you time and money at the planning stage.
What a Velux loft conversion actually is
A Velux loft conversion, sometimes called a roof light conversion, keeps the existing roofline completely intact. No part of the roof structure is extended or altered. Instead, windows are cut into the existing roof slope and fitted flush with the surface, allowing light and ventilation into the space below.
Velux is actually a brand name, the most well-known manufacturer of roof windows, but the term is widely used to describe any roof light conversion regardless of which manufacturer's windows are used. Other brands, such as Fakro and Keylite, produce comparable products and are used interchangeably by most builders.
The conversion works within the existing space inside the roof. The floor is strengthened to meet building regulations requirements for a habitable room, a staircase is installed to provide proper access, insulation is fitted between and below the rafters, and the space is plastered, wired, and finished as a usable room. The roof's external appearance changes only in that windows are now visible on the slope.
How it compares to a dormer
The fundamental difference between a Velux conversion and a dormer is how the roof structure is affected.
A dormer projects outward from the roof slope, creating new vertical walls and additional headroom beyond what the existing roof shape provides. It adds space. A Velux conversion does not add any space. It simply makes the existing space usable.
This distinction matters enormously in practice. If your existing loft has enough height throughout to stand and move around comfortably, a Velux conversion can create a perfectly usable room. If it does not, no amount of roof windows will fix that. You are limited by the geometry of the existing roof, and nothing in a Velux conversion changes that geometry.
Our Velux vs dormer guide compares both options across cost, space, planning, and value. If you want a more detailed side-by-side comparison before deciding which route to take.
The headroom question
This is the single most important factor in deciding whether a Velux conversion will work for your home.
Building regulations require a minimum headroom of two metres at the centre of a habitable room, though in practice a comfortable usable room needs more than the bare minimum throughout the floor area. The relevant measurement is the height from the finished floor level to the underside of the rafters at the ridge, which is the highest point of the internal space.
A ridge height of at least 2.2 metres is generally considered the minimum for a Velux conversion to create a genuinely usable room. Below that, even with roof windows providing excellent natural light, the space feels cramped, and the practical usable area is limited.
Many London homes have sufficient ridge height for a Velux conversion to work well. Victorian and Edwardian terraces with steep-pitched roofs often have surprisingly generous loft spaces. Postwar homes with shallower pitches tend to have lower ceilings and are more likely to need a dormer to create a proper room.
The only reliable way to know whether your loft has enough height is to measure it. Take the measurement from the existing floor joists, not from the loft boarding if there is any, to the underside of the ridge timber. If you are not comfortable doing this yourself, a structural engineer can assess it as part of a broader loft suitability review.
Our loft suitability guide explains what to look for when assessing your existing roof space and which measurements matter most.
When a Velux conversion works best
There are specific situations where a Velux conversion is genuinely the right choice rather than a compromise.
The first is where the existing loft already has excellent natural height. If your ridge is high and the roof pitch is steep, you may have more usable space within the existing roof than you realise. In these cases, a Velux conversion creates a light, airy room that costs significantly less than a dormer and involves considerably less disruption to the building.
The second is where planning restrictions make structural alterations difficult or impossible. In conservation areas, a Velux conversion on a rear slope that is not visible from the street is often the most straightforward route to adding a room without triggering a planning application. Roof windows fitted flush with the slope typically do not alter the character of the roofscape as a dormer does, making them more acceptable in sensitive locations.
Our conservation area guide explains how planning restrictions in sensitive locations affect loft conversion options and what tends to get approved.
The third situation is the budget. A Velux conversion typically costs between £20,000 and £35,000 fully finished, compared to £35,000 to £60,000 for a rear dormer. If budget is the primary constraint and the loft has adequate height, a Velux conversion delivers a usable room at a lower cost and with a faster build programme.
The fourth is where speed and minimal disruption matter. Because the roof structure is not being altered, a Velux conversion is faster to build than a dormer. The risk of weather-related delays during the structural phase is lower. And the project is generally less disruptive to the household throughout.
When a Velux conversion does not work
Being honest about the limitations is just as important as understanding the benefits.
If your loft does not have sufficient ridge height, a Velux conversion will be disappointing. The room will feel cramped, the usable floor area will be small, and you will have spent money creating a space that does not function well for its intended purpose. In this situation, a dormer is the right answer even though it costs more.
If you want to fit a proper bedroom and ensuite, the available floor area in a Velux conversion is often not sufficient, particularly in narrower London homes. The sloping ceilings eat into the usable area quickly as you move toward the eaves, and fitting a bathroom alongside a bedroom in the remaining space requires very careful planning.
If your primary goal is maximising the value added to the property, a dormer that creates a generous bedroom and ensuite will almost always deliver a stronger return than a Velux conversion. The value uplift from adding usable floor area in London is significant, and a Velux conversion adds less floor area than a dormer by definition.
If you want to understand the financial comparison in detail, our loft conversion vs moving house guide covers the return on investment for different conversion types in the context of London property values.
Planning and permitted development
Velux conversions have the most straightforward planning position of any loft conversion type. Because they do not alter the roofline and the windows sit flush with the existing roof slope, they almost always qualify for permitted development.
The conditions are simple. The windows must not protrude more than 150mm beyond the roof slope. They must not be installed on a front elevation that faces a highway. And the property must not be subject to restrictions that remove permitted development rights, such as a conservation area designation on a front slope or an Article 4 direction.
For most London homes, a rear slope Velux conversion is permitted development without question. This means no planning application, no eight week wait for a decision, and no planning fees beyond the cost of drawings for building regulations.
Even where a planning application would not be required, it is worth considering a Lawful Development Certificate if you plan to sell the property in the future. This gives you formal written confirmation from the council that the works were lawful, which buyers and their solicitors will find reassuring. Our permitted development rules guide explains the Lawful Development Certificate process and when it is worth applying for one.
Building regulations still apply
A common misconception is that because Velux conversions are simple and do not need planning permission, they somehow bypass building regulations. They do not. Building regulations apply to every loft conversion without exception.
The same requirements that apply to a dormer or hip to gable conversion apply here. The floor must be structurally adequate for a habitable room. Fire safety measures must be in place including a protected escape route and interlinked smoke alarms. Insulation must meet minimum thermal performance standards. The staircase must comply with the required dimensions and specifications. Electrics must be installed and certified by a registered electrician.
None of these are optional even on the simplest Velux conversion. A building regulations completion certificate is required at the end of the project and is necessary when you come to sell. Our building regulations guide covers what each requirement involves and what the inspection process looks like throughout the build.
The staircase on a Velux conversion
One aspect of Velux conversions that people underestimate is the staircase. Because no space is being added to the roof structure, the staircase must fit within the house's existing floor plan below. This is sometimes more challenging than it sounds.
A fixed staircase that meets building regulations requires a certain run and rise, a minimum headroom above the stair, and handrails on both sides if the width requires it. Finding a position within the existing first-floor layout that accommodates all of this without sacrificing too much usable space on the floor below is a design challenge that needs proper thought.
In some London homes with tight layouts, the staircase question is the most constraining element of a Velux conversion and should be resolved at the design stage before any other decisions are made. An experienced architect or architectural technician will work through this early and confirm whether a compliant staircase can be fitted before you commit to the conversion.
Our 'Do you need an architect?' guide explains the roles of different design professionals on a loft conversion project and when it is worth appointing an architect rather than an architectural technician.
The insulation consideration
Roof insulation in a Velux conversion requires careful attention because the existing rafters in most older London homes are not deep enough to accommodate the thickness of insulation needed to meet current building regulations thermal standards in a single layer between the rafters.
The standard approach is to insulate between the rafters, then add a further layer below them, reducing the internal height slightly but achieving the required thermal performance. This needs to be accounted for in the design, as it affects the finished ceiling height and the position of the roof windows relative to the finished internal surfaces.
Getting the insulation specification right matters beyond compliance. A well-insulated Velux conversion will be comfortable year-round. A poorly insulated one will be cold in winter and overheated in summer, particularly given that roof windows admit a lot of solar gain on warm days. Roof windows with solar control glass are worth specifying on south or west-facing slopes for this reason.
Velux windows: what to specify
Not all roof windows are equal. The specification choices you make affect both the performance of the finished room and the project's cost.
Centre-pivot windows, which open by rotating around a central horizontal axis, are the most common and affordable. Top-hung windows, which hinge at the top and open outward at the bottom, offer a cleaner view when open and suit rooms with lower window sills. Both are widely available, and both meet building regulations requirements for ventilation and means of escape where required.
Glazing specification matters. Double-glazed units are standard. Triple glazing improves thermal and acoustic performance and is worth considering on busy London streets. Solar control glazing reduces heat gain on south and west-facing slopes. Laminated inner panes improve security and reduce the risk of injury if the glass breaks.
Electric operation, where the windows open and close via a motor and can be linked to rain sensors, is a popular upgrade, particularly for windows that are not easily reached from floor level. The cost premium over manual operation is modest relative to the overall project cost, and the convenience benefit in daily use is significant.
What a Velux conversion costs in London
A fully finished Velux conversion in London typically costs between £20,000 and £35,000. This covers the structural floor work, staircase, insulation, roof windows, plastering, electrics, and basic decoration.
The variables that push the cost toward the upper end of the range include the number and specification of roof windows, the complexity of the staircase, the addition of an ensuite if the space allows, and the quality of the internal finish.
The costs that often sit outside the headline quote include building control fees, structural engineer fees, party wall notices if applicable, and any scaffold required for window installation. Our loft conversion budgeting guide covers all of these additional costs in detail so you can build a realistic total budget rather than working from the build cost alone.
The straightforward summary
A Velux loft conversion is the right choice when your existing loft already has good natural height, when planning restrictions make structural alterations difficult, when budget is the primary constraint, or when you want the fastest and least disruptive route to adding a room.
It is not the right choice when headroom is marginal, when you need to maximise floor space, or when the goal is the strongest possible return on investment. In those situations, a dormer delivers better results even at a higher cost.
The starting point for any decision is measuring your ridge height accurately and being honest about whether the existing space will work as a room. If it will, a Velux conversion is an excellent value option. If it will not, knowing that early saves you from committing to a conversion that will disappoint.
At Loft Converter London, we assess every loft individually before recommending an approach. We would rather tell you honestly that a Velux conversion will not work for your home than let you spend money finding that out halfway through a project. Getting the right conversion type from the start is the foundation of a project that delivers what you actually need.
If you are still comparing your options, our loft conversion types guide, loft conversion costs page, and hip to gable vs dormer guide are useful next steps before you make any decisions.
Hip to Gable vs Dormer Loft Conversion: Key Differences
April 13, 2025
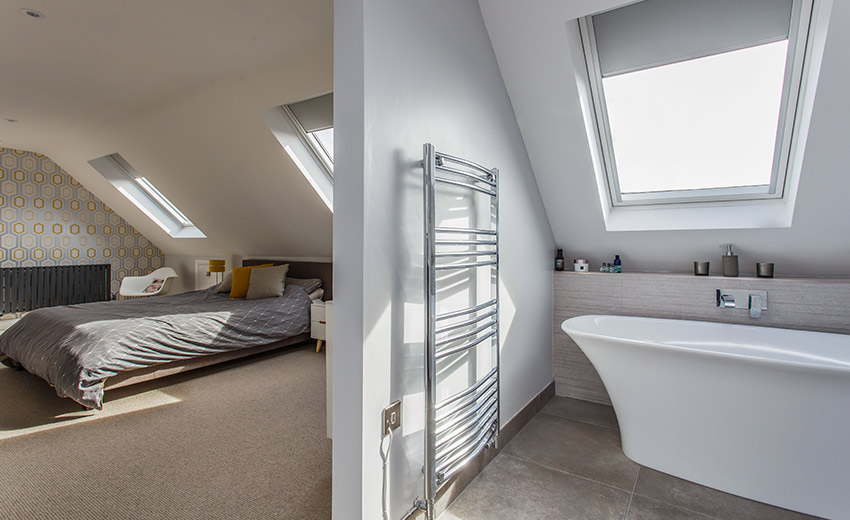
If you are trying to decide between a hip to gable conversion and a dormer, you are probably at the stage where you have done enough research to know both options exist but are not yet clear on which makes more sense for your home.
The two are often discussed together because they are frequently combined on the same project. But they are fundamentally different in what they do, what they cost, and which homes they suit. Understanding the differences clearly will help you make a better decision.
What each one actually does
A dormer conversion extends outward from the existing roof slope, creating a vertical wall and a flat or shallow pitched roof section that projects beyond the original roofline. It adds headroom and usable floor space within the footprint of the existing roof. Most rear dormers in London are built at the back of the property where they are not visible from the street.
A hip to gable conversion does something structurally different. Instead of projecting outward from the slope, it replaces the sloping hip end of the roof with a new vertical gable wall built out to the ridge line. This extends the ridge and creates a much wider, squarer loft space than existed before.
A hip to gable conversion does not add space in the same way a dormer does. What it does is unlock space that the hip end of the roof was previously eating into. The awkward, unusable triangular corners that a hipped roof creates inside the loft are eliminated, and the room becomes a proper rectangular space from wall to wall.
Which homes each option suits
This is the most important practical distinction between the two.
A dormer can be added to almost any roof type, including hipped roofs, gable ended roofs, and most other configurations. It is the most versatile conversion option and suits the widest range of London home types. Terraced houses, semi detached homes, and detached properties can all benefit from a rear dormer.
A hip to gable conversion only applies to homes with a hipped roof. If your roof already has a gable end, a hip to gable conversion is simply not relevant. The question only arises when the end of your roof slopes inward rather than ending in a vertical wall.
In London, hipped roofs are most common on detached and semi detached homes, particularly those built between the 1920s and 1960s. Victorian and Edwardian terraces usually have gable ended roofs and therefore do not need or benefit from a hip to gable conversion.
If you are not sure what type of roof you have, standing back and looking at the end of your house from the street or garden will tell you. A sloping end is a hip. A flat vertical end wall is a gable.
The space each one creates
This is where the numbers start to matter.
A rear dormer on a standard London terrace typically adds between 15 and 25 square metres of usable floor space, depending on the width of the house and the size of the dormer. The headroom within the dormer itself is full height throughout, which makes it straightforward to fit a bedroom, an ensuite, or a study.
A hip to gable conversion on its own does not add a fixed amount of space in the same measurable way. What it does is transform the shape of the existing loft from an awkward wedge to a proper rectangular room. The gain in usable space depends on how steeply the hip slopes and how much of the loft it was previously eating into. For a typical semi detached home the space gained by converting the hip end can be substantial, sometimes adding the equivalent of several square metres of properly usable floor area.
The reason most people combine the two on the same project is that a hip to gable conversion alone, without a rear dormer, often still lacks headroom over much of the floor area. Adding a rear dormer at the same time resolves this and together the two create a genuinely large, well proportioned loft room.
Our hip to gable loft conversion guide covers the specific space gains in more detail and explains how the combination with a rear dormer works in practice.
Cost comparison
A rear dormer on a standard London terrace typically costs between £35,000 and £60,000 fully finished. The range reflects differences in size, specification, and the complexity of the structural work involved.
A hip to gable conversion costs between £40,000 and £65,000 on its own. When combined with a rear dormer, which is the most common approach on semi detached homes, the combined cost typically sits between £55,000 and £80,000 fully finished.
The higher cost of a hip to gable conversion compared to a standard dormer reflects the greater structural complexity. You are removing part of the existing roof, building a new gable wall, extending the ridge, and re-covering the roof over the new structure. Each of those elements adds material and labour cost over and above what a dormer alone requires.
Our loft conversion budgeting guide covers the full cost picture for both types including the additional professional fees, party wall costs, and building control fees that sit alongside the build quote.
Planning permission considerations
Rear dormers on most London homes qualify for permitted development, meaning no planning application is needed provided the design stays within the defined volume and height limits and the property is not in a conservation area or subject to other restrictions.
Hip to gable conversions have a more complicated relationship with permitted development. In many London boroughs a hip to gable conversion falls outside permitted development because it alters the external appearance of a visible roof end. Some boroughs accept them as permitted development. Others require a full planning application.
This variation between boroughs makes it particularly important to check with your local planning authority before proceeding. Do not assume permitted development applies to a hip to gable conversion without confirming it for your specific property and borough.
If planning permission is required it adds cost and time to the programme. A householder planning application costs £258 in England and takes eight to twelve weeks to decide, with professional drawing and consultant costs typically adding £800 to £1,500 on top of that.
Our permitted development rules guide explains the framework in detail and our planning permission timeline guide walks through what the application process involves and how long each stage realistically takes.
Structural complexity
Both conversion types involve structural work, but the nature of that work differs.
A rear dormer requires the existing roof slope to be cut into and a new structural frame built for the dormer itself. Steel beams are commonly required to carry the loads around the dormer opening and transfer them to the walls below. The floor may also need strengthening to meet building regulations requirements for a habitable room.
A hip to gable conversion involves removing the hip rafter and the hip end of the roof structure entirely and replacing it with a new gable wall built out to the ridge. The ridge itself is extended. New roof timbers are required to span the enlarged roof area. Steel beams are almost always needed to carry the extended ridge and transfer loads to the new gable wall and the structure below.
In structural terms a hip to gable conversion is generally the more complex of the two. It involves more disruption to the existing roof structure and requires more careful engineering to ensure the loads are carried correctly through the new configuration.
Our structural calculations guide explains what the structural engineer assesses on each type of conversion and why getting the structural design right before work starts is fundamental to a safe and compliant build.
Disruption and build programme
A standard rear dormer on a London terrace typically takes eight to fourteen weeks from start to completion. During the structural phase, when the roof is being opened up and the dormer frame is being built, there will be several days where the roof is partially exposed. Good builders manage this carefully and have the structure weathertight as quickly as possible.
A hip to gable conversion takes slightly longer because the structural work is more extensive. A hip to gable with rear dormer combined typically runs between twelve and eighteen weeks depending on the size and complexity of the project.
Both types of conversion can be carried out while the family continues to live in the property. The noise and dust during the structural phase is significant but manageable for most households.
Value added to the property
Both types of conversion add meaningful value to London properties, but the combined hip to gable and rear dormer consistently delivers the strongest return.
A rear dormer that creates a bedroom and ensuite typically adds between 15% and 20% to a property's value in London. On a £650,000 home that is £97,000 to £130,000 in added value.
A hip to gable with rear dormer, which creates a larger and better proportioned space, typically adds between 20% and 25%. On the same £650,000 home that is £130,000 to £162,000 in added value.
The stronger return reflects the greater usable space created and the appeal to buyers of a large, well proportioned loft room with proper headroom throughout. In London where space commands a premium, the difference in floor area between a standard dormer and a hip to gable dormer combination translates directly into value.
Our loft conversion vs moving house guide puts these numbers in the context of the full financial comparison between converting and moving to a bigger property.
Which one is right for your home
The answer depends on what type of roof you have and what you are trying to achieve.
If you have a gable ended roof, the hip to gable question does not apply. A rear dormer or an L-shaped dormer is almost certainly the right route and the decision comes down to size, specification, and budget.
If you have a hipped roof and you want to maximise the space and value you create, a hip to gable conversion combined with a rear dormer is the strongest option financially and practically. The additional cost over a dormer alone is usually justified by the additional space and value created.
If you have a hipped roof but budget is the primary constraint, a rear dormer alone can still create a usable room in many cases, particularly if the existing ridge height is reasonable. A structural engineer can assess whether the existing loft space has enough natural height to make a dormer alone work without the hip to gable element.
The most reliable way to understand which approach suits your specific home is to have a structural engineer assess the existing roof space before you commit to any design direction. It costs a few hundred pounds and gives you an accurate picture of what is actually possible before you spend money on drawings or builder quotes.
The straightforward summary
A dormer adds space by projecting outward from the roof slope. A hip to gable conversion adds space by replacing the sloping hip end with a vertical gable wall. Most homes with hipped roofs benefit from both at the same time.
The dormer is the more versatile option and suits a wider range of homes. The hip to gable conversion is only relevant for hipped roof properties but when combined with a dormer creates the largest and most valuable loft conversions available to London homeowners.
At Loft Converter London we assess every project individually to recommend the approach that makes the most sense for the specific home, the budget, and what the homeowner is trying to achieve. There is no one size fits all answer, but there is always a right answer for your property if you take the time to understand it properly.
If you are continuing to build your understanding of what your options are, our loft conversion costs page, loft conversion types guide, and do you need an architect guide are useful next steps.
How Long Does Planning Permission Take for a Loft Conversion?
March 31, 2025
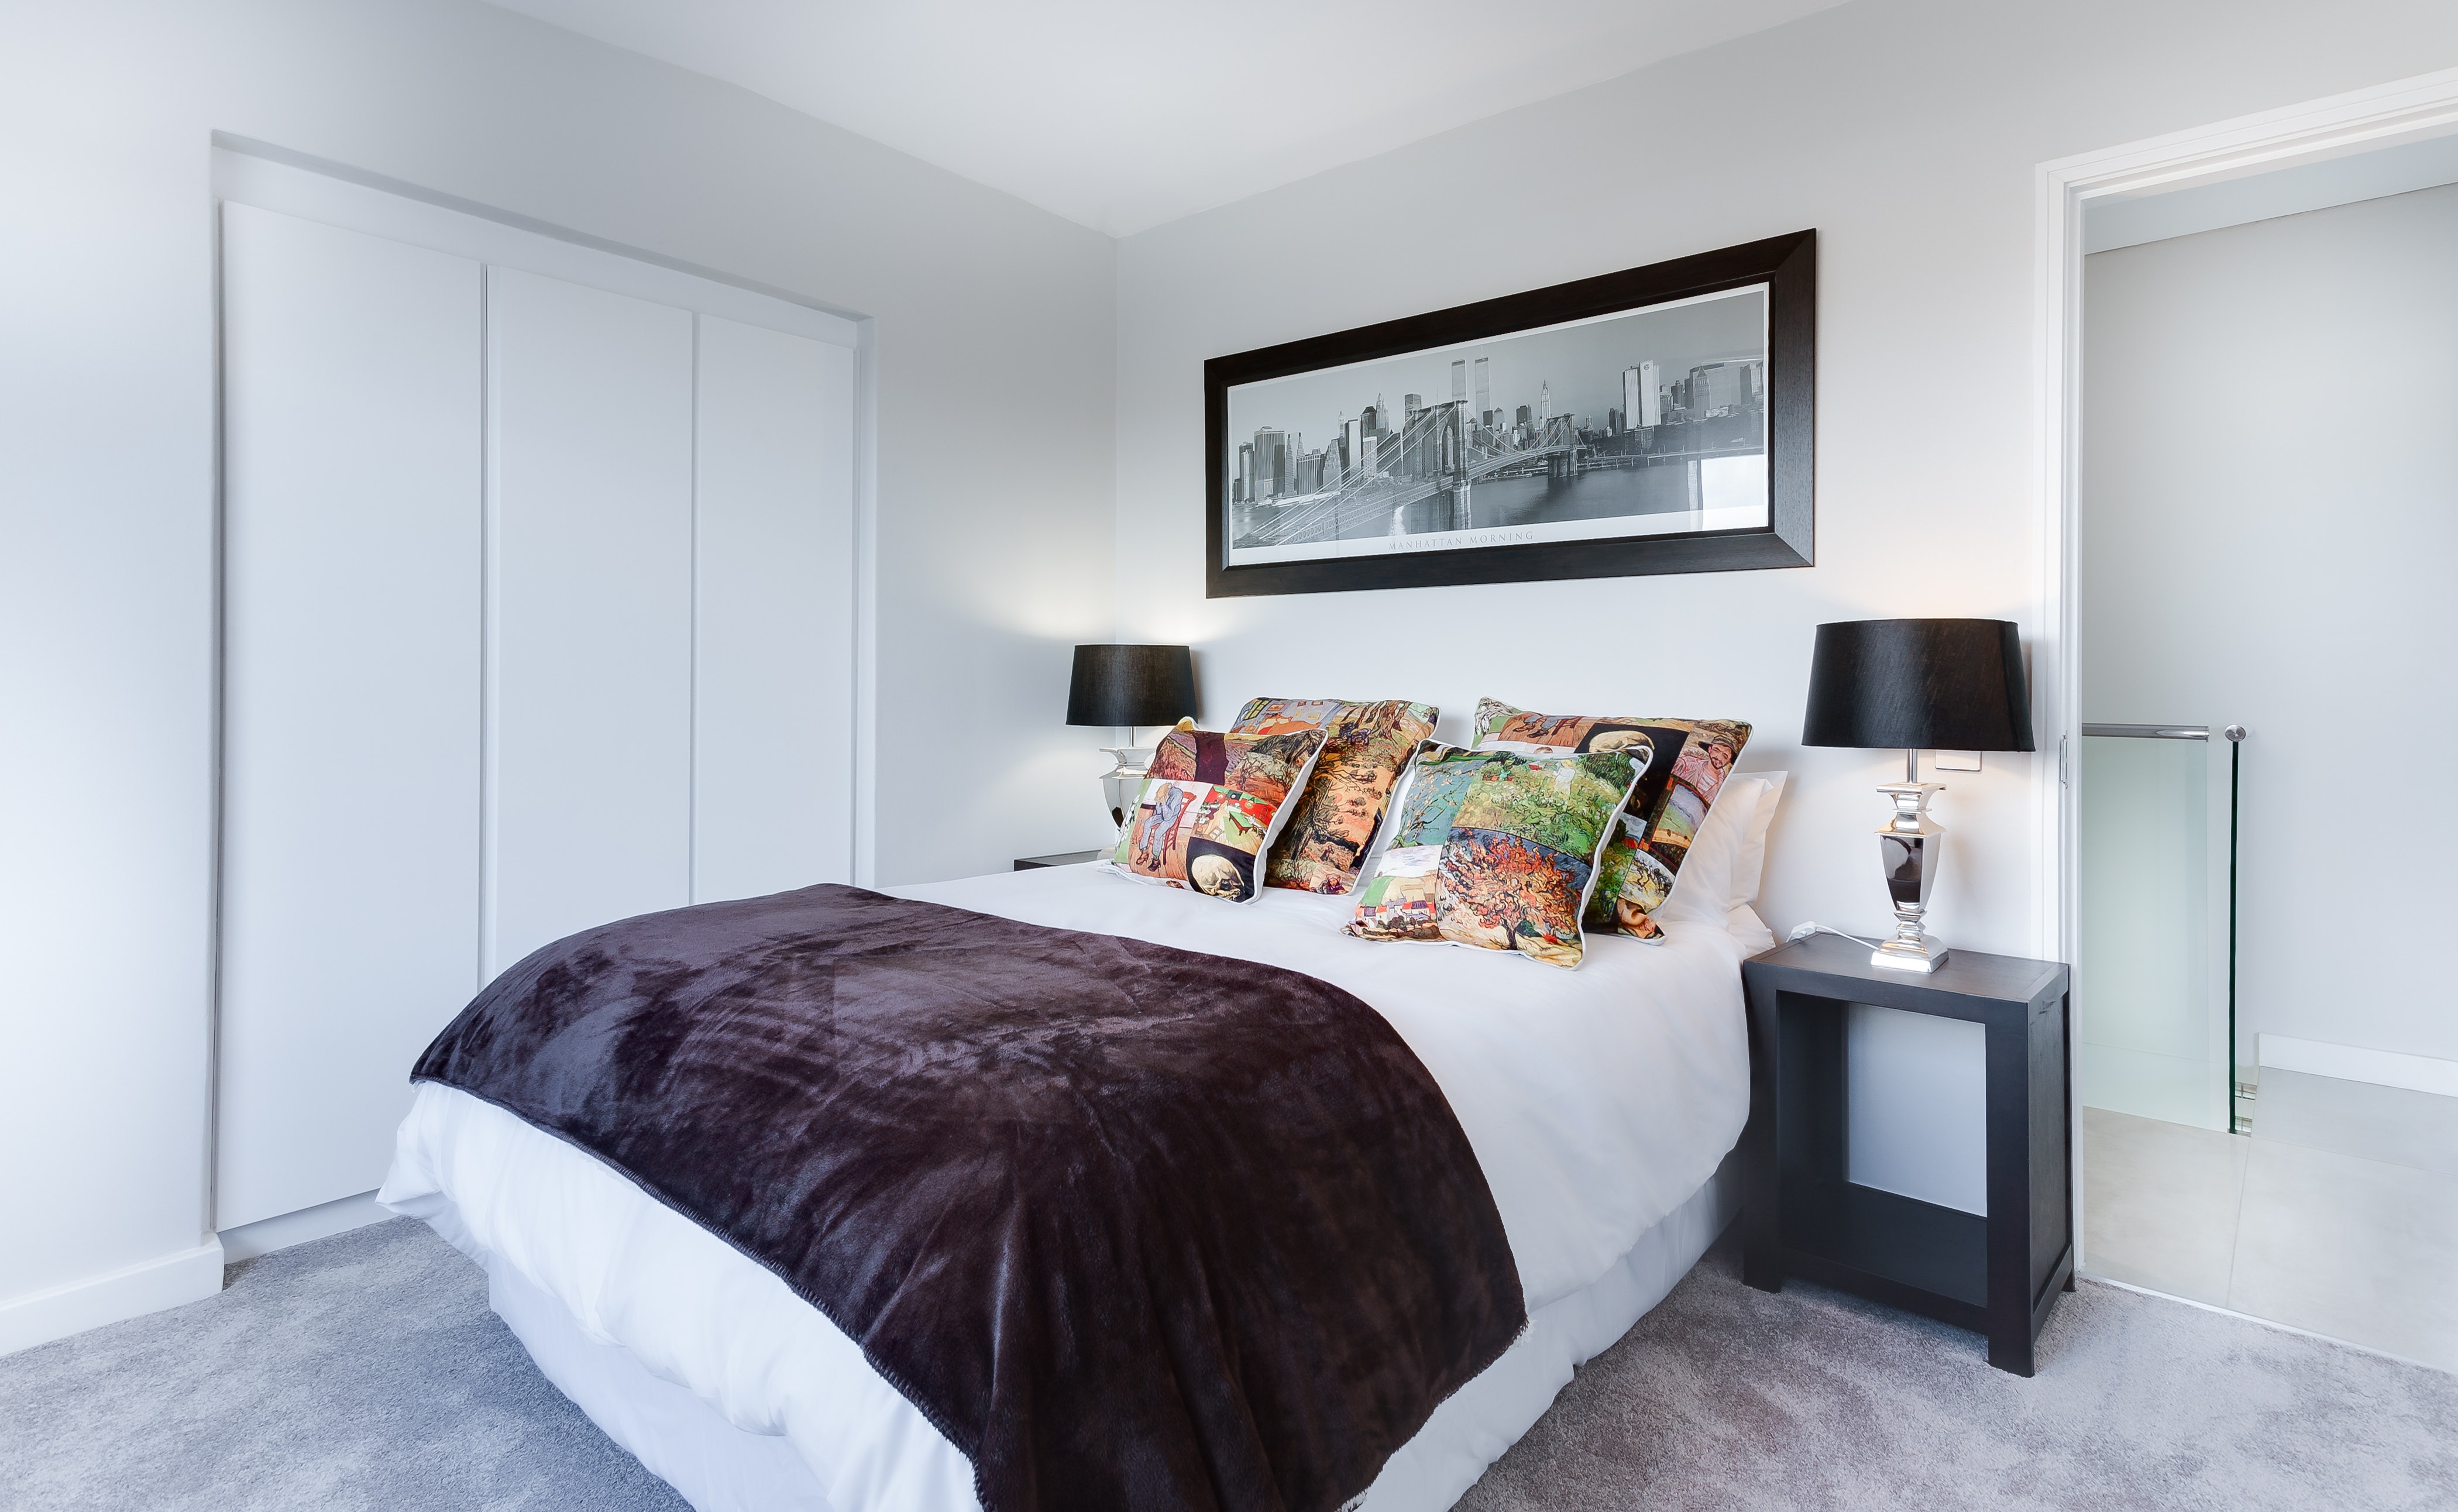
One of the most common planning questions we hear is how long the whole process takes. The honest answer is that it depends on whether you need planning permission at all, and if you do, how straightforward your application is.
This guide walks through the realistic timelines at each stage so you can plan your project properly rather than discovering delays when they are least convenient.
First, check whether you actually need planning permission
Most loft conversions in London do not require a planning application. They fall under permitted development rights, which allow certain types of work to proceed without formal council approval, provided they stay within defined limits.
A standard rear dormer on a terraced or semi detached home, a Velux conversion that does not alter the roofline, and many hip to gable conversions all typically qualify for permitted development. If your project falls within these parameters and your property is not in a conservation area or subject to an Article 4 direction, you may be able to start the planning stage of your project in days rather than months.
Our permitted development rules guide explains the specific conditions in detail and helps you work out whether your project qualifies before you spend time and money on a planning application that may not be necessary.
If you are not certain either way, a quick call to your local planning authority or a pre-application enquiry will give you clarity. Assuming permitted development applies without checking is one of the most common and costly mistakes homeowners make.
If you do need planning permission, the statutory timeline
Once a valid planning application is submitted, the local authority has a statutory target of eight weeks to issue a decision for a standard householder application. This is the legal target, not a guarantee.
In practice, eight weeks is achievable for straightforward applications on unrestricted properties where the proposal is clearly acceptable and the case officer has no significant concerns. But a meaningful proportion of London applications take longer than eight weeks, for reasons ranging from officer workload to requests for additional information to referrals to a committee.
For applications in conservation areas, on or near listed buildings, or involving designs that require more detailed assessment, twelve weeks is a more realistic expectation. Some complex or contested applications take longer still.
The stages before you even submit
The statutory eight-week clock does not start until a valid application is submitted. Everything that happens before submission adds to the overall timeline, and this pre-submission phase is where most of the time is actually spent on a well-prepared application.
Getting drawings produced to the planning standard takes time. An architect or architectural technician needs to prepare existing and proposed floor plans, elevations, and a site location plan. For a conservation area application, additional documents such as a design and access statement or a heritage statement may be required. Allow four to eight weeks for drawing preparation, depending on your designer's availability and the complexity of the project.
If you are considering a pre-application enquiry with the council, which we generally recommend for conservation area projects or anything that is not straightforward, that process adds further time. Most London boroughs take four to six weeks to respond to a pre-application query, and some take longer. The fee varies by borough but typically ranges from £150 to £500 for a householder enquiry.
Our conservation area guide explains why pre-application engagement is particularly valuable for properties in sensitive locations and what you are likely to learn from it.
Validation: the step people forget
When you submit a planning application, the council must first validate it before the eight-week clock starts. Validation means checking that the application is complete, the correct fee has been paid, and all required documents are included.
If anything is missing or incorrect, the council will return the application as invalid and ask you to resubmit. This resets the clock and adds further delay. In some London boroughs, validation backlogs mean it takes two to three weeks just to get an application validated after submission.
A well-prepared application that includes everything required the first time avoids this. Your architect or planning consultant should be familiar with the specific validation requirements of your local borough and prepare the submission accordingly.
What happens during the eight-week assessment period
Once validated, the application is assigned to a case officer who carries out the assessment. During this period, several things happen in parallel.
The application is publicised. A site notice is posted on or near your property, and neighbouring properties are notified by letter. They have a defined period, usually 21 days, to submit representations, either supporting or objecting, to the proposal.
Statutory consultees may be asked for comments. In a conservation area, this typically includes the council's own conservation officer. In some cases, highway officers, tree officers, or other specialists are consulted.
The case officer reviews all of this alongside the policy framework and prepares a recommendation. For straightforward applications, the recommendation is to approve, and the decision is issued under delegated powers without going to committee.
When applications go to the committee
Most householder planning applications are decided by a case officer under delegated powers. But some applications are referred to the planning committee, a panel of elected councillors that meets regularly to make decisions on more complex or contentious cases.
If your application is called to the committee, the timeline extends. Committee meetings are held on a fixed schedule, typically monthly, and an application that misses one cycle waits until the next cycle. A referral to the committee can add four to eight weeks to the overall timeline.
Applications are more likely to go to committee when there have been significant objections from neighbours or local groups, when the proposal is a departure from policy, or when a councillor specifically requests it. In conservation areas where local character is a sensitive issue, committee referral is more common than on unrestricted properties.
If your application is refused
A planning refusal is not necessarily the end of the road. You have two options.
The first is to revise the design to address the reasons for refusal and resubmit. A resubmission within twelve months of the original decision does not attract a further planning fee. The assessment timeline restarts from the submission date, so add another 8 to 12 weeks to your overall programme.
The second is to appeal to the Planning Inspectorate. A householder planning appeal is decided by an independent planning inspector rather than the local authority. The written representations procedure, the most common route for householder appeals, typically takes around 6 months from submission to decision.
Appeals succeed when the original refusal was not well-founded in planning policy. They are not a guaranteed route to approval and the timeline is significant. Investing in a well-prepared application and engaging with the council's concerns before and during the process is almost always preferable to relying on appeal.
Lawful Development Certificates: a parallel process worth knowing
If your project qualifies for permitted development, you do not need planning permission. But you may want to apply for a Lawful Development Certificate, which is a formal confirmation from the council that your proposed works are lawful.
This is not planning permission. It is a separate application that confirms the works comply with permitted development rules. It costs £258 in England, and the council has eight weeks to decide.
The practical value is at the point of sale. When you sell the property, the buyer's solicitor will want evidence that the loft conversion was carried out lawfully. A Lawful Development Certificate provides that evidence clearly and removes any ambiguity. Without it, you are relying on the permitted development rules having been correctly interpreted, which can become a friction point in a sale.
Our permitted development rules guide explains when a Lawful Development Certificate is worth applying for and what the process involves.
Building regulations run in parallel, not after
A common misconception is that building regulations approval happens after planning permission is granted. In reality the two processes run in parallel and are completely independent of each other.
You can submit a building regulations application at the same time as your planning application, or even before it if you are confident the planning route is clear. There is no requirement to wait for planning permission before starting the building regulations process.
Running both processes simultaneously reduces the overall programme size. By the time planning permission is granted, your building regulations drawings may already be approved or close to approval, meaning you can start on site sooner.
Our building regulations guide covers what building regulations approval involves and how it fits into the overall project timeline.
A realistic end-to-end timeline
Putting all of this together, here is what a realistic programme looks like for a loft conversion that requires planning permission in London.
Pre-application enquiry, if required, takes four to six weeks. Drawing preparation takes four to eight weeks, which runs partially in parallel with the pre-application stage. Validation and submission take one to two weeks. The statutory determination period is 8 to 12 weeks. If the application goes to the committee, add four to eight weeks. Building regulations running in parallel take six to ten weeks.
From the point you appoint a designer to the point you have planning permission and building regulations approval in hand, allow five to seven months for a straightforward application and seven to ten months if the project is more complex or involves a conservation area.
The build itself then follows, typically taking 10 to 16 weeks for a standard loft conversion. Our dormer loft conversion guide and hip to gable conversion guide give more details on build timelines for specific conversion types.
The straightforward summary
Most loft conversions in London do not need planning permission at all. If yours does, the statutory decision period is eight weeks but the realistic end to end timeline from appointing a designer to having all approvals in place is considerably longer.
The best way to keep the timeline as short as possible is to appoint an experienced designer early, prepare a complete and well documented application first time, consider pre-application engagement in sensitive locations, and run building regulations in parallel with the planning process rather than sequentially.
At Loft Converter London we manage the planning and approvals process as part of every project, making sure applications are properly prepared, submitted on time, and progressed efficiently. Understanding the timeline upfront is the first step to planning a project that runs smoothly from start to finish.
If you are still building your understanding of what the process involves, our loft conversion costs page, building regulations guide, and party wall agreements guide are useful next steps.
Loft Conversion Structural Calculations Explained
February 14, 2025
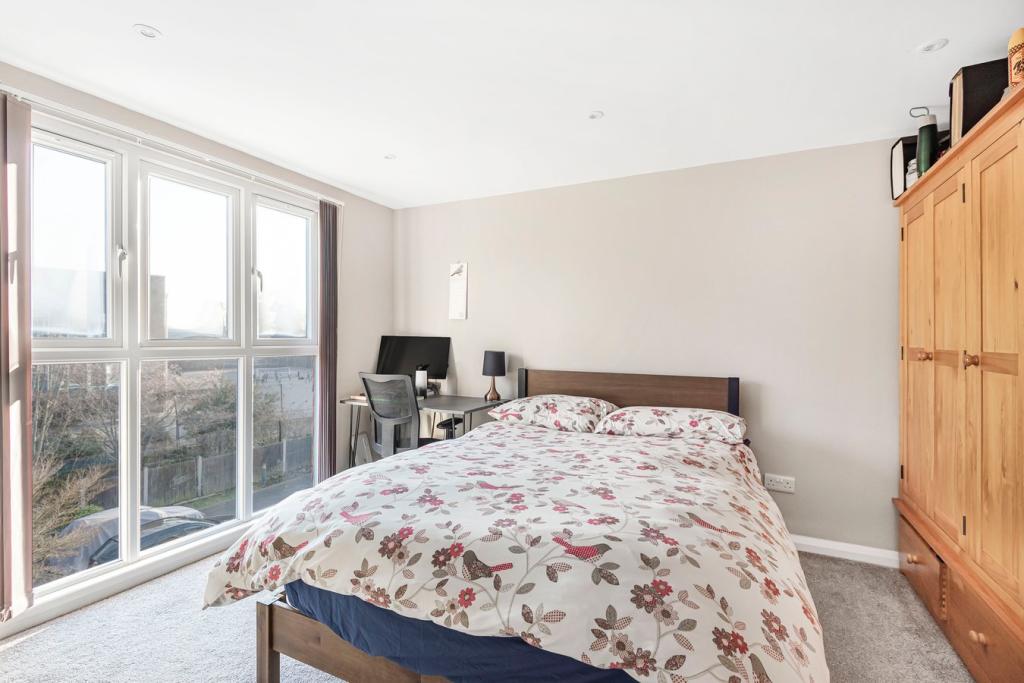
Structural calculations are one of those parts of a loft conversion that most homeowners never see but absolutely depend on. They sit behind every decision about how the building is strengthened, where beams go, and what the floor can safely carry. Get them right, and the conversion is safe, compliant, and signed off without problems. Get them wrong, and the consequences range from a delayed project to a genuinely dangerous structure.
Here is a plain explanation of what structural calculations involve, why they matter, and what to expect from the process.
What structural calculations actually are
Structural calculations are a set of engineering calculations produced by a qualified structural engineer. They demonstrate mathematically that the proposed structure is strong enough to safely carry the loads placed on it and remain within the limits set by building regulations.
For a loft conversion, the calculations cover several specific elements. The existing floor structure and whether it needs strengthening to support a habitable room. The new roof structure and how it will behave once the conversion is built. Any steel beams required to carry loads across openings or transfer weight to the foundations. And the staircase structure and its connections to the floors above and below.
These calculations are not optional. Building control requires them as part of the building regulations approval process. Without approved structural calculations, your loft conversion cannot be signed off.
Why the existing floor almost always needs strengthening
This is the structural reality that surprises most homeowners when they first hear it.
The timber joists in most London loft floors were not designed to carry the weight of a habitable room. They were sized for occasional access only, meaning someone going up to store boxes or check the water tank a few times a year. The loads in a room where people sleep, furnish, and move around every day are significantly higher.
Building regulations define minimum structural performance standards for habitable floors. In most older London homes, the existing loft joists do not meet those standards without intervention.
The most common solution is to install new, deeper joists alongside the existing ones, a process called doubling up or sistering joisting. This increases the floor's load-carrying capacity without removing the existing structure. In some cases, where spans are longer or loads are higher, a steel beam is needed to reduce the effective span of the joists and bring the floor within acceptable limits.
A structural engineer will calculate exactly what is needed for your specific floor based on the span, the existing joist size and spacing, and the loads the floor needs to carry. There is no standard answer that applies to every home. Each calculation is specific to the building.
Steel beams in loft conversions
Steel beams, typically called RSJs or universal beams, are used in many loft conversions for several reasons.
When a dormer is added, the existing roof structure is cut into and modified. The loads that were previously carried by the roof slope need to be redirected, often through a steel beam that transfers them to the load-bearing walls below. Without this, the structural integrity of the roof is compromised.
In hip-to-gable conversions, removing the hip rafter and constructing a new gable wall involves significant structural reorganisation. Steel beams are almost always required to carry the ridge and transfer loads appropriately. Our hip to gable loft conversion guide explains how this type of conversion works and why the structural element is more involved than a standard dormer.
Steel beams are also used to create the opening for the staircase in the floor below, where the cut in the existing floor structure needs to be properly supported on either side of the opening.
The structural engineer specifies the size, grade, and bearing length of each beam based on the calculated loads. Getting this specification right matters. An undersized beam will deflect excessively and potentially fail. An oversized beam costs more than necessary. The calculation produces the right answer for the specific situation.
What a structural engineer does on a loft conversion
The structural engineer's role starts with an assessment of the existing building. They will visit the property, inspect the loft space, measure the existing joists and roof timbers, and assess the load-bearing walls and foundations.
They will then review the proposed conversion design, typically based on the architectural drawings prepared by your architect or architectural technician. Where the design has structural implications, they will work with the designer to resolve them before finalising the calculations.
The output is a set of structural drawings and calculations that form part of the building regulations submission. These show where new joists go, where beams are positioned, their sizes, how they are supported, and how the new structure connects to the existing building.
During the build, the structural engineer may visit the site to ensure the work is carried out in accordance with their specification. Building control will also inspect structural elements at key stages. Our building regulations guide explains the inspection process in detail and what the building control inspector looks for at each stage.
What happens when unexpected structural issues are found
This is worth understanding before you start, because it happens on a meaningful proportion of London loft conversions.
Older homes sometimes have structural issues that are not visible until the roof is opened. Existing timbers that are undersized, damaged by rot or insect attack, or poorly connected. Previous modifications to the roof structure were not carried out properly. Foundation conditions are weaker than expected.
When these issues are found during the build, the structural engineer needs to revise their calculations and specify additional remedial work. This takes time and costs money. It is one of the main reasons why having a contingency budget is important on any loft conversion project.
Our loft conversion budgeting guide covers contingency allowances and the other hidden costs that sit alongside the standard build quote.
The best way to minimise structural surprises is to have the structural engineer visit the property and carry out a thorough assessment before you finalise drawings or sign a building contract. This costs a few hundred pounds but gives you the most accurate picture possible of what the build involves before you commit.
Party walls and structural calculations
Where the loft conversion involves work on or near a party wall, the structural calculations are relevant to both the party wall process and building regulations.
Your neighbour's party wall surveyor will want to understand what structural work is proposed, how loads are being transferred, and what impact the works may have on the shared wall. The structural engineer's drawings and calculations provide the technical basis for answering those questions.
A clear, well-prepared structural package makes the party wall process smoother. Gaps or ambiguities in the structural information are one of the most common reasons party wall negotiations take longer than necessary. Our party wall agreements guide explains the full party wall process and what to expect at each stage.
How much do structural calculations cost?
For a standard loft conversion in London, structural engineer fees typically range from £500 to £1,500, depending on the project's complexity and the level of involvement required.
A straightforward rear dormer on a standard terrace sits toward the lower end. A hip-to-gable conversion with multiple steel beams and a more complex structural package sits toward the higher end. If the engineer visits the site during the build to inspect structural elements, there will be additional fees for those visits.
Some structural engineers charge a fixed fee for a defined scope of work. Others charge on an hourly or daily rate basis. Get clarity on the fee structure and what is included before you appoint anyone.
These fees are in addition to the build cost and other professional fees. Building control fees, architectural drawing fees, and party wall surveyor fees are all separate costs. Our loft conversion budgeting guide covers all of these in one place, so you can build a realistic total budget before you start.
Choosing a structural engineer
Not all structural engineers have the same experience with residential loft conversions. Some specialise in commercial or large-scale projects and treat domestic work as a secondary activity. For a loft conversion, you want someone who works regularly on residential projects in London and understands the specific structural characteristics of the housing types common in your area.
Ask how many loft conversions they have worked on in the past year. Ask whether they are familiar with your specific conversion type. Ask whether they will visit the site before producing calculations, rather than working solely from drawings. A site visit before calculations are produced is always preferable to an engineer working blind from plans.
Check that they hold professional indemnity insurance. This protects you if their calculations are incorrect and remedial work is required as a result.
The relationship between structural engineer and architect
On a well run loft conversion project, the structural engineer and the designer work together rather than in isolation. The designer produces the spatial layout and the structural engineer makes it work structurally. When structural constraints require changes to the design, the two work together to find solutions that satisfy both the structural requirements and the spatial intent.
This collaboration matters most on complex projects where the structural solution significantly affects how the space looks and functions. A staircase position that works structurally but destroys the usable floor area of the room below needs to be worked through jointly, not resolved by the engineer alone.
Our do you need an architect guide explains how the different professionals on a loft conversion project relate to each other and what each one is responsible for.
The straightforward summary
Structural calculations are not a bureaucratic formality. They are the engineering evidence that your loft conversion is safe to live in, properly built, and compliant with building regulations. Every element of the structural design, from the floor joists to the steel beams to the staircase opening, is based on these calculations.
Appoint a structural engineer early, before drawings are finalised and before you approach builders for quotes. Get them to visit the site in person. And make sure their drawings and calculations are clear and complete before the building regulations submission is made.
At Loft Converter London, every project involves a fully qualified structural engineer from the earliest stage. We believe getting the structural design right before work starts is fundamental to a conversion that is safe, compliant, and built without expensive surprises. If you want to understand more about what your specific project involves structurally, we are happy to talk it through.
If you are continuing to build your understanding of the loft conversion process, our building regulations guide, loft conversion costs page, and loft conversion types guide are useful next steps.
Do You Need an Architect for a Loft Conversion?
January 23, 2025
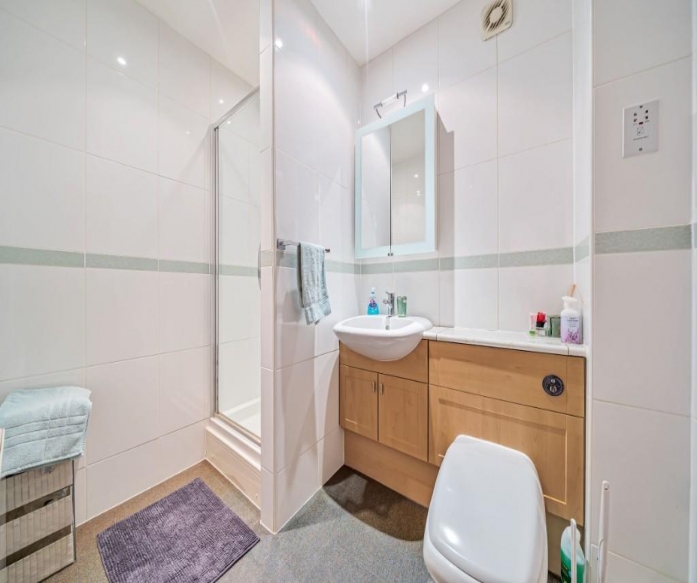
It is one of the first questions people ask when they start planning a loft conversion. The honest answer is that it depends on your project. But understanding what an architect actually does, and where other professionals can step in, helps you make a smarter decision about who to involve and when.
The short answer
There is no legal requirement to use an architect for a loft conversion. Unlike some types of construction work, nothing in planning law or building regulations specifically mandates that an architect prepare your drawings or oversee your project.
But that does not mean professional design input is optional. You will almost certainly need someone to produce building regulations drawings, and, depending on your project, you may need planning drawings too. Whether that person is a registered architect, an architectural technician, or a design-and-build contractor matters less than the quality of what they produce.
What an architect brings to a loft conversion
A good architect does more than draw plans. They think about how the space will actually work for you. How natural light moves through the room across the day. How does the staircase connect to the floor below without ruining an existing room? How the room feels proportioned and liveable rather than just technically compliant.
On a straightforward rear dormer on a standard London terrace, this level of design input may not be critical. The brief is simple, the constraints are well understood, and an experienced architectural technician or a design-and-build specialist can handle it competently.
On a more complex project, a conservation area application, a listed building, an unusual roof structure, or a conversion that involves significant changes to the floor below, an architect's design thinking can make a meaningful difference to the outcome.
What an architectural technician does
An architectural technician specialises in the technical side of building design. They are skilled at producing the detailed drawings and specifications required by building regulations and planning applications, and many have extensive experience specifically with loft conversions.
For a standard loft conversion that does not require planning permission, an architectural technician is often the most cost-effective way to produce compliant, accurate drawings efficiently. They understand building regulations in detail and know what building control inspectors look for.
The distinction between an architect and an architectural technician matters less than their experience with loft conversions in London specifically. Someone who has done fifty loft conversions in your borough will navigate the process more smoothly than a generalist architect who rarely works on residential extensions.
Design and build contractors
Many loft conversion specialists in London offer a design-and-build service. This means they handle everything from initial drawings through to completion, using in-house or closely associated designers rather than a separately appointed architect.
This approach can work well for straightforward projects. It simplifies the process, reduces the number of separate appointments you need to manage, and can be cost-effective.
The potential downside is that the designer is employed by the contractor, which creates an incentive to design what is easy to build rather than what is best for you. On a simple rear dormer, this tension rarely causes problems. On a more complex project where design decisions have significant implications for how you live in the space, having an independent designer who works solely in your interest is worth considering.
When an architect is genuinely worth it
There are specific situations where appointing a registered architect adds clear value.
Conservation area applications benefit from an architect who understands the local character appraisal and has a track record of gaining consent in sensitive areas. The design language they bring, and the relationship they may have with local conservation officers, can meaningfully improve your chances of approval. Our conservation area guide explains why the design approach matters so much in these applications.
Complex roof structures, where a standard design approach will not work, and creative problem-solving is needed to make the space function properly, are another area where architectural input pays for itself.
If you are planning a conversion that involves significant reconfiguration of the floor below, perhaps combining the loft conversion with changes to the first floor layout to improve the overall flow of the house, an architect who can think across the whole building rather than just the loft is the right choice.
And if you are planning to sell within a few years and want the conversion to have maximum appeal to buyers, good design that makes the space genuinely liveable rather than just technically adequate is a worthwhile investment.
What does an architect cost for a loft conversion?
Architect fees for a loft conversion in London typically range from 5% to 15% of the build cost, depending on the scope of their involvement.
At the lower end, that might mean drawings only for planning and building regulations, with no involvement during the build itself. At the higher end, it covers full design development, planning application management, building regulations drawings, and contract administration during the build.
For a £50,000 loft conversion, full architectural services might cost between £2,500 and £7,500. Drawings-only services typically sit between £1,500 and £3,000.
An architectural technician will generally charge less than a registered architect for equivalent drawing work, typically between £1,000 and £2,500 for a standard loft conversion package.
These costs sit on top of the build cost and the other professional fees involved in a loft conversion project. Our loft conversion budgeting guide covers the full picture of what to budget for beyond the headline build quote.
What drawings do you actually need?
Even if you decide not to appoint a separate architect, you will need certain drawings produced by someone.
For building regulations, you need detailed technical drawings showing the structural design, insulation specification, staircase dimensions, fire safety measures, and ventilation strategy. These need to be accurate and complete. Building control will reject or query drawings that do not meet the required standard, which causes delays.
If planning permission is required, you need planning drawings showing the existing and proposed elevations, floor plans, and a site plan. These do not need to be as technically detailed as building regulations drawings, but they need to accurately represent the proposed works.
Your structural engineer will also produce their own calculations and drawings for the structural elements. These feed into the building regulations package but are separate from the architectural drawings. Our building regulations guide explains how these different sets of drawings fit together in the approval process.
Questions to ask before appointing anyone
Whether you are considering a full architect, an architectural technician, or a design-and-build contractor, the same questions apply.
How many loft conversions have they completed in London, and specifically in your borough or area type? Ask to see examples of completed projects and, if possible, speak to previous clients.
Do they have experience with your specific conversion type? A hip to gable on a semi detached home in a conservation area requires different expertise than a rear dormer on a standard terrace. Our loft conversion types guide explains the different conversion types and their respective complexities.
Are their fees fixed or based on a percentage of build cost? Fixed fees are easier to budget for. Percentage fees can creep upward if the build cost increases.
What is included in their fee? Specifically, does it cover building regulations drawings, planning drawings if required, and any involvement during the build? Get the scope in writing before you appoint anyone.
The practical recommendation
For a straightforward rear dormer or Velux conversion on an unrestricted London property, an experienced architectural technician or a reputable design-and-build specialist with a strong track record will serve you well. There is no need to pay full architectural fees for a simple project.
For anything involving planning permission in a conservation area, a listed building, a complex roof structure, or a conversion that involves significant changes beyond the loft itself, appointing a registered architect with relevant local experience is the smarter choice. The fee is a small proportion of the total project cost and the difference in outcome can be significant.
The most important thing in either case is to appoint someone early, before you approach builders for quotes. Having accurate drawings in place before you go to tender means builders are quoting against the same information, which makes comparing quotes meaningful and reduces the risk of surprises once work starts.
The straightforward summary
You do not legally need an architect for a loft conversion. But you do need someone competent to produce accurate drawings and think carefully about how the space will work. For simple projects, an architectural technician or design and build specialist is often sufficient. For complex or sensitive projects, a registered architect with local experience adds genuine value.
At Loft Converter London, we work with experienced designers and structural engineers to ensure every project is properly designed and documented from the start, whether it is a straightforward rear dormer or a more complex conversion in a sensitive location. Getting the design right before work starts is the single most reliable way to avoid problems, delays, and unexpected costs during the build.
If you are ready to start planning, our loft conversion costs page, permitted development rules guide, and building regulations guide are useful next steps before you speak to anyone.
What are the Loft Conversion Rules in Conservation Areas in London
December 19, 2024
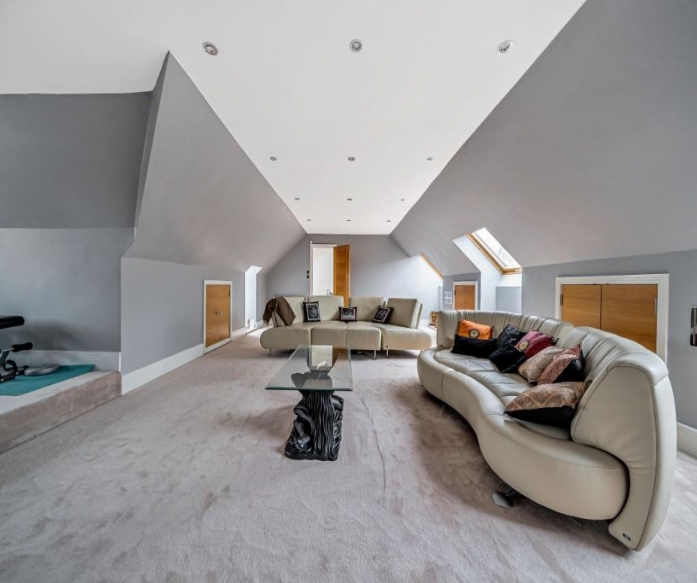
If your home sits within a conservation area, the rules around loft conversions are stricter than they are for most London properties. The permitted development freedoms that apply to standard homes are significantly reduced, and in some cases removed entirely.
This does not mean a loft conversion is impossible. It means you need to understand the rules specific to your area before you commit to any design or spend money on drawings and surveys.
What is a conservation area?
A conservation area is a designated zone where the local planning authority has decided that the character and appearance of the area is worth preserving or enhancing. The designation gives the council additional powers to control changes to buildings and the wider environment within the boundary.
London has more conservation areas than any other part of the country. There are over 1,000 across the capital's 33 boroughs, covering everything from grand Victorian terraces in Kensington to modest Edwardian streets in outer south London. Many homeowners do not realise their property is within one until they start looking into planning rules.
You can check whether your property falls within a conservation area using your local council's planning portal or the Magic Map tool provided by the government, which overlays planning designations across England.
How conservation area status affects permitted development
Under standard national permitted development rules, most rear dormers and Velux conversions can proceed without a planning application. Conservation area designation changes this significantly.
Within a conservation area, any enlargement of a roof that would be visible from a highway requires full planning permission. In practical terms, this means side dormers and often rear dormers that can be seen from a road or public footpath fall outside permitted development.
Velux style roof lights set into the existing slope are sometimes still permitted development within conservation areas, provided they do not project significantly beyond the plane of the roof and are not on a front elevation. But this depends on the specific borough and the local conservation area appraisal, which can impose additional restrictions beyond the national rules.
The key point is that conservation area rules are not uniform across London. Each conservation area has its own character appraisal and management plan, and different boroughs interpret and apply the rules differently. What is acceptable in one area may not be in another even within the same borough.
Our permitted development rules guide explains how the national framework works for standard properties, which provides useful context before looking at the additional conservation area layer.
What planning permission involves in a conservation area
If your proposed conversion requires planning permission, the application is assessed against a broader set of criteria than a standard householder application.
The council will consider whether the design preserves or enhances the character and appearance of the conservation area. This is the central test. It is not enough for the conversion to be structurally sound and code compliant. It also needs to be sympathetic to the architectural character of the area.
In practice this means the materials, proportions, and detailing of the conversion will be closely scrutinised. A zinc clad dormer might be acceptable in some conservation areas and completely refused in others. Traditional materials that match or complement the existing roof covering are generally more likely to gain consent.
The Planning Portal provides guidance on making householder applications and what conservation area considerations typically involve. It is a useful first reference before you engage a planning consultant or architect.
The role of a conservation officer
Every London borough has a conservation officer whose job is to advise on applications affecting conservation areas and listed buildings. Engaging with them before you submit an application can be genuinely useful.
A pre-application enquiry, which is a paid service offered by most councils, gives you the opportunity to present your proposals informally and get officer feedback before you commit to a full application. This can save significant cost if the officer identifies early that a particular design approach is unlikely to gain consent.
Some conservation officers are pragmatic and will work with you to find a design that is acceptable. Others interpret the rules strictly. Knowing where your local officer stands before you invest in detailed drawings is time and money well spent.
Pre-application fees vary by borough but typically run between £150 and £500 for a householder query. Check your local council's planning portal for the specific fee structure in your area.
What designs tend to get approved in conservation areas
While every application is assessed on its own merits, there are design approaches that consistently perform better in conservation area applications than others.
Rear dormers finished in materials that match the existing roof, with proportions that sit quietly within the roofscape rather than dominating it, tend to fare better than bold contemporary additions. Lead or zinc cladding is accepted in some conservation areas but not others. Slate or tile that matches the existing covering is generally the safest material choice.
Keeping the dormer set back from the eaves and the ridge line, rather than running it full width to the very edges of the roof, helps it read as a subordinate addition rather than a dominant new element. Many conservation officers specifically look for this kind of restraint in a design.
Roof lights on rear slopes, where they are not visible from the street, are often the most straightforward option in sensitive conservation areas. A well designed Velux conversion can still create a genuinely useful room in many London lofts, particularly where the existing ridge height is reasonable.
Our Velux vs dormer guide compares both options in terms of cost, space, and value, which is helpful context when you are weighing up which design direction to pursue in a conservation area.
Article 4 directions and their impact
Some London conservation areas go further than standard conservation area restrictions through the use of Article 4 directions. These are local planning directions that specifically remove permitted development rights that would otherwise apply.
In areas covered by an Article 4 direction, works that would normally be permitted development require a planning application. This can include things like changing window materials, altering front boundaries, and in some cases certain types of roof alteration.
Article 4 directions are used extensively in inner London boroughs. Islington, Camden, Hackney, and Southwark all have Article 4 directions covering significant parts of their area. Some of these directions are borough-wide. Others apply to specific streets or estates.
Checking whether an Article 4 direction applies to your property is straightforward on your local council's planning portal and takes only a few minutes. Skipping this check and assuming permitted development applies is one of the most common and costly mistakes homeowners make when planning a loft conversion in London.
Listed buildings within conservation areas
Some properties within conservation areas are also listed buildings. These are subject to an entirely separate and more demanding regime.
If your home is listed, permitted development rights do not apply at all. Any works, including internal alterations, require listed building consent in addition to any planning permission that may be needed. The threshold for what constitutes a notifiable alteration is lower for listed buildings than for unlisted properties.
Listed building consent applications are assessed against the impact on the special architectural or historic interest of the building. Loft conversions on listed buildings are possible but they require careful design, specialist advice, and in many cases a heritage statement that demonstrates understanding of the building's significance.
Unauthorised works to a listed building are a criminal offence. The penalties include unlimited fines and in serious cases prosecution. If you are in any doubt about whether your property is listed, check the Historic England National Heritage List for England before proceeding with any plans.
Structural and building regulations requirements
Getting planning permission in a conservation area does not change what building regulations require. All the same structural, fire safety, insulation, staircase, and electrical standards apply regardless of whether the property is in a conservation area or not.
Our building regulations guide covers these requirements in full. The party wall process also applies in exactly the same way as it would for any other loft conversion in London. Our party wall agreements guide explains what to expect and how to manage the process.
Timelines and costs
A planning application in a conservation area follows the same eight week statutory determination period as a standard householder application. In practice it can take longer, particularly if the officer requests additional information or the application goes to committee rather than being decided under delegated powers.
Budget for the application fees and associated professional costs. A householder application currently costs £258 in England. Architect drawings prepared to planning standard, a planning consultant if required, and any heritage or design and access statements add to this. Total professional costs for a conservation area application typically run between £1,500 and £3,500 depending on the complexity of the proposals and the borough involved.
If the application is refused, you have the right to appeal to the Planning Inspectorate. Appeals take around six months and add further cost. Getting the design right before submission, ideally with pre-application officer engagement, is the most reliable way to avoid this outcome.
For a full picture of the costs involved in a London loft conversion beyond planning, our loft conversion budgeting guide covers everything from structural engineer fees to building control and party wall costs.
The straightforward summary
Living in a conservation area does not prevent you from converting your loft. But it does mean the process requires more care, more professional input, and more time than a standard conversion on an unrestricted property.
Check your conservation area status and any Article 4 directions before you do anything else. Engage a conservation officer early if a planning application is likely. Choose a design that respects the character of the area rather than fighting against it. And if your property is listed, get specialist advice before you proceed with any plans at all.
The homeowners who navigate conservation area rules successfully are the ones who take the time to understand them upfront rather than discovering the constraints halfway through the process.
If you are building your understanding of what a loft conversion involves more broadly, our loft conversion types guide, loft conversion costs page, and permitted development rules guide are useful places to continue.
Party Wall Agreements for Loft Conversions: What You Need to Know
November 20, 2024
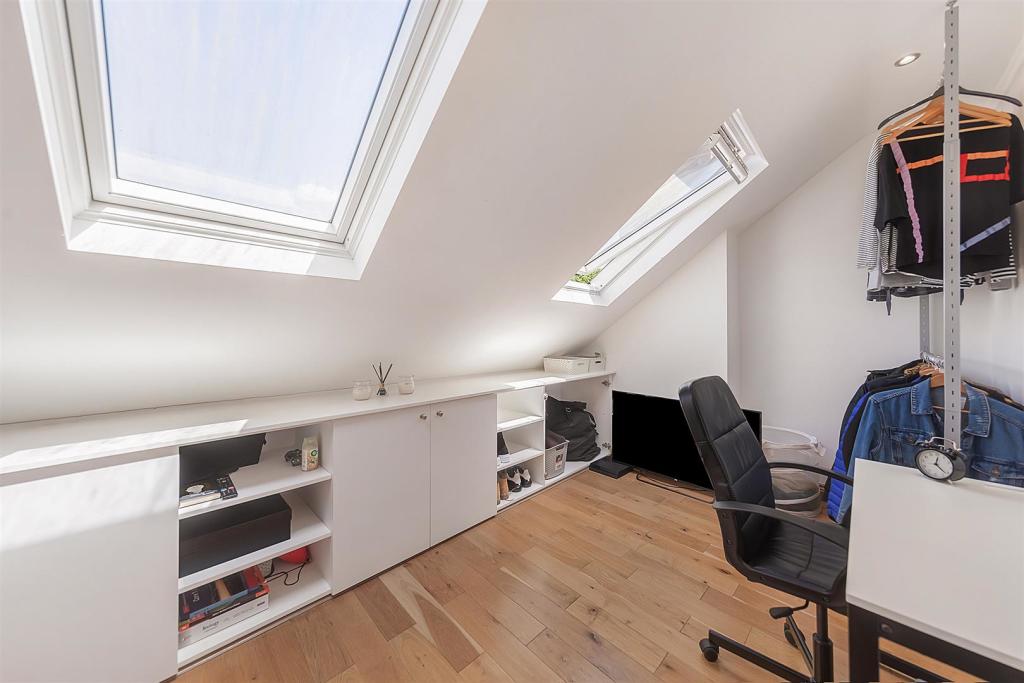
Party wall agreements are among the most overlooked aspects of planning a loft conversion. Most homeowners only find out they need one when their builder mentions it weeks before work is due to start. At that point, it can delay the project, add unexpected cost, and create friction with neighbours at exactly the wrong moment.
Understanding how party wall rules work before you get to that stage makes the whole process considerably smoother.
What is a party wall?
A party wall is a wall that sits on the boundary between two properties and is shared by both owners. In London, terraced and semi-detached homes, the wall between you and your neighbour is almost always a party wall.
The Party Wall etc. Act 1996 sets out the legal framework for how work that affects a party wall must be handled. It exists to protect both you and your neighbour, and it applies regardless of how good your relationship with them is.
Does a loft conversion trigger the Party Wall Act?
Not every loft conversion does, but many do. It depends on the specific work involved.
If your loft conversion involves cutting into the party wall, for example, to insert a steel beam that bears on it, you are almost certainly within the scope of the Act. If you are building a rear dormer that sits close to or on the party wall, that is likely to trigger it too.
A Velux conversion that involves no structural work near the party wall may not require a notice. But if there is any doubt, the safest approach is to have a party wall surveyor review the drawings and confirm either way before work starts.
Getting this wrong is not just a legal issue. Carrying out notifiable works without serving the correct notice leaves you liable for any damage your neighbour can demonstrate was caused by your works, with no formal framework to assess or dispute those claims.
What is a party wall notice?
Before any notifiable work begins, you must serve a formal written notice on your neighbour. This is called a party wall notice.
The notice sets out what work you intend to carry out, when you plan to start, and gives your neighbour the opportunity to consent or dissent. The required notice period is typically two months before work starts for party wall works, and one month for excavation works near a neighbouring building.
You can serve the notice yourself. There is no legal requirement to use a surveyor at this stage. A written letter that clearly describes the proposed works and the intended start date is sufficient, provided it meets the requirements of the Act.
Templates are available online and your architect or builder may be able to help you draft one. The key is to serve it early enough that the response period does not delay your start date.
What happens after you serve the notice?
Your neighbour has fourteen days to respond. There are three possible outcomes.
They consent in writing. If they do, no surveyor is needed and you can proceed once the notice period has elapsed. Keep their written consent safely with your project documents.
They do not respond within fourteen days. If there is no response, they are deemed to have dissented and the dispute resolution process begins automatically. This sounds alarming but it is a routine part of the process and does not indicate hostility.
They actively dissent. They respond to say they do not consent to the works. Again, this triggers the dispute resolution process.
In either dissent scenario, a party wall award must be agreed before work can start. This is where surveyors become involved.
What is a party wall award?
A party wall award is a legally binding document that sets out the rights and obligations of both parties in relation to the proposed works. It typically includes a schedule of condition of the neighbouring property before work starts, the agreed working hours and methods, how any damage will be assessed and resolved, and any specific protections required for the neighbouring structure.
The award is drawn up by surveyors acting for each party. Once agreed and signed, it allows the works to proceed within the defined framework.
Who pays for the surveyors?
This is the part that surprises most people.
You pay for both surveyors. As the building owner carrying out the works, you are responsible for the reasonable fees of both your own surveyor and your neighbour's surveyor if they appoint one.
Your own surveyor's fees typically run between £700 and £1,200 for a straightforward loft conversion. Your neighbour's surveyor will charge similarly. On a mid terrace in London with neighbours on both sides, both of whom dissent and appoint surveyors, you could be looking at £2,000 to £3,000 in surveyor fees alone before a single brick is moved.
This is a genuine and often unbudgeted cost. Our loft conversion budgeting guide covers this alongside the other hidden costs that sit outside the standard build quote.
Can you use one agreed surveyor?
Yes. If both parties agree, a single agreed surveyor can act for both the building owner and the adjoining owner. This is called an agreed surveyor appointment and it is often faster and cheaper than each party appointing their own.
It works best when the relationship with your neighbour is straightforward and neither party has complex concerns about the works. The agreed surveyor must act impartially for both sides.
If your neighbour has specific concerns or wants independent representation, separate surveyors are the more appropriate route.
What is a schedule of condition?
A schedule of condition is a detailed photographic and written record of the state of your neighbour's property before work starts. It documents existing cracks, defects, and the general condition of the walls, ceilings, and floors closest to the works.
This protects both parties. If your neighbour claims after the works that a crack appeared as a result of your conversion, the schedule of condition provides an objective baseline to assess whether that crack existed beforehand.
Without a schedule of condition, disputes about damage become much harder to resolve objectively. A good party wall surveyor will always include one as part of the award process.
How long does the party wall process take?
From serving the notice to having a signed award in place, the process typically takes six to ten weeks if everything runs smoothly. If there are complications, disputes about the scope of works, or delays in your neighbour appointing a surveyor, it can take longer.
This timeline has a direct impact on your project programme. If you serve notice two weeks before you want to start on site, you will almost certainly be delayed. The notice needs to go out early, ideally at the same time you are finalising drawings and getting quotes from builders.
Build the party wall timeline into your project plan from the beginning, not as an afterthought once everything else is in place.
What if your neighbour is difficult?
The Party Wall Act is designed to handle disagreement. A neighbour who dissents is not blocking your project. They are triggering a formal process that protects both sides, and provided the works are reasonable and carried out properly, the award will almost always allow them to proceed.
What a neighbour cannot do is simply refuse to engage. If they fail to appoint a surveyor within the required timeframe, you can appoint one on their behalf. The process continues with or without their active cooperation.
What they can do is raise legitimate concerns about the method or timing of works, and those concerns will be considered as part of the award process. A good surveyor on your side will help you understand which concerns are reasonable and how to address them.
If your neighbour raises issues about the structural impact on their property, your structural engineer's drawings and calculations will be central to resolving those concerns. Our loft conversion building regulations guide explains the structural assessment process in more detail.
What if your neighbour is a leaseholder or a freeholder?
This adds a layer of complexity that is worth being aware of.
If your neighbour owns the freehold, the process is straightforward. If they are a leaseholder, you may need to serve notice on both the leaseholder and the freeholder, depending on the terms of the lease and the nature of the works.
Similarly, if you are a leaseholder yourself, you need to check your lease before carrying out any loft conversion. Most leases require the freeholder's consent for structural works, and some expressly prohibit loft conversions altogether. This is a separate requirement from the Party Wall Act and needs to be resolved before anything else.
Documenting everything properly
Keep copies of every notice served, every response received, and every piece of correspondence with your neighbour and their surveyor throughout the process. The party wall award itself should be filed safely with your other property documents.
When you come to sell, your solicitor will ask about party wall notices and awards as part of the conveyancing process. Having clean, complete documentation makes this straightforward. Gaps in the paperwork create questions that slow down a sale.
The straightforward summary
Party wall agreements are a legal requirement for most loft conversions in London terraced and semi detached homes. They are not optional, they are not just a formality, and they are not free.
Serve notice early, budget for surveyor fees on both sides, and treat the process as a normal part of the project rather than an obstacle. In most cases neighbours are cooperative, the award is agreed without drama, and the works proceed without issue.
The problems arise when people leave it too late, try to avoid the process, or treat their neighbour as an adversary rather than someone with legitimate rights under the law.
Get it right from the start and it is a manageable part of any loft conversion project.
If you are building up your understanding of the full process, our permitted development rules guide, building regulations guide, and loft conversion costs page cover the other key areas you need to know before speaking to contractors.
What are the Loft Conversion Building Regulations Explained for Homeowners
October 1, 2024
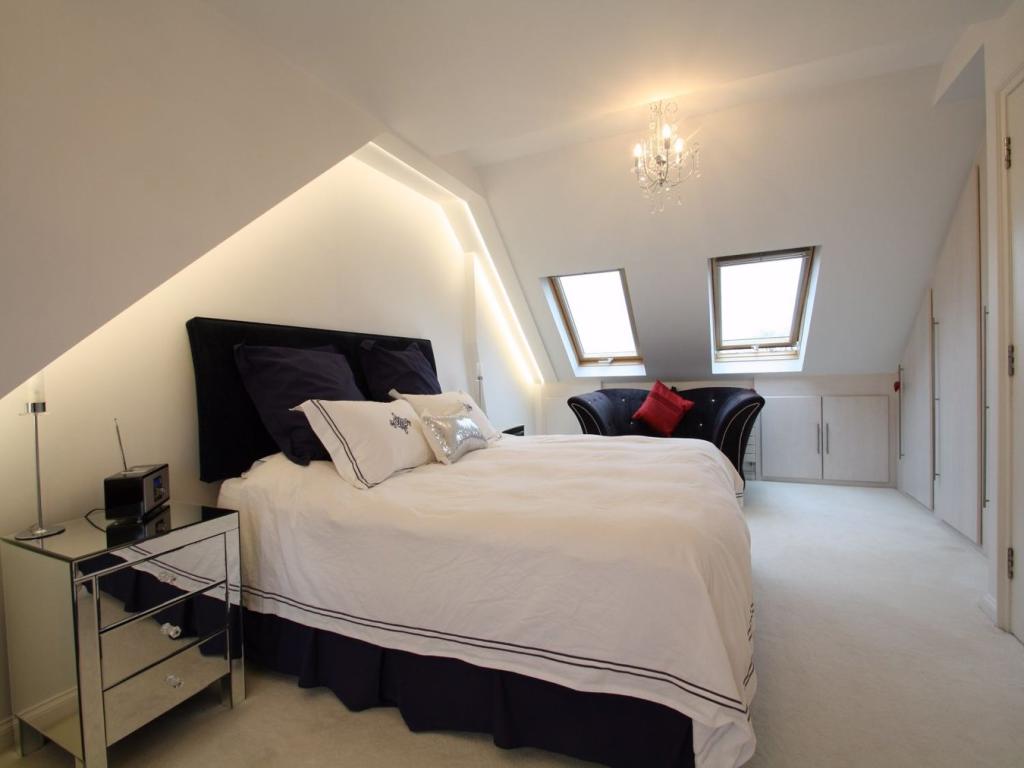
Planning permission gets most of the attention when people start researching loft conversions. But building regulations matter just as much, and in some ways more. They apply to every loft conversion, regardless of whether planning permission was required.
Understanding what building regulations cover, why they exist, and what the process looks like will help you avoid problems during the build and when you eventually come to sell.
What building regulations actually are
Building regulations are a set of nationally defined standards that ensure construction work is safe, structurally sound, and energy efficient. They cover everything from how much weight a floor can take to how quickly you can escape the building in a fire.
They are not optional. Every loft conversion must comply with building regulations, and the work must be inspected and signed off by a building control inspector before the project is considered complete.
This is completely separate from planning permission. You can have permitted development rights that mean no planning application is needed, and building regulations still apply in full. The two processes run independently of each other.
Who handles building control?
You have two options for building control sign-off in England.
The first is your local authority building control team. You submit a building notice or full plans application to the council, pay the associated fee, and their inspector visits at key stages of the build.
The second is an approved inspector, a private-sector alternative. These are commercial firms that perform the same function as local authority building control. Some builders have preferred relationships with approved inspectors, and in some cases, the process can move faster.
Either route results in the same outcome: a completion certificate confirming the work meets building regulations. The cost is broadly similar across the two options, typically £800-£1,200 for a standard loft conversion in London.
Confirm with your builder whether building control fees are included in their quote or billed separately. It is a common source of confusion when comparing quotes from different contractors. Our loft conversion budgeting guide covers this alongside the other costs that often sit outside the headline quote.
What building regulations cover in a loft conversion
There are several specific areas that building control will assess during and after your loft conversion. Each one has practical implications for how the building is designed and carried out.
Structural strength
The existing floor structure in most lofts is not designed to take the weight of a habitable room. The joists are typically sized for occasional access, not for people living and sleeping in the space.
Before anything else, a structural engineer will assess whether the floor needs strengthening and specify what is required. New or doubled-up joists are common. Steel beams are sometimes needed, depending on the span and the loads involved.
The structural engineer's calculations form part of the building regulations submission. Building control will want to see these before approving the structural elements of the build.
If you are not sure whether your loft floor is suitable as it stands, our loft suitability guide explains what to look for before you get to the formal assessment stage.
Fire safety
This is one of the most important and sometimes most misunderstood parts of building regulations for loft conversions.
Adding a habitable room at the top of a house changes the building's fire risk profile. The regulations require that anyone sleeping in the loft can escape safely in the event of a fire, and that the fire does not spread rapidly through the structure.
In practical terms, this usually means a protected escape route from the loft down to the ground floor exit. For a two-storey house becoming three-storey, this typically requires fire doors on all rooms that open onto the staircase, mains-wired, interlinked smoke alarms on every floor, and the staircase itself to be enclosed rather than open-plan.
In some cases, a skylight window large enough to escape through can substitute for a protected staircase route, but this depends on the specific layout and the building control inspector's assessment.
These fire safety measures are not optional extras. They are a condition of sign off, and a builder who tells you they are not required is either mistaken or cutting corners. Make sure you discuss fire safety requirements explicitly with both your builder and your building control inspector early in the process.
Insulation and thermal performance
Loft conversions must meet minimum thermal insulation standards. The roof slopes, any flat roof sections, the gable walls, and the floor all need to meet specific U-values, which measure how much heat passes through them.
In practice, this means a decent depth of insulation between and below the rafters, careful attention to cold bridges where the insulation is interrupted, and appropriate vapour control layers to manage condensation.
Getting insulation right matters beyond just compliance. A poorly insulated loft conversion will be cold in winter and uncomfortably hot in summer. It will also cost more to heat. Specifying good-quality insulation at the build stage is always worthwhile.
Staircase requirements
Building regulations set specific requirements for the staircase that provides access to the loft conversion. The pitch angle, the dimensions of each step, the headroom above the stairs, and the handrail and balustrade must all meet defined standards.
This matters practically because the staircase has to fit within the available floor space on the floor below while still meeting these requirements. In some London homes with tight layouts, this is genuinely challenging and requires careful design to resolve.
A staircase that does not meet building regulations will not receive sign-off. Building this requirement into the design from the start, rather than retrofitting a compliant staircase into a fixed layout, saves on high costs and frustration. Our dormer loft conversion guide covers how staircase planning affects the overall design and budget.
Electrics and lighting
Any electrical work carried out as part of the loft conversion must comply with Part P of the building regulations, which covers electrical safety in dwellings.
This means the electrical installation must be designed, installed, and tested by a qualified electrician who is registered with a competent person scheme such as NICEIC or NAPIT. They will self-certify the work, which means they can issue the relevant certificate directly without a separate building control inspection of the electrics.
Make sure your builder uses a registered electrician and that you receive the electrical installation certificate upon completion. You will need this when you sell the property.
Ventilation
Habitable rooms need adequate ventilation to maintain air quality and manage moisture. Building regulations specify minimum requirements for both background ventilation, typically trickle vents in windows, and rapid ventilation, which means openable windows of a certain size.
Bathrooms and en-suites within the loft conversion need mechanical extract ventilation to remove moisture at source, ducted to the outside of the building.
These requirements feed into the window specification and any mechanical ventilation design, so they need to be considered at the design stage rather than treated as an afterthought.
The inspection process
Building control does not just review drawings and sign off at the end. An inspector visits at specific stages throughout the build to check that the work on site matches the approved design and meets the required standards.
Typical inspection points for a loft conversion include the commencement of work, the structural floor and steelwork, the roof structure before it is covered, the insulation before it is boarded, the staircase, and the final completion inspection.
Missing an inspection stage can cause significant problems. If insulation is boarded over before it has been inspected, the inspector may require it to be opened up again. This is avoidable with good communication between your builder and the building control body.
A good builder will manage the inspection schedule as part of project management. Ask specifically how they handle this during contractor interviews.
The completion certificate
At the end of the project, once all inspections have been passed and the work is signed off, you receive a building regulations completion certificate. This is a critical document.
Keep it safe. When you come to sell the property, your solicitor will ask for it and the buyer's solicitor will require it. Without it, there are two routes. One is to apply retrospectively for regularisation, which involves building control inspecting the completed work and potentially requiring elements to be opened up or redone. The other is to take out indemnity insurance, which covers the buyer against enforcement action but does not confirm the work is actually safe or compliant.
Neither option is as straightforward or as reassuring as simply having the original completion certificate. Getting building regulations sign off properly the first time is always the right approach.
Retrospective building regulations approval
If you have bought a property where a previous loft conversion was carried out without building regulations approval, or where the completion certificate has been lost, you have options but none of them are simple.
A regularisation application can be made to the local authority building control team. This involves an inspector assessing the existing work and identifying whether it meets current standards. In some cases work will need to be exposed or altered to achieve compliance.
If the work is older and the regularisation route is not practical, indemnity insurance is sometimes used as an alternative in property transactions. But this is a commercial solution to a legal risk, not confirmation that the building is safe.
If you are buying a property with an unconverted or previously converted loft and want to understand what you are taking on, speaking to a structural engineer and a building control body early is money well spent.
The straightforward summary
Building regulations apply to every loft conversion. They are not a bureaucratic formality but a genuine set of standards that ensure the building is safe, warm, and fit to live in.
The key areas to stay on top of are structural strength, fire safety, insulation, the staircase, electrics, and ventilation. Each one has practical design implications that should be worked through at the planning stage, not discovered halfway through the build.
Use a builder who understands and respects the process, keep all your documentation, and make sure you receive the completion certificate at the end. That single document protects both your safety and your investment.
If you are still at the early stage of planning your conversion, our loft conversion costs page and permitted development rules guide are useful next steps before you start speaking to contractors.
Permitted Development Rules for Loft Conversions in London
September 22, 2024
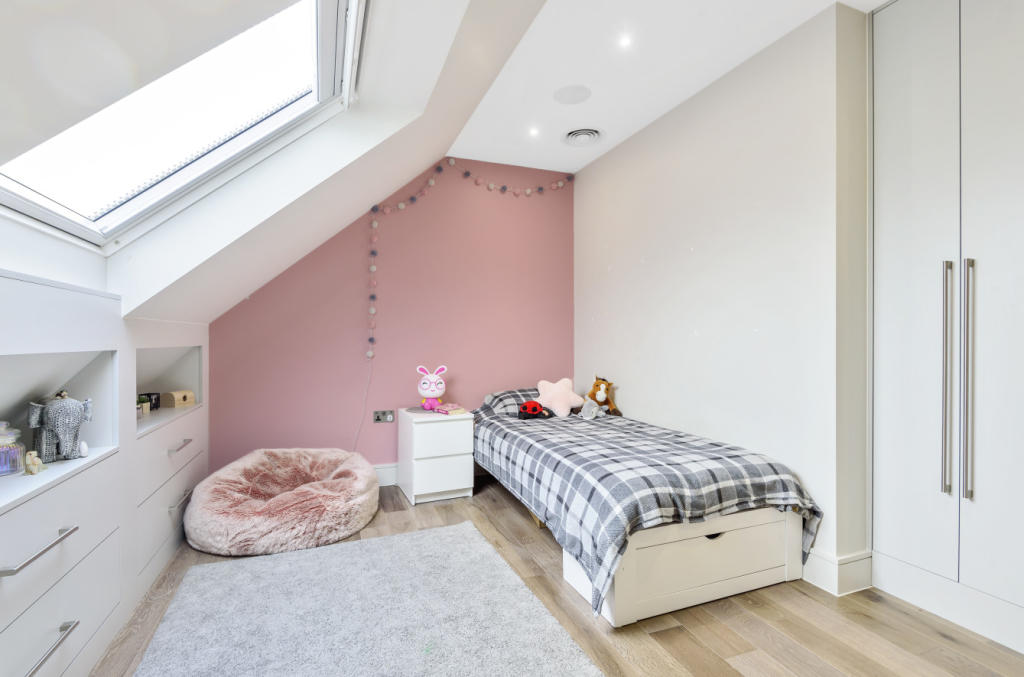
One of the first questions people ask when thinking about a loft conversion is whether they need planning permission. The good news is that most loft conversions in London do not require a formal application. They fall under permitted development rights, which allow certain types of work to proceed without council approval.
But permitted development has conditions attached. And London has more exceptions and local restrictions than most parts of the country. Getting this wrong costs time and money, so it is worth understanding the rules clearly before you start.
What does permitted development actually means
Permitted development is not a free pass to build whatever you want. It is a set of nationally defined rules that allow specific types of home improvement to proceed without a planning application, provided the work stays within certain limits.
For loft conversions, those limits cover things like the volume you can add, the height of the conversion, the materials you use, and where on the roof the work takes place.
If your project stays within those limits, you can proceed without applying to the council. If it exceeds them in any way, you need full planning permission.
The volume limits
This is the most important rule for most loft conversions.
For a terraced house, the total volume added by a loft conversion must not exceed 40 cubic metres. For a detached or semi-detached house, the limit is 50 cubic metres.
This is a cumulative limit. If a previous owner already added a dormer or extended the roof in any way, that volume counts toward your allowance. Always check the property's history before assuming you have the full allowance available.
If you are not sure how to calculate the volume of your proposed conversion, a structural engineer or architect can work this out for you as part of their initial assessment. Our loft suitability guide explains what to look for when assessing your existing roof space.
The height rules
Any addition to the roof must not exceed the height of the existing ridge line. This means you cannot build upward beyond the highest point of your current roof.
This rule catches people out when they are planning a conversion on a property with a relatively low ridge height. If the ridge is not high enough to create a usable room within the permitted development limit, the only options are to apply for planning permission or accept a smaller space.
Roof materials
Under permitted development, the materials used on the exterior of the conversion should be similar in appearance to the existing house. This does not mean identical, but it does mean a wildly different cladding or roofing material is likely to fall outside the rules.
In practice, most builders use materials that match or closely complement the existing roof covering. It is worth confirming this when reviewing drawings and specifications.
Where on the roof can the work go
Permitted development rules are stricter about what faces the street.
Any enlargement that fronts a highway is not permitted development. In plain terms, this means front dormers almost always require full planning permission. A rear dormer that faces the garden and is not visible from the street is much more likely to qualify.
Side dormers are a grey area and depend on the specific property and its orientation. If in doubt, check with your local planning authority or speak to a planning consultant before proceeding.
What is not allowed under permitted development
Even if your conversion meets the volume and height limits, certain things will take it outside permitted development entirely.
Verandas, balconies, and raised platforms are not permitted. If you want a roof terrace or an external space attached to the loft conversion, you will need planning permission regardless of the size.
Any work that overhangs the house's outer wall is also outside the rules.
And any extension that sits forward of the principal elevation, which usually means the front of the house, requires a full application.
When permitted development does not apply at all
This is where London gets more complicated than the rest of the country.
If your home is in a conservation area, a National Park, an Area of Outstanding Natural Beauty, or a World Heritage Site, permitted development rights for loft conversions are significantly restricted. In these areas, any enlargement of the roof that would be visible from a road or public footpath requires planning permission.
London has a large number of conservation areas spread across almost every borough. If you are unsure whether your property sits within one, you can check on your local council's planning portal or use the Planning Portal's national map.
Listed buildings are a separate category entirely. If your home is listed, permitted development rights do not apply at all. Any work, including internal changes, requires listed building consent in addition to any planning permission needed. The rules are strict and the penalties for non-compliance are serious.
Article 4 directions are another London-specific issue. These are local planning directions that remove permitted development rights in specific streets or areas, usually to protect the character of a neighbourhood. Some London boroughs use these extensively. Islington, Camden, and several other inner London boroughs have Article 4 directions covering large parts of their area.
Always check whether an Article 4 direction applies to your specific property before assuming permitted development is available to you.
Lawful Development Certificates
Even when your project clearly qualifies for permitted development, it is worth considering applying for a Lawful Development Certificate from your local council.
This is not the same as planning permission. It is a formal confirmation from the council that your proposed works are lawful under permitted development rules. It costs around £230 and takes around eight weeks to process.
Why bother if you do not need permission? Because when you come to sell the property, buyers and their solicitors will ask for evidence that the loft conversion was carried out lawfully. A Lawful Development Certificate provides that evidence clearly and removes any ambiguity.
Without it, you are relying on the permitted development rules having been correctly applied, which can become a point of friction in a sale even if everything was done properly.
Permitted development versus planning permission: the cost difference
If your project does need planning permission, it is worth knowing what that adds to your budget and timeline.
A householder planning application currently costs £258 in England. But the associated costs, including architect drawings prepared to planning standard, a planning consultant if required, and any additional reports the council requests, typically bring the total to £800 to £1,500.
The bigger impact is time. A standard householder application takes 8 weeks to be decided. In practice, with pre-application queries, requests for additional information, and occasional delays, twelve weeks is more realistic.
If your project is borderline, it is sometimes worth making small design changes to bring it within permitted development rather than going through a planning application. A good architect or planning consultant can advise on this quickly.
The practical steps to take
Before you speak to builders or commit to any design, take these steps in order.
Check whether your property is listed or in a conservation area. Your local council's planning portal will tell you this in a few minutes.
Check whether an Article 4 direction applies to your street. This is also available on the planning portal.
Check whether any previous loft or roof extensions have used up part of your permitted development volume allowance. Land Registry records and the property's planning history will show this.
If everything is clear, confirm with your architect or structural engineer that the proposed design remains within the volume and height limits before finalising the drawings.
And consider applying for a Lawful Development Certificate once the design is confirmed, particularly if you plan to sell the property within the next few years.
Our loft conversion types guide explains how different conversion designs interact with these rules, and our loft conversion budgeting guide covers the full cost picture, including planning fees and associated professional costs.
The honest summary
Most standard rear dormer and Velux loft conversions on non-listed London homes outside conservation areas will qualify for permitted development. But London has more exceptions than anywhere else in the country, and the consequences of getting it wrong, whether that is an enforcement notice or a problem at the point of sale, are worth avoiding.
Take thirty minutes to check the rules that apply to your specific property before you start planning anything. It costs nothing and could save you significant time and money further down the line.
If you are ready to start thinking about what kind of conversion suits your home, our loft conversion costs page and dormer loft conversion guide are good starting points.
Dormer Loft Conversion Cost Guide for London Homeowners
August 17, 2024
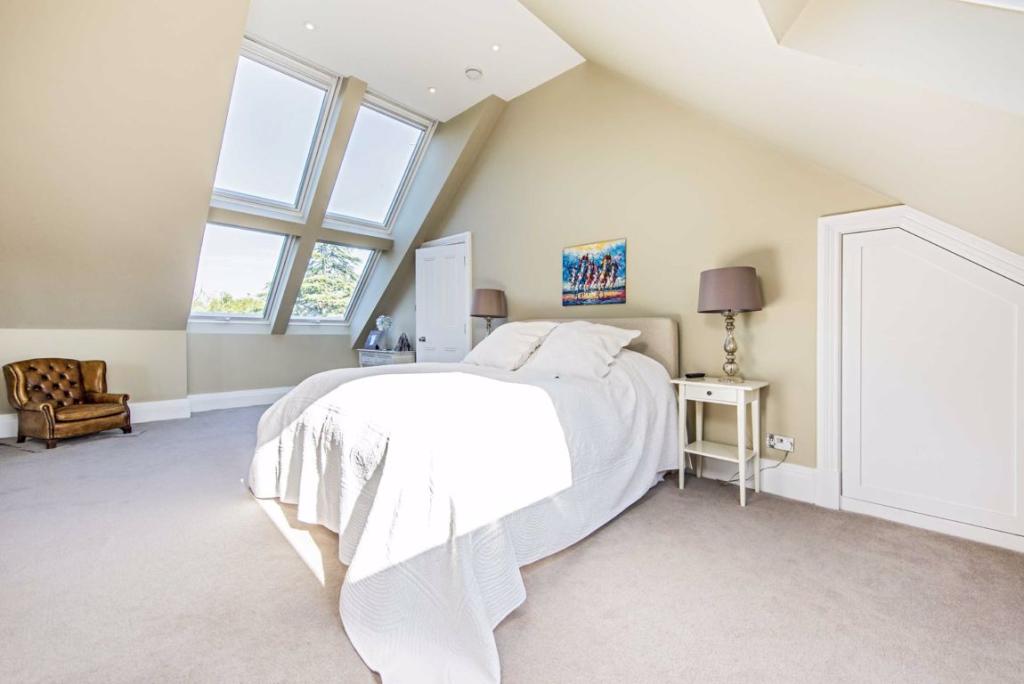
A dormer loft conversion is the most popular choice for London homeowners, and it is not hard to see why. It adds genuine headroom, creates a proper, usable room, and, in most cases, does not require planning permission.
But the cost varies more than most people expect. This guide breaks down what you are actually paying for, what drives the price up or down, and what a realistic budget looks like for a London property.
What is a dormer loft conversion?
A dormer is a structural extension that projects outward from the existing roof slope. It creates a vertical wall and a flat or shallow-pitched roof, which adds headroom and floor space that simply would not exist in the original roof shape.
The most common version in London is a rear dormer, built at the back of the property, out of sight from the street. This is practical, usually permitted development, and gives you the most usable space for the money.
Other variations include side dormers, L-shaped dormers on Victorian and Edwardian terraces, and full-width dormers that run across the entire rear of the roof. Each has different cost implications and planning considerations.
If you want to understand how a dormer compares to other conversion types before deciding, our loft conversion types guide covers all the main options side by side.
What does a dormer loft conversion cost in London?
For most London homes, a rear dormer loft conversion costs between £35,000 and £60,000 fully finished. That is a wide range, and the gap between the lower and upper ends comes down to a handful of specific factors.
A basic rear dormer on a standard London terrace, finished to a decent standard with a single room, sits toward the lower end of that range. Add an ensuite bathroom, high-end finishes, complex steelwork, or a larger footprint and the cost moves toward the upper end.
An L-shaped dormer, which combines a rear dormer with a smaller side return and is common on Victorian terraces, typically costs between £45,000 and £70,000. The additional structure and roofing work adds to both the build time and the cost.
A full-width rear dormer, which maximises the space across the entire back of the roof, costs between £50,000 and £75,000 in most cases.
These figures assume a fully finished room ready to use. They include the structural work, staircase, insulation, windows, plastering, electrics, and basic decoration. What they often do not include are the additional costs that sit alongside any loft conversion project.
Our loft conversion budgeting guide covers those hidden costs in detail, including party wall agreements, structural engineer fees, building control, and planning if required.
What affects the cost most?
Size is the obvious one. A larger dormer means more structure, more roofing, more internal volume to finish, and a longer build programme. Every additional square metre adds cost.
The staircase has a bigger impact than most people realise. A simple straight stair costs less than a space-saving alternating tread stair or a bespoke joinery solution. But the staircase also affects how much floor space you lose on the floor below, sometimes forcing layout changes that add further cost.
Adding an ensuite bathroom is where costs can jump significantly. You are adding plumbing, tiling, sanitaryware, and ventilation on top of the standard room fit out. Budget an additional £6,000 to £12,000 for a well-finished ensuite, depending on specification.
The condition of your existing roof matters too. Older roofs sometimes need structural repairs or strengthening before the dormer can be built. A structural engineer will identify this early, which is why getting one involved before you approach builders is always worth the cost.
Specification drives the final number more than anything else. The difference between a mid-range and high-end finish on windows, flooring, joinery, and bathroom fittings can easily be £10,000 to £15,000 on the same structural build.
Planning permission and permitted development
Most rear dormers in London qualify for permitted development, meaning no formal planning application is needed. But there are conditions attached and exceptions that catch people out.
The dormer must not exceed the highest point of the existing roof. It must not overhang the outer wall of the house. Materials should be similar in appearance to the existing house. And the total volume added across all extensions must not exceed 40 cubic metres for a terraced home or 50 cubic metres for a detached or semi-detached property.
If you live in a conservation area, a listed building, or an area covered by an Article 4 direction, permitted development rights may be restricted or removed entirely. Some London boroughs have specific local policies that go further than the national rules.
A full planning application adds around £800 to £1,500 in fees and drawings, and typically takes eight to twelve weeks. If your property is in a sensitive area, it is worth getting professional advice before assuming you can proceed without one.
Building regulations and sign off
Every dormer loft conversion needs building regulations approval, regardless of whether planning permission is required. These are separate processes and both are mandatory.
Building regulations cover structural integrity, fire safety, insulation, ventilation, and means of escape. An inspector will visit at key stages of the build and sign off at the end.
Without a building regulations completion certificate, you cannot legally sell the property and the work is not covered by the protections that come with a proper sign-off. Budget around £800 to £1,200 for building control fees, and confirm with your builder whether this is included in their quote or separate.
Party wall considerations
If your dormer is being built close to or on a shared wall, you are legally required to serve a party wall notice on your neighbour before work starts. Most rear dormers on terraced homes trigger this requirement.
If your neighbour agrees and signs the notice, costs are minimal. If they appoint their own surveyor, you pay their fees. That can run to £1,000 or more per neighbour. On a mid-terrace with neighbours on both sides, that is a potential £2,000 addition to your budget that many people do not anticipate.
How much value does a dormer add?
This is the number that puts the cost in context. A well-built dormer loft conversion in London, particularly one that creates a bedroom and ensuite, typically adds between 15% and 25% to a property's value.
On a £650,000 London terrace, that is £97,000 to £162,000 in added value. Even at the upper end of build costs, the return on investment is strong. London's price per square foot makes adding usable space one of the most reliable ways to increase what a property is worth.
An L-shaped dormer that creates a large master bedroom with an ensuite consistently performs at the higher end of that value range because it adds the kind of space buyers specifically look for and pay a premium for.
If you are weighing up a loft conversion vs moving to a bigger home, our guide runs through the full financial comparison honestly.
What the build process looks like
A standard rear dormer on a London terrace takes between eight and fourteen weeks from start to finish. An L-shaped dormer or a more complex build can take sixteen weeks or more.
The project typically starts with scaffolding, followed by structural work to prepare the floor and support any required steel beams. The dormer structure goes up next, followed by roofing and weatherproofing before internal work begins.
The disruption is real but manageable. Most families continue living in the property throughout the build, though the noise and dust during the structural phase can be significant for a few weeks.
A good builder will keep you informed at each stage and have the building weather-tight as quickly as possible. Ask specifically about this when you are interviewing contractors.
Getting quotes right
The most common mistake people make is comparing quotes that do not cover the same scope. One builder includes scaffolding, building control, and a staircase. Another does not. On paper, the second quote looks cheaper, but it is not.
Ask every builder to provide an itemised quote that specifies exactly what is and is not included. Confirm whether VAT is included. Ask about contingency allowances for unforeseen structural issues. And check what their process is for managing building control sign-off.
Three comparable quotes from experienced loft conversion specialists will give you a reliable picture of what your specific project should cost.
The straightforward summary
A dormer loft conversion is the most practical and most popular way to add serious usable space to a London home. For most terraced and semi-detached properties, it delivers the best combination of added space, added value, and realistic cost.
Budget honestly, understand what is and isn't in your quotes, and involve a structural engineer early. Those three steps will save you from the surprises that catch most people off guard.
If you are at the early stage of thinking this through, our loft conversion costs page and loft suitability guide are good places to start before you speak to anyone.
Hip to Gable Loft Conversion Cost in London Explained
July 29, 2024
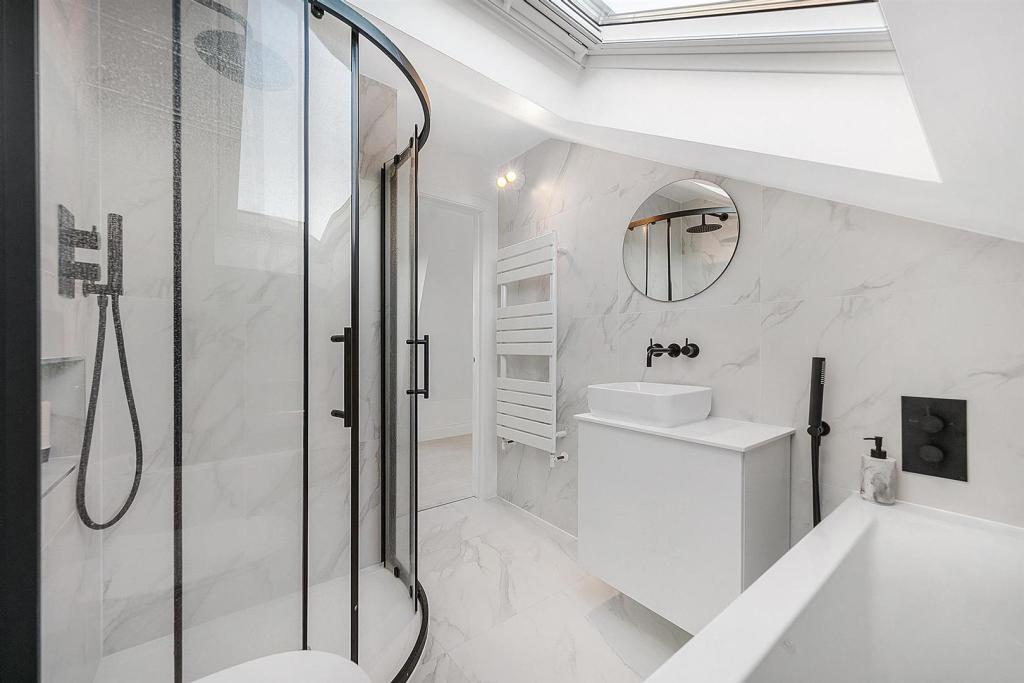
If you live in a detached or semi-detached home in London, there is a good chance your roof has a hipped end. That sloping side means your loft loses a significant amount of usable space compared to a house with a straight gable wall.
A hip-to-gable conversion fixes that. It extends the sloping hip end outward to create a vertical gable wall, thereby dramatically increasing the floor area and headroom in the loft.
It is one of the more substantial types of conversion, but for the right home, it transforms what is possible in the space.
How it works
On a standard hipped roof, all four sides slope downward. The two shorter ends, the hips, cut into the loft space at an angle, leaving awkward triangular corners that are largely unusable.
A hip-to-gable conversion removes that sloping end and replaces it with a straight vertical wall extending to the ridge line. The result is a much squarer, more usable room.
On a semi-detached home, this is done on the outward-facing side, not the party wall side. On a detached home, it can be done on either or both ends.
It is often combined with a rear dormer, creating a substantial amount of new space across the entire upper floor. If you want to understand how these two types work together, our loft conversion types guide explains the different combinations clearly.
What does it cost in London?
A hip-to-gable conversion in London typically costs between £40,000 and £65,000, fully finished. If you add a rear dormer at the same time, which most people do, the combined cost usually sits between £55,000 and £80,000.
The higher cost compared to a simple Velux or basic dormer reflects the structural complexity involved. You are removing part of the existing roof, building a new gable wall, and extending the roof covering. That requires more materials, more time, and more skilled labour.
What drives the final number up or down includes the size of the hip end being converted, whether you are combining it with a dormer, the finish specification inside, and the complexity of the steelwork required.
For a full picture of what sits on top of the build cost, our loft conversion budgeting guide covers the additional fees, surveys, and hidden costs that apply to most London conversions.
Does it need planning permission?
This is where hip-to-gable conversions differ from a standard rear dormer.
In many London boroughs, hip-to-gable conversions fall outside permitted development. Because the change alters the roof's external appearance on a visible side of the property, some councils require a full planning application.
This is not universal. Permitted development rules allow hip-to-gable conversions in many cases, provided the total volume added does not exceed 40 cubic metres for a terraced home or 50 cubic metres for a detached or semi-detached property, and certain other conditions are met.
But conservation areas, Article 4 directions, and local borough policies can all restrict what is allowed without permission. Some London boroughs are stricter than others, and it is always worth checking before assuming you can proceed without an application.
A planning application incurs fees of roughly £800 to £1,500 and typically takes eight to twelve weeks to decide. Factor that into your timeline if required.
What about party wall agreements?
On a semi-detached home, the hip end you are converting sits away from the shared wall, so the conversion itself may not trigger party wall obligations. But if a rear dormer is being added at the same time, and that work is close to or on the party wall, notices will likely be required.
Our loft conversion budgeting guide covers party wall costs in more detail, including what happens when neighbours appoint their own surveyor.
How much value does it add?
A hip-to-gable conversion, particularly when combined with a rear dormer, creates some of the largest usable floor areas of any loft conversion type. More usable space means more value, and in London, that relationship is fairly direct.
Most agents and surveyors report that a well-executed hip-to-gable with a rear dormer adds between 20% and 25% to a property's value in London. On a £700,000 semi-detached home, that is £140,000 to £175,000 in added value.
Even at the higher end of build costs, the numbers make a strong case for this type of conversion in London, where space is at a premium, and buyers pay accordingly for extra bedrooms and bathrooms.
Is your home suitable?
Not every hipped roof is a straightforward candidate. The height of the existing ridge line matters, as does the roof pitch and the span of the hip end being extended.
Some older London homes have complex roof structures with multiple hips, valleys, and other features that complicate construction. A structural engineer will identify these early and give you a realistic picture of what is involved before you get builder quotes.
It is also worth checking the ridge height at the hip end, specifically, as this determines how much usable space is actually gained once the conversion is done. Our loft suitability guide helps you understand what to look for before speaking to builders or engineers.
What the build process looks like
A hip-to-gable conversion is more disruptive than a Velux conversion but is broadly similar in duration to a standard dormer. Most projects run between ten and sixteen weeks from start to finish.
The sequence typically starts with scaffolding, followed by the removal of the existing hip tiles and structure, the construction of the new gable wall, and then the roofing work to tie everything together. Internal work follows once the structure is weathertight.
Because the roof is partially open during the structural phase, weather matters. Good builders will time this work carefully and have plans in place to protect the building during that period.
The straightforward summary
A hip-to-gable conversion is not the cheapest option, but for detached and semi-detached homes in London, it is often the most transformative. It turns a cramped, awkward loft into a proper full-width room, and when combined with a rear dormer, it can add as much usable space as a full-floor extension at a fraction of the disruption.
If you are in a semi-detached or detached London home with a hipped roof and need more space, this is one of the strongest value-adds available to you.
The first step is finding out whether your roof is suitable and what planning rules apply in your borough. Start with a structural engineer visit and a quick check with your local planning authority, or speak to a specialist who knows your area well.
If you are still comparing your options, our Velux vs dormer guide and loft conversion costs page are good places to build your understanding before committing to anything.
Velux Loft Conversion Cost vs Dormer: Which Is Better Value?
June 25, 2024
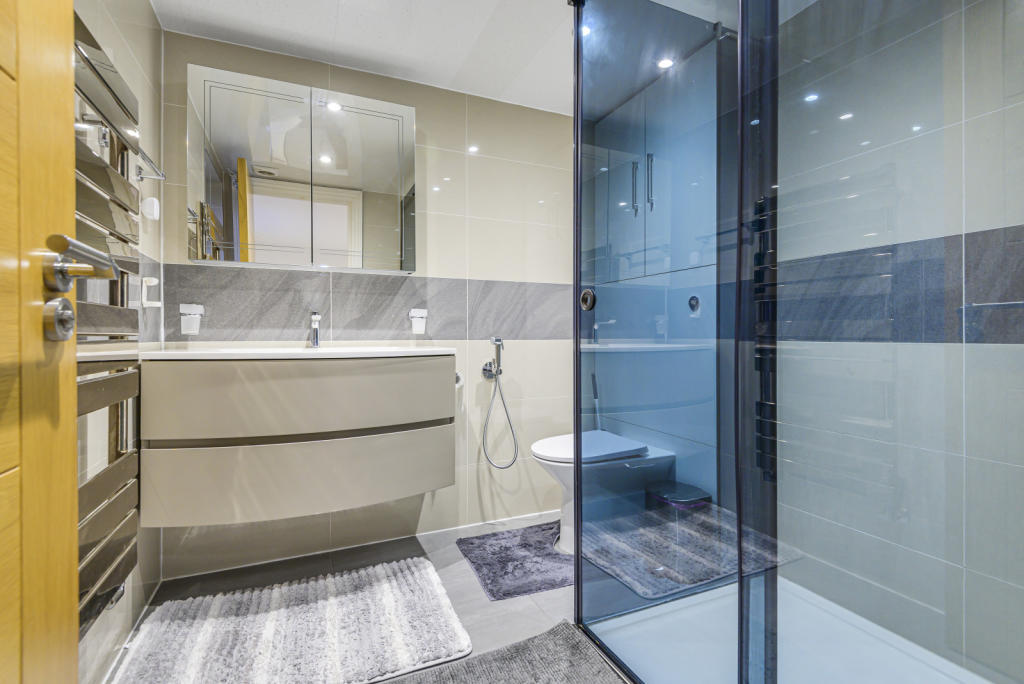
If you are looking at converting your loft, these are the two most common options you will come across. Both add usable space. Both are popular in London. But they work differently, cost differently, and suit different homes.
Here is a clear comparison to help you decide which makes more sense for your situation.
What is a Velux loft conversion?
A Velux conversion, sometimes called a roof light conversion, is the most straightforward type. It keeps the existing roofline completely intact and simply adds windows flush into the roof slope.
Because you are not changing the roof structure, the build is faster, cheaper, and less disruptive. It is also more likely to fall under permitted development, meaning no planning permission is required in most cases.
The trade-off is headroom. You are working entirely within the existing roof space, so the usable floor area is limited to wherever the ceiling height is tall enough to stand or sit comfortably. In many London terraces and semis, that means a smaller usable room than people expect.
What is a dormer loft conversion?
A dormer extends outward from the existing roof slope, creating a vertical wall and a flat or pitched roof section. This dramatically increases both headroom and floor space compared to a Velux conversion.
Most dormers are built at the rear of the property. A rear dormer is the most common loft conversion in London because it maximises space, typically falls under permitted development, and does not affect the home's street appearance.
The build is more complex than a Velux conversion, which means it costs more and takes longer. But the space you gain is considerably greater.
If you want to understand the full range of conversion types before deciding, our loft conversion types guide covers everything from hip to gable and mansard options too.
The cost difference
This is where most people start, so here are realistic London figures for both.
A Velux loft conversion typically costs between £20,000 and £35,000 fully finished. The lower cost reflects the simpler build, less structural work, and shorter programme. You are essentially fitting windows, insulating, boarding out, adding a staircase, and finishing the space.
A dormer loft conversion typically costs between £35,000 and £60,000 fully finished. The additional cost covers the structural extension of the roof, new external walls, weatherproofing, and the extra internal volume that needs insulating, plastering, and finishing.
For a full breakdown of what drives these numbers, our loft conversion budgeting guide covers the hidden costs that sit on top of both types.
The value each one adds
Cost is only part of the equation. What matters is what you get for the money and what it does to your property value.
A Velux conversion adds value, but less than a dormer in most cases. Because the usable floor space is smaller, it is harder to fit a proper bedroom and ensuite, which is what buyers pay a premium for.
A dormer, particularly a rear dormer with a bedroom and bathroom, consistently adds more value in London. Agents and surveyors generally report that a well built dormer adds 15% to 25% to a property's value, which on most London homes means the conversion pays for itself and then some.
If the goal is maximising return on investment, the dormer wins for most London homes, even though it costs more upfront.
Which is better for your home?
The honest answer is that it depends on your roof.
A Velux conversion works well when the existing loft already has reasonable height throughout, typically a ridge height of at least 2.2 metres, and the floor area is large enough to create a comfortable room. It is also a good option when budget is the primary constraint or when planning restrictions make structural changes difficult.
A dormer makes more sense when headroom is limited, when you want to fit a bedroom and bathroom, or when you want to maximise the value added to the property. For most standard London terraces and semis, a rear dormer is simply the more practical and more valuable option.
The key question is whether your existing roof space has enough natural height. If it does, a Velux conversion can be excellent value. If it does not, you will be disappointed with the result and a dormer is worth the additional cost.
Our loft suitability guide helps you understand what your existing roof space can realistically support before you commit to either route.
Planning permission considerations
Both types usually fall under permitted development for rear extensions, but there are exceptions worth knowing about.
Velux conversions almost always qualify for permitted development because they do not alter the roofline. Rear dormers also typically qualify, provided they do not exceed certain size limits and you are not in a conservation area or a borough with additional restrictions.
Front dormers almost always require full planning permission, which adds cost and time. If you are in a conservation area, even rear dormers may need an application.
It is always worth checking with your local authority or speaking to a planning consultant before assuming permitted development applies to your specific property.
The straightforward verdict
If your budget is tight and your loft already has reasonable height, a Velux conversion offers solid value and a faster, cleaner build.
If you want to maximise space, create a proper bedroom and bathroom, and get the strongest return on your investment, a dormer costs more but delivers more. For most London homes, the extra spend is justified by the extra value it creates.
The best way to know for certain is to get a structural engineer to assess your roof space first. It costs a few hundred pounds and tells you clearly which route is actually viable for your home, before you spend time and money getting quotes for something that may not work.
Loft Conversion vs Moving House in London: Which Saves More Money?
April 13, 2024
This is one of the most common questions we hear. You need more space, and you have two realistic options. Do you convert your loft and stay put, or do you sell up and buy somewhere bigger?
Both routes cost serious money in London. The question is which one makes more financial sense for your situation.
What moving house actually costs in London
People focus on the price difference between their current home and the next one. But moving is expensive before you even think about that gap.
Here is what you are actually paying when you move in London:
Estate agent fees typically range from 1% to 3% of your sale price. On a £600,000 home, that is up to £18,000 gone before you see a penny.
Stamp duty on your next purchase can be substantial. On a £750,000 property, you are looking at around £27,500. If you already own and are not a first-time buyer, there is no relief available on standard purchases.
Solicitor fees, surveys, and removals add another £3,000 to £5,000. And if your chain falls through and you restart the process, many of those costs repeat.
In total, moving in London routinely costs £40,000 to £70,000 in transaction costs alone, before you account for any difference in mortgage.
What a loft conversion actually costs
A well-built loft conversion in London typically runs between £35,000 and £65,000 fully finished. That includes the structure, staircase, insulation, electrics, plastering, and basic decoration.
Add in the hidden costs we cover in our loft conversion budgeting guide, such as party wall agreements, structural engineer fees, building control, and planning if required, and the realistic all-in number for most London homes sits around £45,000 to £70,000.
That is comparable to moving costs, but with one major difference. The loft conversion adds a room and adds value. Moving costs just disappear.
The value a loft conversion adds
This is where the numbers start to favour converting. A properly built loft conversion in London typically adds between 15% and 25% to a property's value, according to multiple estate agent and surveyor reports.
On a £600,000 home, that is £90,000 to £150,000 in added value. Even if you spend £60,000 on the conversion, the return on investment is strong, particularly in areas where square footage commands a premium.
A bedroom and bathroom loft conversion will almost always add more value than it costs in London. That is not always true in other parts of the country, but London's price per square foot makes the calculation different.
If you want to understand which type of conversion adds the most value, our loft conversion types guide breaks it down clearly.
The mortgage reality
Moving to a bigger home usually means a bigger mortgage. In the current rate environment, that matters a lot.
If you are moving from a £600,000 home to a £800,000 home and need to borrow an extra £200,000, at a 5% rate that adds roughly £1,100 per month to your repayments. Over five years, that is £66,000 in additional interest alone, not capital repayment.
A loft conversion financed through savings or a remortgage at a lower rate can cost significantly less in total, especially if your existing mortgage deal is already favourable.
It is worth speaking to a mortgage broker before making this decision, because the numbers look very different depending on your current deal, equity position, and what you would need to borrow.
When moving makes more sense
A loft conversion is not always the right answer.
If your home has other fundamental problems, too small a footprint, a poor location, bad schools nearby, or a layout that simply does not work for your family, adding a room at the top will not fix them.
If you need significantly more space beyond one or two rooms, converting your loft gets you one or possibly two extra rooms. Moving might get you a whole different class of property.
And if your loft is not suitable for conversion due to roof height, structure, or access constraints, the decision gets made for you. Our loft suitability guide helps you understand whether your home is a realistic candidate before you go any further.
When converting makes more sense
If you like where you live, your home is fundamentally right for your family, and you just need more space, a loft conversion is hard to argue against financially.
You avoid all transaction costs. You stay in an area you know. You add lasting value to an asset you already own. And you avoid the disruption, uncertainty, and cost of a chain.
For most London homeowners who are happy in their location and have a suitable roof, the numbers consistently favour converting over moving.
The honest comparison
Here is a straightforward way to think about it. Add up the realistic cost of moving, including stamp duty, agent fees, legal costs, and any premium you would pay for the extra space. Then compare that to a realistic all-in loft conversion quote, including contingency.
In most London scenarios, the conversion comes out cheaper and leaves you with a more valuable home at the end of it.
The exception is if you genuinely need to move for reasons beyond space. But if space is the primary driver, staying put and building up is almost always the better financial decision in London.
If you are at the early stage of thinking this through, our loft conversion cost guide gives you a solid starting point for what to budget.
Budgeting for a Loft Conversion in London: Hidden Costs to Know
March 11, 2024

A loft conversion sounds simple on paper. You have unused space above your head, and you want to turn it into something useful. But the final bill almost always surprises people, and not in a good way.
Here's what actually drives up the cost, and what to watch for before you commit.
The quote you get is rarely the final number
Most builders quote for the core build. That includes the structure, stairs, insulation, windows, and basic electrical work. What it often does not include is everything that comes after or around it.
Party wall agreements, planning fees, structural engineer reports, building control sign off, and specialist surveys all sit outside the standard quote. In London, these extras can easily add £3,000 to £8,000 to your budget before a single wall goes up.
Planning permission is not always straightforward
Many loft conversions fall under permitted development, which means no formal planning application is needed. But not all do. If you live in a conservation area, a listed building, or certain boroughs with local restrictions, you will need full planning permission.
That costs money and takes time. Budget around £800 to £1,500 for the application and associated drawings, and expect a decision to take eight to twelve weeks.
If you want to understand more about what counts as permitted development, our planning and permissions guide walks through it in plain terms.
Party wall notices catch people off guard
If your loft conversion involves work on or near a shared wall, you are legally required to serve notice on your neighbours. Most people forget this until the build is about to start.
If your neighbour agrees, costs are minimal. If they appoint their own surveyor, you pay their fees too. That can run to £1,000 or more per neighbour. In a terrace, that could mean two sets of fees.
Structural work can vary wildly
Older London homes often need more work than expected once a structural engineer gets involved. Existing roof timbers may not be strong enough, or the floor will need strengthening to meet building regulations.
These are not optional extras. They are legal requirements. A standard steel beam installation runs between £1,500 and £3,000, but this varies depending on access, size, and what the engineer specifies.
The staircase takes up more of your budget than most people expect
A new staircase is not just carpentry. It needs to comply with building regulations, fit within the available floor space, and often means sacrificing part of an existing room below. If that means moving a wall or relocating a door, the costs stack up quickly.
Budget at least £3,000 to £5,000 for a well made, code compliant staircase. Cheaper options exist, but they often cause problems at building sign off.
VAT is not always included
Most quotes from builders are either plus VAT or already include it. Make sure you know which you are looking at. At 20%, it is a significant difference on a £40,000 build.
If your builder is not VAT registered, that can sometimes save money, but it also raises questions about their size, experience, and insurance. Worth checking carefully.
Finishing costs are often underestimated
The shell of a loft is one thing. Getting it to a liveable standard is another. Plastering, flooring, lighting, sockets, decoration, and fitted storage are rarely included in a structural quote.
For a modest loft room you might budget £5,000 to £10,000 for finishes alone. For a bedroom with an ensuite, that number climbs further.
Our loft conversion costs page gives a fuller breakdown of what to expect at each stage of the finish.
Building regulations sign off is not optional
Every loft conversion in England needs building regulations approval. This is separate from planning permission and covers things like fire safety, structural integrity, insulation, and means of escape.
You will need a building control inspector to visit at various stages of the build and sign off at the end. Some builders include this in their quote. Many do not. Budget around £800 to £1,200 for building control fees.
Without sign off, you cannot legally sell the property and the work is not protected under building regulations warranties.
What to do before you get quotes
Get a structural engineer to look at your roof before you even approach builders. It costs a few hundred pounds and tells you upfront whether your loft is viable and what complications exist. It also means builders are quoting against the same information, which makes comparing quotes much easier.
If you want to see what types of loft conversion suit different home styles, take a look at our loft conversion types guide.
The honest summary
A well planned loft conversion in London typically costs between £35,000 and £65,000 fully finished, depending on the type, size, and specification. The wide range exists because the hidden costs above can shift a project significantly.
Get everything itemised in writing before you sign anything. Ask each builder specifically what is and is not included. And build in at least a 15% contingency because something almost always comes up once the roof is open.
The Most Cost-Effective Loft Conversions for London Homes
January 30, 2024
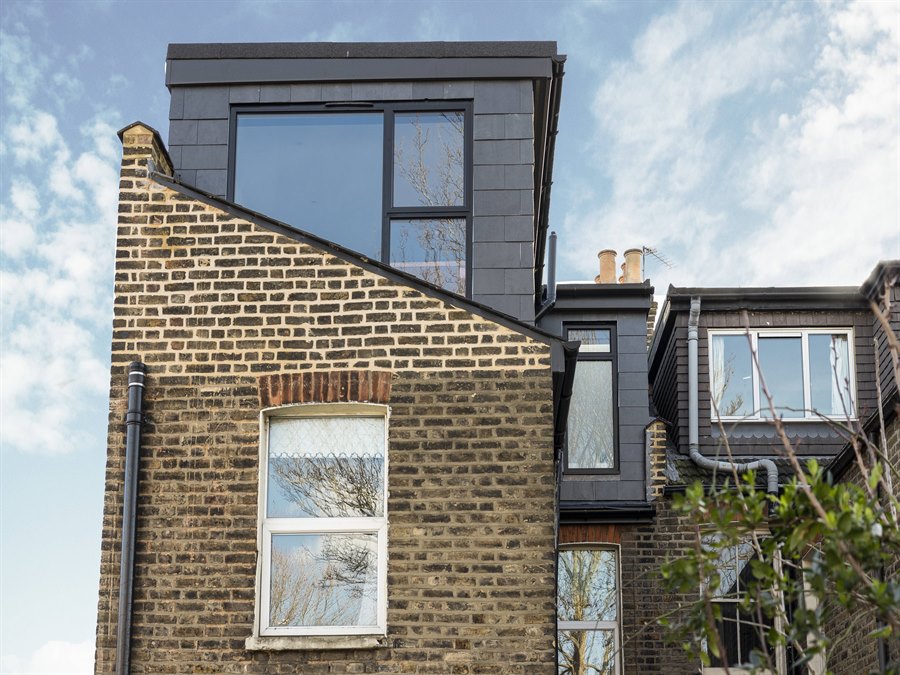
Moving house in London is expensive. Between stamp duty, estate agent fees, solicitor costs, and the premium on a bigger property, you're easily looking at £50,000 to £100,000+ just to get through the door of somewhere larger. A loft conversion sidesteps all of that. You stay put, keep your commute, keep the kids in the same school — and still get the extra space you need.
But not all loft conversions cost the same. The type you choose, the property you live in, and where you are in London all play a big part in the final bill. Here's what actually works if you want to get the most from your budget.
Why London Homeowners Keep Choosing Loft Conversions
The numbers make sense. A loft conversion can add 20–25% to a London property's value. A 2025 Nationwide report found that adding a double bedroom and bathroom through a loft conversion can boost a three-bedroom home's value by up to 24%. On a £500,000 London property, that's roughly £100,000–£120,000 in added value.
Compare that to the cost of the conversion itself — typically £50,000 to £90,000 in London — and the maths speaks for itself.
You also get to skip the garden sacrifice. Unlike a rear extension, a loft conversion uses space that's already there, sitting empty above your head. In tightly packed London boroughs where gardens are small, that matters.
The Four Main Types (Ranked by Cost)
1. Velux (Rooflight) Conversion — From Around £45,000–£65,000
This is the cheapest option. No changes to the roof structure — just skylights fitted into the existing slope, along with insulation, flooring, and a new staircase.
It works best if your loft already has decent headroom (at least 2.3 metres at the ridge). You won't get as much usable floor space as other options, but you'll spend less and the build is quicker — often just a few weeks.
The catch: because the roof stays as it is, you lose usable space where the ceiling slopes down. It's fine for a home office or spare bedroom. Less ideal if you need a full master suite.
Almost always falls under permitted development, so no planning application needed.
2. Dormer Conversion — Around £50,000–£80,000
The most popular choice for London terraces. A dormer is a box-shaped structure that extends out from the rear roof slope, giving you proper full-height walls at the back of the room.
This opens up significantly more space than a Velux conversion. Most people use it for a bedroom and en-suite bathroom. On a Victorian or Edwardian terrace — which makes up a huge chunk of London's housing — a rear dormer is often the sweet spot between cost and space gained.
Rear dormers usually qualify for permitted development. Front and side dormers typically need planning permission.
3. Hip-to-Gable Conversion — Around £65,000–£90,000
If you live in a semi-detached or detached house with a hipped roof (one that slopes down on the side), this converts that sloping end into a vertical gable wall. The result is a much bigger room with full headroom across a wider area.
It's commonly combined with a rear dormer for maximum space. Popular across outer London boroughs like Ealing, Hounslow, and Hillingdon.
More structural work involved than a dormer, so costs go up. But for semi-detached homes, it's often the most effective way to create genuinely usable loft space.
4. Mansard Conversion — £80,000–£120,000+
The most expensive option, and the one that gives you the most space. A mansard rebuilds the rear roof into near-vertical walls with a flat top, essentially creating a whole new floor.
Common in inner London, especially on terraced properties where maximising every square metre matters. It's the go-to for conservation areas where other dormer styles might not get planning approval (though mansards themselves always require planning permission).
The build takes longer, costs more, and involves more red tape. But the extra floor area and property value increase can make it worthwhile on higher-value properties.
What Makes London More Expensive?
London loft conversions typically cost 15–25% more than the same job elsewhere in the UK. Here's why:
Labour costs are higher. A skilled carpenter or structural engineer in West London charges more per day than one in the Midlands. That's just the cost of living difference filtering through to trades.
Site logistics are trickier. Terraced streets mean parking permits, restricted delivery windows, and sometimes crane hire to get materials over the roof. On a wide plot in the suburbs, the same job is simpler and cheaper.
Older housing stock needs more work. Victorian and Edwardian homes — the majority across many London boroughs — have cut timber roof structures. Each one needs individual structural assessment before work can start.
How to Keep Costs Down
Pick the right conversion for your property. A Velux conversion on a house with good existing headroom is far cheaper than forcing a mansard onto a property that doesn't need one. Match the conversion type to what your roof can handle.
Consider a first-fix (shell) conversion. Some builders offer to handle the structural work — steel beams, floor, staircase, dormer structure — and leave the finishing to you. If you're handy or have contacts in the trades, this can cut the bill significantly.
Don't over-spec the finishes. The biggest cost creep comes from finishing work: flooring, built-in storage, bathroom fittings, decorating. Set a clear budget for finishes early and stick to it.
Get a Lawful Development Certificate. Even if you don't need planning permission, getting an LDC (around £100–£200) proves your conversion is legal. It protects you at resale and avoids headaches with solicitors down the line.
Budget 15–20% above the base quote. Construction on existing buildings is unpredictable. Older roofs can need more strengthening than expected. A contingency fund stops surprises from derailing the project.
Do You Need Planning Permission?
Most loft conversions in London fall under permitted development, meaning no planning application is needed. The rules are:
- No more than 40 cubic metres of extra roof space for terraced houses, or 50 cubic metres for semi-detached and detached homes.
- No extension higher than the existing roof.
- Materials must match the existing house.
- Side-facing windows must be obscure-glazed.
- No extension beyond the front roof slope facing the road.
However, these rights don't apply if your property is listed, in a conservation area, or subject to an Article 4 direction. Many inner London boroughs — Islington, Hackney, Southwark, Camden — have significant conservation area coverage. Always check with your local authority or a planning consultant before you commit.
And remember: even if you don't need planning permission, building regulations approval is mandatory for every loft conversion. This covers structural safety, fire protection, insulation, and staircase standards. Skipping building regs creates serious problems when you try to sell.
Party Wall Agreements
If your loft conversion involves work on or near a shared wall — and on most London terraces, it will — you need a party wall agreement with your neighbours. Serve notice at least two months before work starts. Budget £1,000–£3,000 for surveyor fees per neighbour.
It's tempting to skip this. Don't. It protects both you and your neighbours, and missing it can cause legal issues at sale.
Which Conversion Offers the Best Value?
For most London homeowners on a budget, a rear dormer hits the best balance. It costs less than a hip-to-gable or mansard, gives you proper full-height space, works on the terraced houses that dominate London's housing, and usually doesn't need planning permission.
If your loft already has good headroom and you just need a functional extra room, a Velux conversion is the most affordable path.
And if you're in a semi-detached property with a hipped roof, a hip-to-gable with rear dormer combination gets you the most space for the money.
The mansard makes financial sense mainly on higher-value properties in inner London, where the larger space gain translates to a bigger value uplift.
The Bottom Line
A loft conversion remains one of the smartest investments a London homeowner can make. You avoid the crushing costs of moving, you add genuine value to your property, and you get usable space without giving up your garden.
The key is matching the conversion type to your property, your budget, and your actual needs. Start with a structural survey and an honest conversation with a specialist about what your roof can support. Get at least three quotes. And always — always — go through building regulations properly.
Your loft is sitting there doing nothing. Put it to work.
Explanation Of The Professional Fees Involved In A Loft Conversion
December 20, 2023
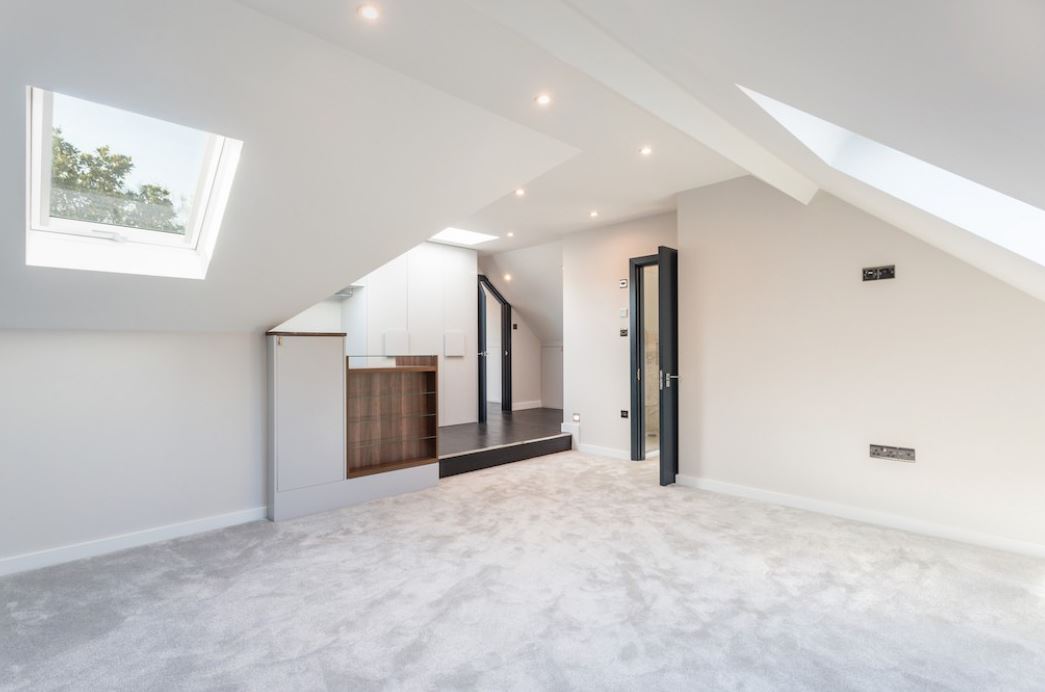
When you hire a professional to carry out the work on your loft conversion, there will be additional fees involved. These could include architectural and design fees, permits, and inspections, as well as any other specialist services required. It is important to factor these costs into your budget when considering undertaking a loft conversion.
Architectural and design fees
It is important to hire a professional architect or designer when undertaking a loft conversion. This will help ensure that the project is completed safely and meets all necessary regulations. The cost of these services can range from £500 - £5,000 depending on the size of the project.
Permits and inspections
Depending on your local regulations, you may need to apply for permits and inspections in order to proceed with a loft conversion. These can range from £50 - £500 depending on the complexity of the project.
Specialist services
Depending on the nature of your project, you may need to hire specialist services such as electrical or plumbing work. Again, these costs vary greatly and will depend on the size and complexity of the project.
Party Wall Agreement
A party wall agreement may be required if your loft conversion affects a neighbouring property. This can cost between £250 - £500 depending on the complexity of the project.
Can converting my Loft Improve my Property's Energy Efficiency?
October 30, 2023
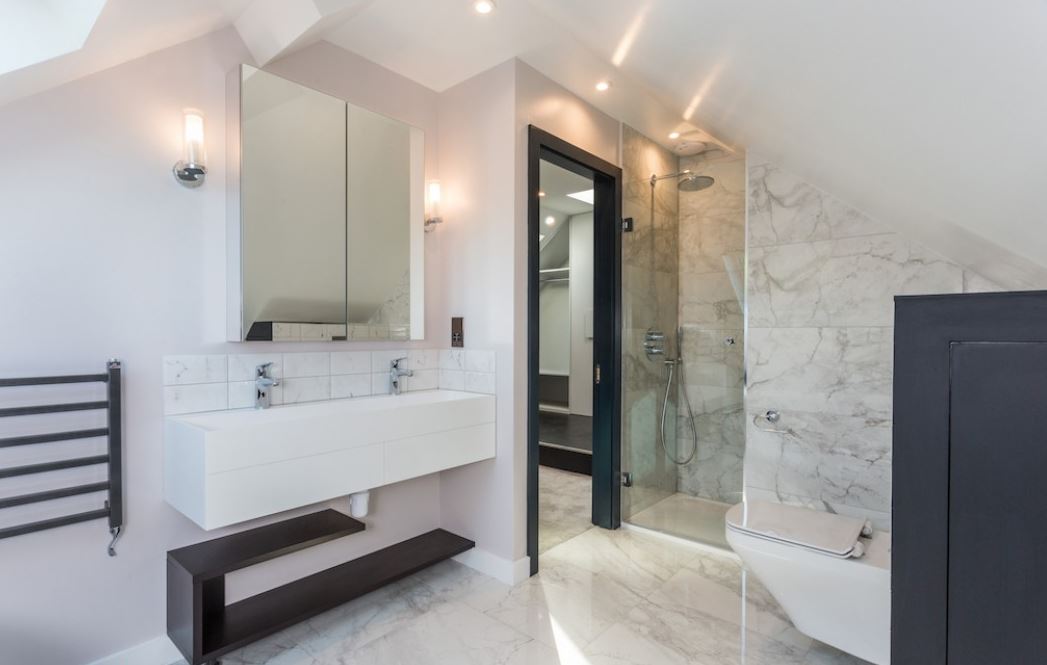
The answer is Yes! By adding a loft conversion will give you the best chance to make your house more energy efficient, as the installation of the insulation is a standard requirement. As per the building regulations, it is required, and there are two forms of insulation which either your local authority or a local building inspector will determine when they visit your house. The Cold Roof Insulation: which in total is 10cm of insulation, 7cm is made up by filling the spaces between the rafters with foam insulation. The remainder of the 3cm of slab insulation is attached to the inside of the rafters. It is important that the 5cm gap is left between the roof felt and insulation in order to allow for ventilation purposes. The Cold Roof insulation is the most straight-forward method to use. Secondly, the Warm-roof insulation, this involves foam insulation of 10cm thick to be fitted over the rafters before the capping, tile battens and tiles are added. When creating a dormer, this is the more difficult option that is usually used when the roof covering has been taken off. This 10cm thick slab of foam insulation can insulate a dormer wall, whereas a 10cm thick quilt of insulation is needed between plasterboard attached to both sides of an internal partition wall. In addition, you will require a 10cm thick insulation between your lofts floor joists. All in all, the insulation work in the loft will help bring the energy costs of your house down. Read more on how to insulate your roofs.
Heating and Ventilation in your Loft
In order to improve your property's energy efficiency, the roof space should be as airtight as possible. It is imperative to introduce controlled ventilation to avoid any risk of condensation and maintain good air quality in your loft. Ventilation in your loft can be via the means of background ventilation such as airbricks and trickle vents, and rapid ventilation via windows, and extract ventilation in wet areas, such as kitchen and bathroom. There is no requirement that the attic bathrooms must have a window given the fact the extract fan can offer rapid ventilation.
A house extension usually increase the heating requirement of the home, and for this reason your boiler might have to be upgraded, but on the other hand, a loft conversion needs little capacity because the walls will be well insulated which will improve the overall energy efficiency of the property. Heat emitters in the attic rooms can be in the form of radiatiors, underfloor heating or even electic floor heating mats in bathrooms. Please do note that if the bathroom has been added then a boiler upgrade might be needed.
Installation of a New Staircase for a Loft Conversion
September 22, 2023

The best place for the staircase to land should be in line with the roof ridge, this is make the best use of the available height above the staircase. The required minimum height above the pitch line is 2m, which can be reduced to 1.9m towards the centre, and further 1.8m to the side of the stairs. In actual sense, the exact staircase position will much depend on the layout of the floor below, and where possibly the available height can be achieved using a dormer or by adding a skylight above the staircase or, if possible, converting a hip rood end to a gable. The maximum number of steps within a straight line are sixteen, a typical installation usually only requires thirteen steps. When it comes to step size, the maximum step rise is 220m and the step depth is around 220mm, both these measurements are taken from the pitch point. The step usually has a nose that protrudes 16-22mm in front of the pitch line. By all means, the ratio size must not exceed the maximum angle of pitch requirement of 42 degrees. Winders should have a minimum requirement of atleast 50mm at the narrowest point. Finally when it comes to Balustrading, the minimum height is 900mm above the pitch line, and the spindles should have enough seperation distance that a 100mm sphere cannot pass through it.
Will I need new ceiling joists for my Loft Conversion?
Yes, in most cases, you will be required to get additional new joists that comply with the building regulations because the existing ceiling joists are very unlikely to be able to take the load of a conversion floor. You can get your structural engineer to specify the exact size and grade required. The new joists will span between the load bearing walls in the loft, and are usually raised slighly above the existing ceiling plasterwork with the use of spaceers below the joist ends. You need to ensure that this spacing must be good enough to avoud any new floor joist deflection from touching the ceiling plaster below. The new joists will run along the existing joists. In addition, above window and door openings, thicker wood is used to bridge the opening, because you do not want pressure on the existing opening lintel. RCJs which are known as Rolled steel joists, are specifically used to distribute the load, and in some installations are used to carry the ends of the new joists. If you head space is limited, then bigger thicker joists, much more closely spaced, can be specified.
What can your Loft be used for?
July 29, 2023
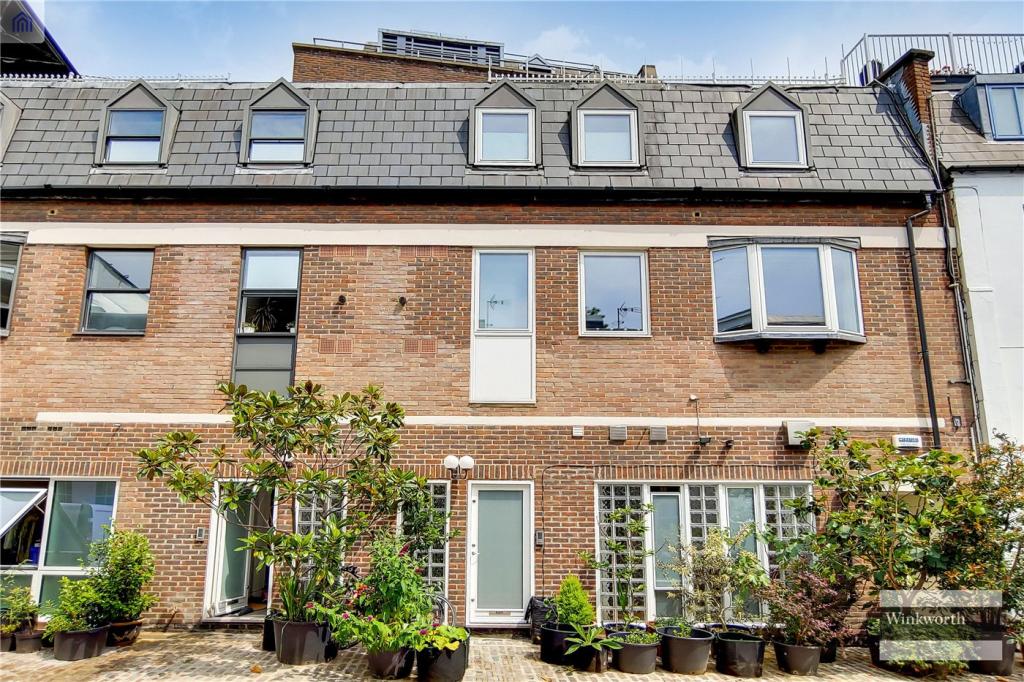
Home Office or Kids Playroom in your Loft?
Did you know the loft is one of the perfect locations for your Home office? If you do not want to add an extra bedroom in the loft but you work from home then the best alternative will be a " home office". Like all offices, you want to keep your office full of natural light and this can be done via some fantastic skylights, which will bring you natural light. In our opinion, go for the light colored blinds as they will still let some light through even when closed which will allow you to work effectively when the sun sets. The home office loft conversion will make use of the areas around the sloped ceilings in the most productive way. You can have built-in storage on the sides and your desk close to the skylight. On the other side, lofts make great kids bedrooms, playrooms as the extra space are just perfect for kids and teens.
Dresser / Walk-in Wardrobe in your Loft
A loft conversion can give you lots of space and ideas that you can implement. if you always wanted a walk-in Wardrobe but space was little around your room then why not have your very own walk-in wardrobe. We can make use of the space in the eaves with built-in storage which will solve the problem of the awkward sloping roof. You can add a large skylight above your dresser or walk-in wardrobe positioning it in such a way that it gives you the most natural light. We absolutely love the concept of having a master bedroom in the loft with this walk-in wardrobe concept. For those people who do not have space in the loft for a dresser or walk-in wardrobe, they can opt for an open wardrobe or clothes rack that will dramatically reduce the amount of space required.
How to utilise the Eaves Space in your Loft?
There are quite a few difficult spaces in the Loft conversion, not more so than the eaves. If you are designing a bathroom for the loft and want to find a solution to make use of the awkward space, do consider implementing a handy recess into the eaves. This will make the most of the space which otherwise would have been wasted. The eaves area is also best suited for building the toilet and bath. As you might be aware by now that, by undertaking loft conversion, we need to embrace the awkward spaces that come with it and utilise them in a creative and practical way. For example, add shelves or a desk into that corner which seems difficult, add cupboards custom-made to match the slanted roof, which will give you a brilliant storage solution, and at the same time it will maximise your internal space.
Additional Features and Their Associated Costs
When it comes to loft conversions, there are many additional features that can be added to create an even more luxurious and functional space. Some of these features include Skylights, Velux windows, en-suite bathrooms, kitchenettes, and home offices. These features can add significantly to the overall cost of a loft conversion but they can also add tremendous value and functionality as well.
Planning And Budgeting Tips For Getting The Most Out Of Your Project
When it comes to planning and budgeting for a loft conversion, the key is to plan ahead. Start by researching different types of conversions and get an estimate on the cost associated with each one. Additionally, look into ways you can save money on materials and labor costs before starting the project. Finally, make sure to create a detailed budget and plan for the project before beginning any work. This will help ensure that you get the most out of your project.
Importance of Lighting in Lofts
June 20, 2023
Skylights/Rooflights
The ideal method is to use skylights/rooflights that follow the pitch line of the roof. This is fitted by removing the tiles and battens where the skylight will be fitted. The skylight frame is fitted and the surrounding tiled to a good finish. Such type of window is the most cost-effective and no permission is required to install it. You need to take time out to have a think about how you want your windows in your Loft conversion. Think about the size and where do you want to position them as this is an important factor that can determine how much light you get into your loft. The general rule states that window glazing should make up at least 20% of the loft area, that is if you are very keen on natural light.
Dormer Windows
Dormer windows add the much needed space to your loft conversion, in addition to giving natural light. Dormer windows are most effective when the pitch angle is high, as this way the internal floor area can be increased. The mansard conversion type will give the most converted roof space because it projects the maximum available head space, this providing a bigger usable internal floor area. The hip to gable conversion will also have a similar effect.
Do you know that the position of the windows will help us decide what sort of roof shape to go for?
For instance, a long, shallow room will benefit from windows that are equally spaced along its length, whereas a narrow deeper room can benefit from just one big window. As all rooms vary in size and shape, you have to take time to consider what type of window will be most apt for your loft conversion. Grant Sneddon, who is a daylight window expert at Velux says " A top-hung alternative whereas the window is just within an arm's reach gives a better view and more headspace too. He further adds that the center-pivot window, that is operated by a rod or electronically is best if the window is out of reach. All in all, before you start bringing your loft to life, take time about to decide about what window you want and where do you want to place it.
How Much Does a Loft Conversion in London Cost?
April 17, 2023
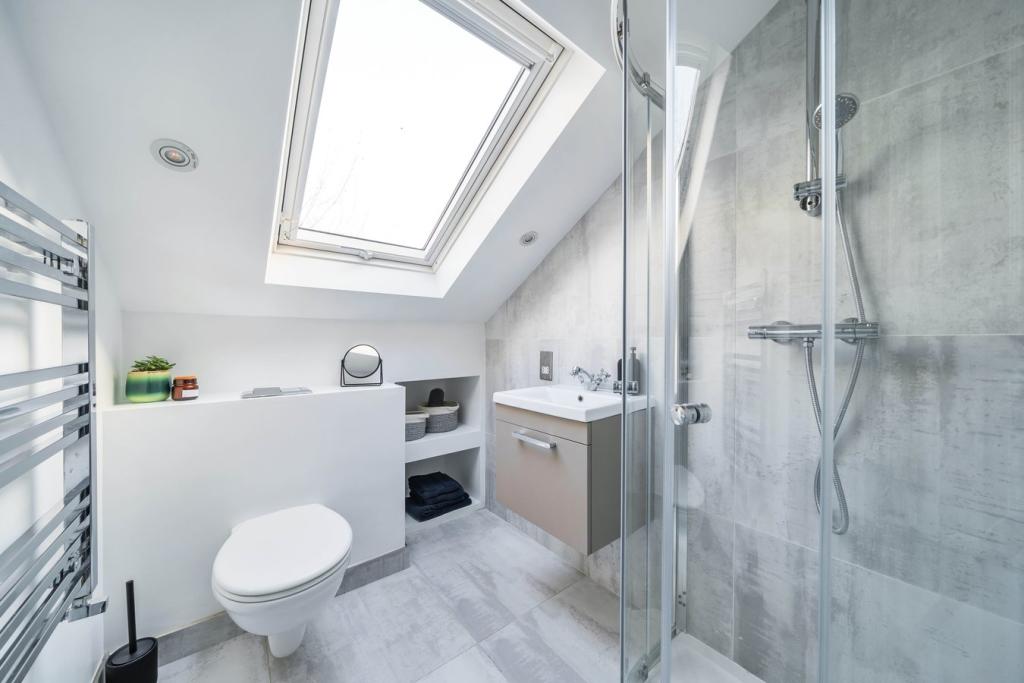
The cost of a loft conversion in London can vary widely depending on several factors, such as the type of conversion, the size of the space, and the materials used. Generally, the cost of a loft conversion in London can range from £20,000 to £50,000, and sometimes more for larger or more complex projects.
It's important to note that loft conversion costs can be higher in London due to higher labour and material costs compared to other parts of the UK. Additionally, the cost may be affected by the location of the property, accessibility, and whether any additional work, such as plumbing or electrical work, is required.
To get a more accurate estimate of the cost of your loft conversion project in London, it's best to consult with a professional loft conversion company. They can provide you with a detailed breakdown of costs based on your specific project requirements and provide you with a more accurate estimate.
How do you calculate the cost?
Calculating the cost of a loft conversion can be challenging, as it can depend on many different factors. Here are some of the key factors to consider when estimating the cost of a loft conversion:
Type of loft conversion: Different types of loft conversions have different costs. For example, a dormer loft conversion may be less expensive than a mansard loft conversion.
Size of the loft: The larger the loft space, the higher the cost is likely to be. However, larger spaces may also be able to accommodate more features, such as an en-suite bathroom or additional storage.
Structural work required: If structural work is required to support the loft conversion, such as adding steel beams, this will add to the cost.
Materials used: The cost of materials used for the loft conversion can vary depending on the quality and type of materials chosen.
Electrical and plumbing work: If the loft conversion includes adding electrical or plumbing work, this will add to the cost.
Labour costs: Labour costs will depend on the complexity of the project and the hourly rate of the contractors.
To get an accurate estimate of the cost of a loft conversion, it's recommended to get quotes from several reputable loft conversion companies. They can assess your specific requirements and provide a detailed breakdown of costs, including materials, labour, and any additional expenses such as planning permission or building regulations. It's important to keep in mind that loft conversion costs can vary, so it's best to get multiple quotes to compare prices and ensure you are getting a fair price.
How Your Location Can Change The Cost Of Your Loft Conversion
The average cost for a loft conversion will vary depending on where you live. Generally, homeowners in major cities and densely populated areas are likely to pay more due to the increased demand for space. Additionally, properties outside major cities may have access to cheaper labor costs and materials as well as more flexible planning permission regulations.
Factors That May Increase The Cost Of A Loft Conversion
Whenever a loft conversion project is not a standard one, costs can increase accordingly. The most common reasons why the budget can be higher than the average are:
Unexpected structural issues that need to be fixed
These can range from the removal of existing structures or having to reinforce the floorings and walls.
Additional work required
This may include extra electrical, plumbing, or insulation.
Unforeseen complications during construction
These could range from access issues to delays due to bad weather.
Having an extra level added in the loft conversion
This can be a great way to add extra space, but it also adds to the cost.
Higher quality materials than expected
If you decide to use more expensive materials than originally planned, this too can add to the cost.
The Legal Side of Loft Conversions: What You Need to Know Before Starting Your Project
May 5, 2023
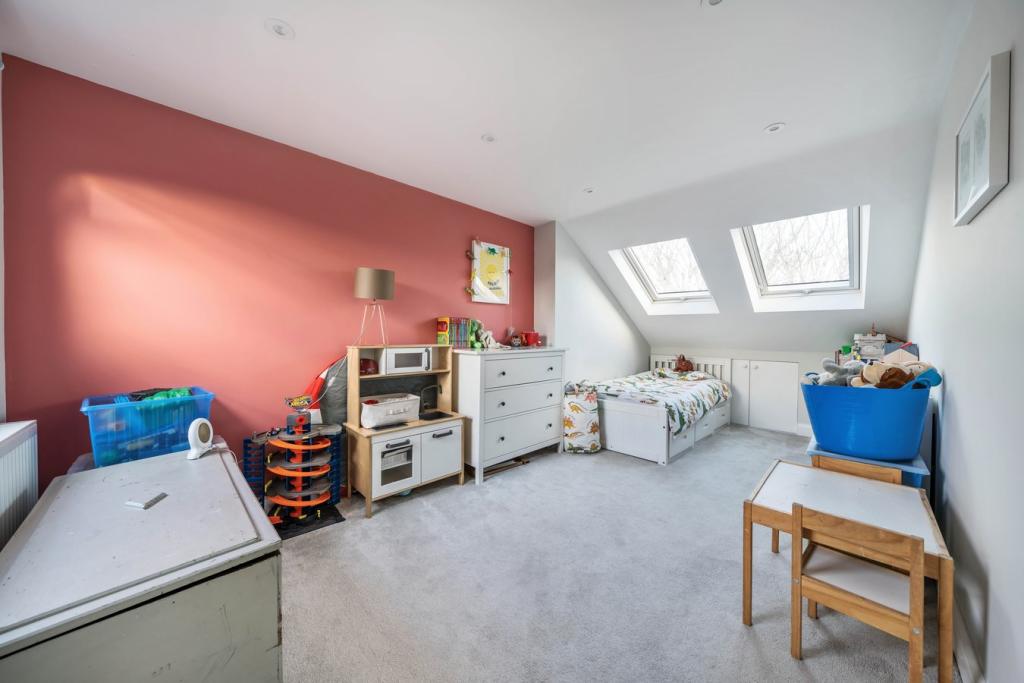
LEGAL TERMINOLOGIES IN LOFT CONVERSIONS
Building Regulations
These are a set of standards and guidelines that dictate the minimum requirements for the construction and alteration of buildings in order to ensure the health, safety, and welfare of people who use them.
Party Wall Agreements
Legal agreements made between property owners that govern the rights and responsibilities associated with shared walls or boundaries between their respective properties.
Planning Permission
A formal process of obtaining approval from local authorities for proposed developments or changes to existing buildings or land use, ensuring that they comply with local planning policies and regulations.
Permitted Development Rights
A set of planning rules that allow certain types of building work and changes of use to be carried out without the need for planning permission, subject to certain restrictions and conditions.
PLANNING PERMISSION FOR LOFT CONVERSIONS
When considering a loft conversion project, it is important to understand whether planning permission is required. Planning permission is typically required for loft conversions that involve significant alterations to the roof space or changes to the overall appearance of the property, particularly in conservation areas or listed buildings. The size and location of the property can also be factors in determining whether planning permission is required. It is important to consult with your local planning authority to determine the specific requirements in your area. If planning permission is required, the process involves submitting an application and following the necessary steps to ensure compliance with all relevant regulations. This can include submitting detailed plans and working with professionals to ensure that the project meets all building codes and standards.
By understanding the requirements for planning permission and following the necessary process, you can ensure that your loft conversion project is successful and compliant with all necessary regulations. Additionally, it is important to consider any restrictions or limitations that may apply to the property. This could include factors such as the height of the roof or the amount of available space in the loft. Working with a professional architect or builder can help to identify any potential limitations and ensure that the project is feasible. It is also important to consider the potential impact of the loft conversion on the surrounding area, including issues such as noise, privacy, and access. When applying for planning permission, it may be necessary to address any concerns raised by neighbors or other stakeholders. Ultimately, by taking a thorough and careful approach to the planning permission process, you can ensure that your loft conversion project is successful and meets all necessary requirements.
COMPLIANCE WITH BUILDING REGULATIONS
When undertaking a loft conversion project, it is important to understand the role of building regulations and ensure that your project complies with all relevant standards. Building regulations are in place to ensure that all construction work meets minimum standards for safety, health, and environmental protection. Identifying the specific regulations that are relevant to your loft conversion project is essential, as these may vary depending on the type of work being carried out.
Relevant regulations may include those related to structural work, fire safety, and insulation. For example, regulations related to structural stability ensure that buildings are constructed to withstand the loads they will be subjected to, including the weight of the building itself, occupants, and furniture. Fire safety regulations require that buildings have adequate fire detection and alarm systems, emergency lighting, and escape routes, to ensure that occupants can safely evacuate in the event of a fire.
Energy efficiency regulations set minimum standards for insulation, heating, and lighting, helping to reduce energy consumption and carbon emissions. Ventilation and drainage regulations ensure that buildings have adequate ventilation and water management systems, preventing the buildup of moisture and mold, which can have negative impacts on health. Overall, building regulations are an essential component of the construction process, ensuring that buildings are safe, healthy, and sustainable. Compliance with building regulations is mandatory, and failure to comply can result in fines, legal action, or even the demolition of the building. By taking a careful and thorough approach to building regulations, you can ensure that your loft conversion project is safe, compliant, and of high quality.
DEALING WITH PARTY WALL AGREEMENTS
When planning a loft conversion project, it is important to understand the role of party wall agreements and when they are required. Party wall agreements are legal agreements between neighbors that govern work that is carried out on or adjacent to a shared wall or boundary. They are designed to protect the interests of both parties and prevent disputes from arising. If your loft conversion project involves work that affects a shared wall or boundary, you may need to negotiate a party wall agreement with your neighbor. This may involve providing notice of the proposed work, giving your neighbor the opportunity to review and comment on the plans, and agreeing on any necessary safeguards to protect their property.
Negotiating a party wall agreement can be a complex process, and it is important to work with a qualified and experienced party wall surveyor to ensure that the agreement is fair, legal, and binding. It is also important to understand the rights and responsibilities of both you and your neighbor under the party wall agreement. This may include provisions for access to the shared wall, compensation for any damage that occurs during the work, and dispute resolution mechanisms. By understanding the role of party wall agreements and negotiating them in good faith, you can ensure that your loft conversion project proceeds smoothly and without dispute, while also protecting the interests of your neighbor.
INSURANCE AND LIABILITY
When embarking on a loft conversion project, it is important to understand the insurance requirements involved. Depending on the scope of the project and the specific insurance coverage you already have in place, you may need to obtain additional insurance to protect yourself and your property during the construction process. It is also critical to ensure that the loft conversion company you hire has adequate insurance coverage to protect against any unforeseen accidents or liability issues that may arise during the project. It is also important to understand the legal implications of accidents or damage that may occur during the project and to have appropriate protection in place to mitigate any potential losses. When it comes to insurance requirements for a loft conversion, there are a few key factors to consider. Here are some potential insurance requirements for a loft conversion project:
Building Insurance
Your building insurance policy may not cover any damage caused during a loft conversion project, especially if the work is considered structural or if the scope of the project is significant. You may need to purchase additional building insurance coverage or update your current policy to ensure that it covers any new work done on the property.
Accidental Damage Insurance
In addition to building insurance, you may also want to consider purchasing accidental damage insurance. This can provide coverage for damage to your property that occurs during the loft conversion project, such as accidental damage to walls, floors, or other parts of the property.
Contractor Insurance
It's important to work with a reputable loft conversion company that has the necessary insurance coverage to protect against liability and any unforeseen circumstances that may arise during the project. They should have a Public Liability insurance policy that will cover any damages caused by their work.
Warranty
Check with your contractor if their work is covered by a warranty. Some contractors provide a warranty for their work, which can provide peace of mind and additional protection in case of any problems that arise after the project is completed.
Personal Liability Insurance
Personal Liability insurance can cover you in case of any accidents or incidents that occur during the project. It can cover you for any injuries suffered by workers on your property or visitors, in addition to covering any damages that might result from the work being done
How a Loft Conversion can transform your home
February 22, 2023
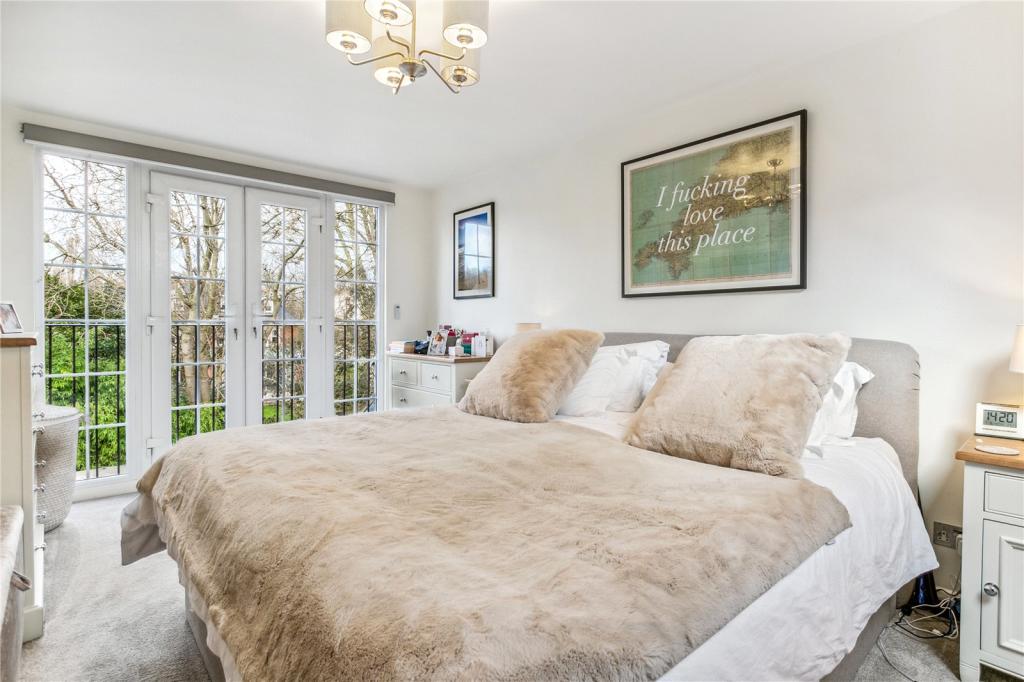
PLANNING YOUR LOFT CONVERSION FOR MAXIMUM SPACE
When planning a loft conversion, it's important to assess your home's existing layout and identify areas where additional space could be added. A loft conversion can provide valuable additional living space, but it's essential to plan for maximum use of that space. For example, if your loft will be built on your roof with slanted pitches, rather than leaving these awkward angles as dead space, it could be better to convert it into storage, add plugs, or customize your wiring to have unwanted pieces and wires hidden into these unnoticed spaces. Moreover, making the most of vertical space is key. Incorporating smart storage solutions, loft beds, and built-in shelving can help maximize your loft conversion's potential. By carefully considering the layout and function of your new space, you can create a loft conversion that not only adds valuable living space but also enhances the overall functionality and flow of your home. In addition to maximizing your loft’s space, it is also important to consider the size of the loft you will make use of. Pushing for a bedroom with an en-suite bathroom in a small loft space can technically give you two rooms in one space, but it may be too cramped, making it challenging to fully utilize. This logic goes both ways. If you’re lucky enough to have a bigger space for your loft conversion, rather than just having a bedroom, if there seems to be awkward or blank space, it can be better to convert it into something as simple as a built-in vanity or closet for wardrobe space. By understanding your space, you’re able to better maximize and make your loft truly functional and practical.
DESIGNING YOUR LOFT CONVERSION FOR MAXIMUM VALUE
Identifying features and finishes that will add the most value to your home is an important consideration when planning your loft conversion. Choosing finishes and features that are both aesthetically pleasing and high-quality can help increase the overall value of your home. En-suite bathrooms are a popular feature that can add value and convenience to your home, while high-end flooring and fixtures can give your loft conversion a luxurious feel. Juliet Balconies and Skylights are also good options to add to further enhance your loft. When selecting features, finishes, and materials for your loft conversion, it's important to choose options that are both stylish and functional, while also complementing your personal tastes and preferences. By incorporating these elements into your design, you can create a loft conversion that is both beautiful and practical. Furthermore, understanding your loft layout is a great way to fully utilize your space. An open plan layout can be a great option for a loft conversion, especially if the space is large enough to accommodate multiple functions. An open plan design allows for flexibility and can make the loft feel more spacious and airy. In an open plan loft conversion, the space can be divided into distinct zones for different functions, such as a living area, dining area, and home office. This can be achieved through the use of furniture placement, area rugs, and lighting. It is important to consider the flow of the space and ensure that there is enough room for each zone to function comfortably.
EVALUATING LOFT CONVERSION LAYOUT
When designing a loft conversion, it is important to consider not only your current needs, but also the future. Factors such as potential family growth, working from home, or rental income opportunities should be taken into account to ensure that the space remains functional and useful in the long term. One way to future-proof your loft conversion is to incorporate multi-functional furniture and features. For example, a built-in desk or shelving unit can serve as both a workspace and storage solution, while a sofa bed or fold-out table can provide extra sleeping or dining space when needed. It is also important to think about the layout of the space and how it can be adapted for different uses. For example, a bedroom could be converted into a home office or a playroom as your family's needs change over time. Finally, it is worth considering the potential for rental income, either through a self-contained unit or by renting out a spare bedroom. By designing your loft conversion with the future in mind and incorporating multi-functional features, you can make the most of your new space for years to come. With this in mind, before embarking on your loft conversion project, it is important to have a clear understanding of the costs and benefits involved. The cost of a loft conversion can vary widely depending on factors such as the size and complexity of the project, the materials used, and the location of the property. It is important to obtain detailed quotes from reputable contractors and factor in additional costs such as planning permission, building regulations, and professional fees. However, a loft conversion can also provide a number of benefits, including increased living space, improved functionality, and added value to the property. It can also be a more cost-effective option than moving to a larger home, especially in areas where property prices are high. In addition, a well-designed loft conversion can help to reduce energy bills by improving insulation and ventilation. Ultimately, the decision to undertake a loft conversion should be based on a thorough assessment of the costs and benefits involved, as well as your own personal circumstances and goals
CALCULATING POTENTIAL COSTS AND BENEFITS OF A LOFT CONVERSION
Developing a realistic budget for a loft conversion project is crucial to avoid overspending and ensure that the project is completed within your financial means. It is important to take into account all potential costs, including materials, labor, professional fees, and any additional expenses such as planning permission or building regulations. Researching prices and obtaining quotes from reputable contractors can help you develop a more accurate budget. It is also important to set aside a contingency budget of around 10-20% of the total project cost to cover unexpected expenses that may arise during the project. This can help to prevent delays and ensure that the project can be completed smoothly. It is important to be realistic about your budget and avoid cutting corners or sacrificing quality to save money. A well-planned and executed loft conversion can add value to your property and provide a comfortable and functional living space for you and your family.
FINDING THE RIGHT LOFT CONVERSION COMPANY FOR MAXIMUM QUALITY AND SATISFACTION
One key factor to consider when evaluating potential loft conversion companies is their experience and qualifications. Look for companies that specialize in loft conversions and have a track record of successful projects. It is also important to check their qualifications and certifications, such as membership in a professional organization or accreditation from a regulatory body. Additionally, customer reviews can provide valuable insights into the company's reputation and level of customer service. In relation to this, it is important to work closely with your chosen company to ensure that your loft conversion is completed to your satisfaction. This involves monitoring progress and addressing any issues or concerns that may arise during the project. Regular communication with the company can help to ensure that any problems are addressed promptly and that the project stays on track. It is also important to establish clear timelines and milestones to ensure that the project is completed on time. Finally, it is important to monitor the quality of workmanship throughout the project and ensure that it meets your expectations. This may involve regular site visits or inspections to ensure that the work is progressing according to plan and that the finished product meets your requirements. By working with a reputable and reliable company and monitoring progress throughout the project, you can ensure that your loft conversion is a success and provides a comfortable and functional living space for you and your famil
Guide to Converting your Loft in 2023
February 8, 2023
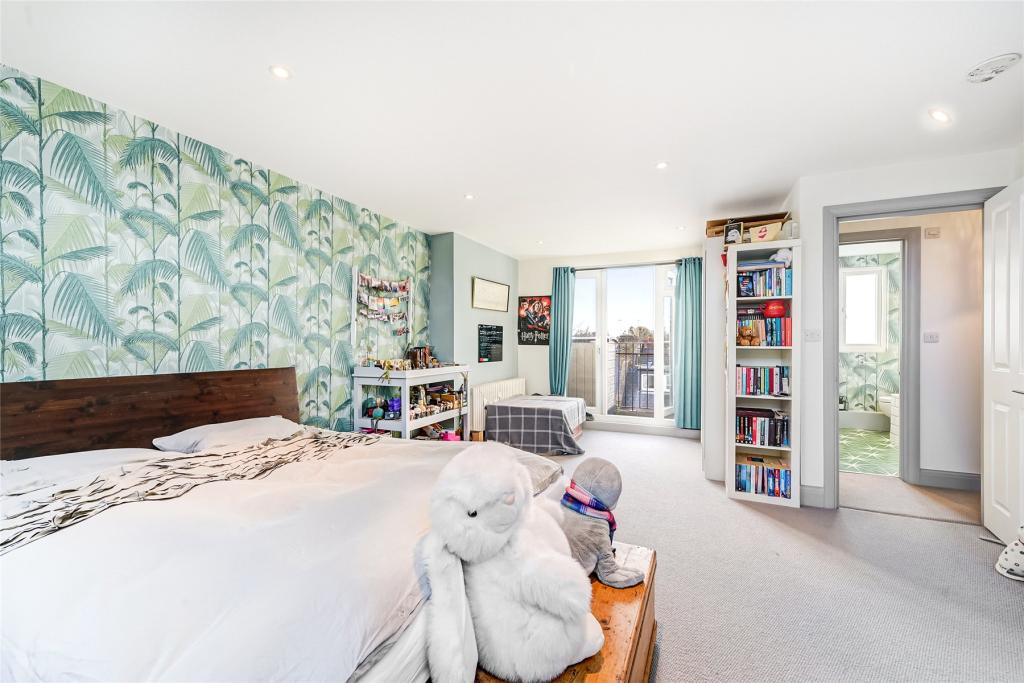
Loft Conversions are now becoming a popular option among homeowners that are looking to upgrade and spruce up their homes without breaking the bank. A loft conversion involves transforming an unused attic space into a functional living area in your home. This process includes adding necessary features such as stairs, windows, insulation, and electrical and plumbing systems to make the space inviting and livable. The purpose of a loft conversion is to increase the overall living space of a property and enhance its value. Loft conversions can vary in complexity and can range from simple storage spaces to fully finished rooms like bedrooms, bathrooms, home offices, or playrooms. Before pushing through with this undertaking, there are several things that should be laid out in order to fully understand the process and advantages of having a loft conversion done in your home.
BENEFITS OF A LOFT CONVERSION
A loft conversion provides numerous benefits to homeowners. Firstly, it increases the overall living space in the property, allowing for an additional room that is fully customizable. Typically, homeowners used to only convert their lofts into bedrooms or bathrooms, but over the years, people have gotten more creative with how they transform their space. Your loft can even become a music room or entertainment area! Surely, it will become a space that will address your needs and mirror your lifestyle. Secondly, a loft conversion is known to add value to the property, making it a cost-effective alternative to moving to a larger home. It increases the property’s square footage and value by 20%. Aside from adding value, a loft conversion can also improve the energy efficiency of the property, thanks to the inclusion of insulation and windows in the conversion process. The high level of customization offered by loft conversions allows homeowners to create a space that meets their specific needs and style preferences.
IS MY HOME SUITABLE FOR A LOFT CONVERSION?
Before proceeding with a loft conversion, your home will be assessed on a number of things. First, it is important to figure out if you have enough room. While a loft conversion will not take away any outdoor space, your loft must be accessible. This will entail building a new stairwell and installing a new structure on the roof of your home. It is important that your home can accommodate not only a new stairwell that will be built, but access points for the construction itself. Secondly, it is important to check for any planning restrictions in your area. This will mostly apply to those who live in conserved or private areas. Typically, homes in these areas prove to be challenging to have a loft conversion done due to regulations set in the area. Lastly, one of the biggest factors that will determine if your home is suitable for a loft conversion is the main structure of your property, and more importantly, your roof. It is important that experts study and inspect the existing beams and structure of your home to check if it can handle the additional weight. In relation to this, the pitch and build of your roof will also be assessed to see how a new structure can be built.
WHAT ARE MY OPTIONS?
A loft conversion is very versatile and can adjust to just about any build and style of home. It will surely match the proportions and measurements of your property to make it look like a seamless addition to your home. There are several types of loft conversions, each with different costs. The following are the most common types:
1. Roof light Conversion: This type of conversion involves adding skylights to the roof to bring in natural light. The estimated cost of this type of loft conversion ranges from £30,000 - £35,000.
2. Dormer Conversion: This type of conversion involves adding a new vertical extension to the roof, creating additional headroom and floor space. The most common type with different varieties like the side dormer or two-window dormer which can cost anywhere from £35,000 - £50,000.
3. Mansard Conversion: This type of conversion involves creating a flat roof extension, with the sides of the roof being built up to the maximum height allowed by planning regulations. This type of loft conversion can cost anywhere between £50,000 - £75,000
4. Hip to Gable Conversion: This type of conversion involves changing the shape of a sloping roof to a gable end, increasing the floor space. A Hip to Gable Loft Conversion typically costs around £35,000 - £45,000
To give you a better picture of what loft conversion can match your home type, here are a few examples of loft conversion styles that match different types of homes:
- Detached / Semi-Detached House: Double Dormers or an L Shaped Loft Conversion would utilize the space the best. This type of home will most likely need planning permission and party wall agreements. Aside from a Dormer, a Hip to Gable is also great for Detached houses with hipped roofs. Detached homes can also accommodate a Roof light or Mansard, but it’s best to have a dormer installed for space maximization.
- End of Terrace House: Since most Terraced homes have a hipped roof, it’s best to do a Hip to Gable on a Terraced home since it can be converted into a gable roof. It will give the best return on space. However, a roof light, dormer, and mansard are also suitable. It is important to note, for dormers specifically, that your space might be limited when you decide to have this built on a Terraced home.
- Mid Terrace House: A Mid Terrace House is great for a loft conversion. It pairs well with either a Dormer or Mansard, but cannot have a Hip to Gable loft conversion done.
WHAT ARE THE BUILDING REQUIREMENTS IN A LOFT CONVERSION?
Height Requirement
The minimum height requirement for a loft conversion is typically 2.2 meters (7 feet 2 inches) to stand up in the space. This is measured from the highest point of the floor to the ridge of the roof. If the height of the loft is less than 2.2 meters, it may still be possible to convert the space, but it will likely require raising your roof, if your building regulations permit you to do so, or lowering your ceiling to accommodate height space for your loft.
Insulation & Fire Safety
Fire safety features are important factors in a loft conversion. This ensures the safety of your loft before, during, and after the build. As a precaution, fire-resistant materials, like gypsum plasterboard for walls and ceilings, are recommended to be used to prevent the spread of fire. In addition to this, smoke detectors are a good option and a must to add to your loft, along with fire-rated doors and emergency lighting. Aside from that, fire-resistant glazing your windows are also an option that will help prevent the spread of fire. These are good measures to take and add to your loft for additional safety. Furthermore, insulation is also important as a start. This helps regulate the temperature in your room, which is essential. It can prevent your loft from catching smoke and fire, especially during hotter seasons. Full insulation is essential, which requires you to properly insulate your roof, walls, floor, and ceiling. There are several types of loft insulation, including:
- Mineral wool: This type of insulation is made from recycled glass or rock and is known for its excellent thermal and acoustic insulation properties.
- Fiberglass: This type of insulation is made from glass fibers and is commonly used in loft insulation due to its affordability and ease of installation.
- Foam: This type of insulation is made from polyurethane or polystyrene and provides excellent thermal insulation properties.
- Sheep's wool: This type of insulation is made from natural wool and is known for its high thermal and acoustic insulation properties, as well as being environmentally friendly.
Generally, the recommended depth of loft insulation is 270mm, but the exact depth required may vary based on the type of insulation used and local building regulations.
Party Wall Agreements
A Party Wall Agreement is necessary if the loft conversion project involves work on a shared or party wall that separates your property from your neighbor's. The party wall agreement details the terms and conditions of the works being done, including the proposed start and end dates, the scope of the work, and any specific requirements to protect the neighboring property. It also outlines the rights and duties of all parties involved, such as access to the property and compensation for any damages caused. To obtain a party wall agreement, you need to serve a party wall notice to the adjacent property owner and allow them time to respond. If a mutually acceptable agreement cannot be reached, a surveyor may be needed to resolve any disputes. It is important to note that Party Wall Agreements may involve local authorities. With this, rules and regulations regarding party wall agreements vary by region or area.
WHAT ARE THE MAIN COMPONENTS OF A LOFT CONVERSION?
A loft is made possible with careful construction and placement of different elements to create a new space that is functional and practical. These include:
- Roof structure: The existing roof structure will be assessed to determine if it's suitable for conversion, and if necessary, reinforced to accommodate the additional weight and usage of the converted space.
- Staircase: A staircase is required to access the converted loft space, and it can be installed in a variety of styles to match the existing decor. A few common options are having a straight or spiral staircase installed to connect your loft to your home.
- Flooring: The flooring of the loft will be reinforced to ensure it can support the additional weight and usage, and finished with appropriate flooring materials such as carpet, hardwood, or laminate.
- Windows: Windows is usually installed in the roof to provide natural light and ventilation to the loft space. - Electrical and plumbing: Electrical and plumbing systems will be installed to provide power, lighting, and heating to the loft space, and to ensure it has an adequate water supply. This makes your loft fully functional and livable, rather than just mere storage or attic space.
- Insulation: Loft insulation is installed to ensure the converted space is energy-efficient and comfortable to use.
- Structural support: Structural support such as steel beams or rolled steel joists may be required to ensure the stability and safety of the conversion.
- Interior finishes: The interior of the loft will be finished with appropriate materials and fixtures, such as walls, ceilings, doors, and lighting fixtures, to match the existing decor and create a functional living space.
Do I need Planning Permission for a Loft Conversion?
January 1, 2023
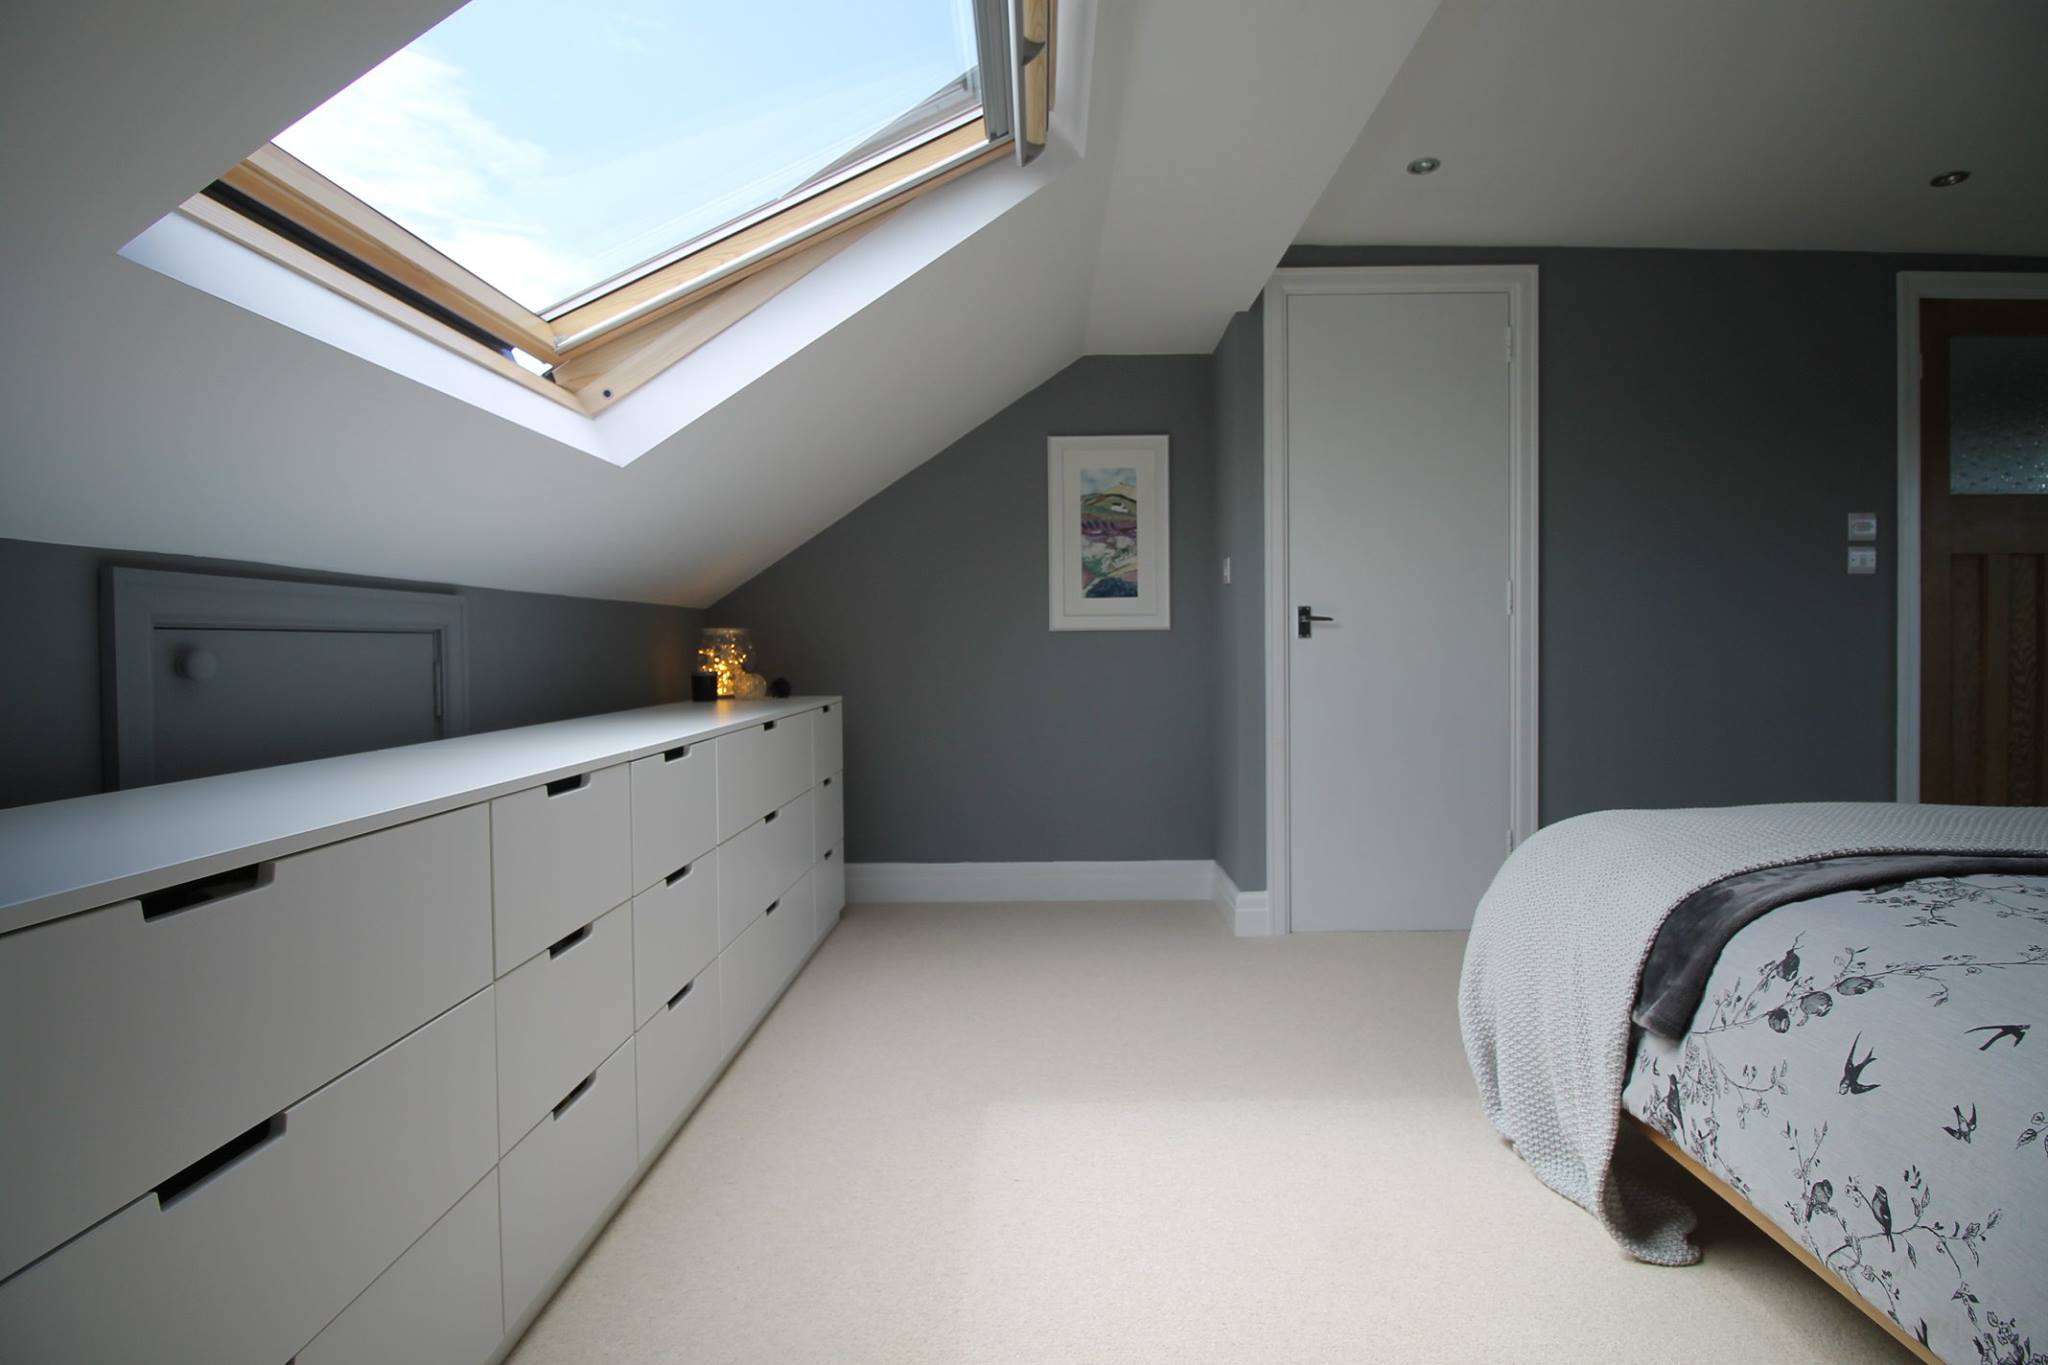
Whether or not you need planning permission for a loft conversion depends on the type of conversion and where it is being carried out. If you are carrying out a simple loft conversion without a roof extension, you will probably not need to apply for planning permission. However, if you are considering extending the roof or converting the space into an additional room, you should apply for planning permission.
Getting planning permission
Getting planning permission for a loft conversion is not always easy. There are a number of rules that must be followed. It can take months to obtain approval. This is especially important if you are planning to sell your home in the future.
If you're unsure about whether or not you need planning permission for your loft conversion, you should ask experts from Loft Conversion Company. You should also check with your neighbors, who may be able to give you more information. You can find more information about permitted development rights at the Planning Portal, or in government guidance.
Most loft conversions are considered permitted development, but there are certain restrictions that apply. For example, a loft conversion can't extend beyond the highest point of the roof, nor can it have more space than the volume allowance for the building. In addition, you can't have raised platforms, balconies or verandahs.
If you need planning permission for your loft conversion, it can take up to eight weeks. You can apply online via the ePlanning website. The process can also be speeded up by using the building notice application. This allows you to avoid detailed drawings, and instead focus on getting an accurate quote for the work.
In most cases, a loft conversion is considered permitted development, but you may need to obtain planning permission if you want to enlarge the roof space. You may also be required to submit a party wall notice, or make a party wall agreement with your neighbours.
You can also get your plans approved if you have listed buildings or if you're in a conservation area.
Can My Neighbour Object to My Loft Conversion?
December 5, 2022
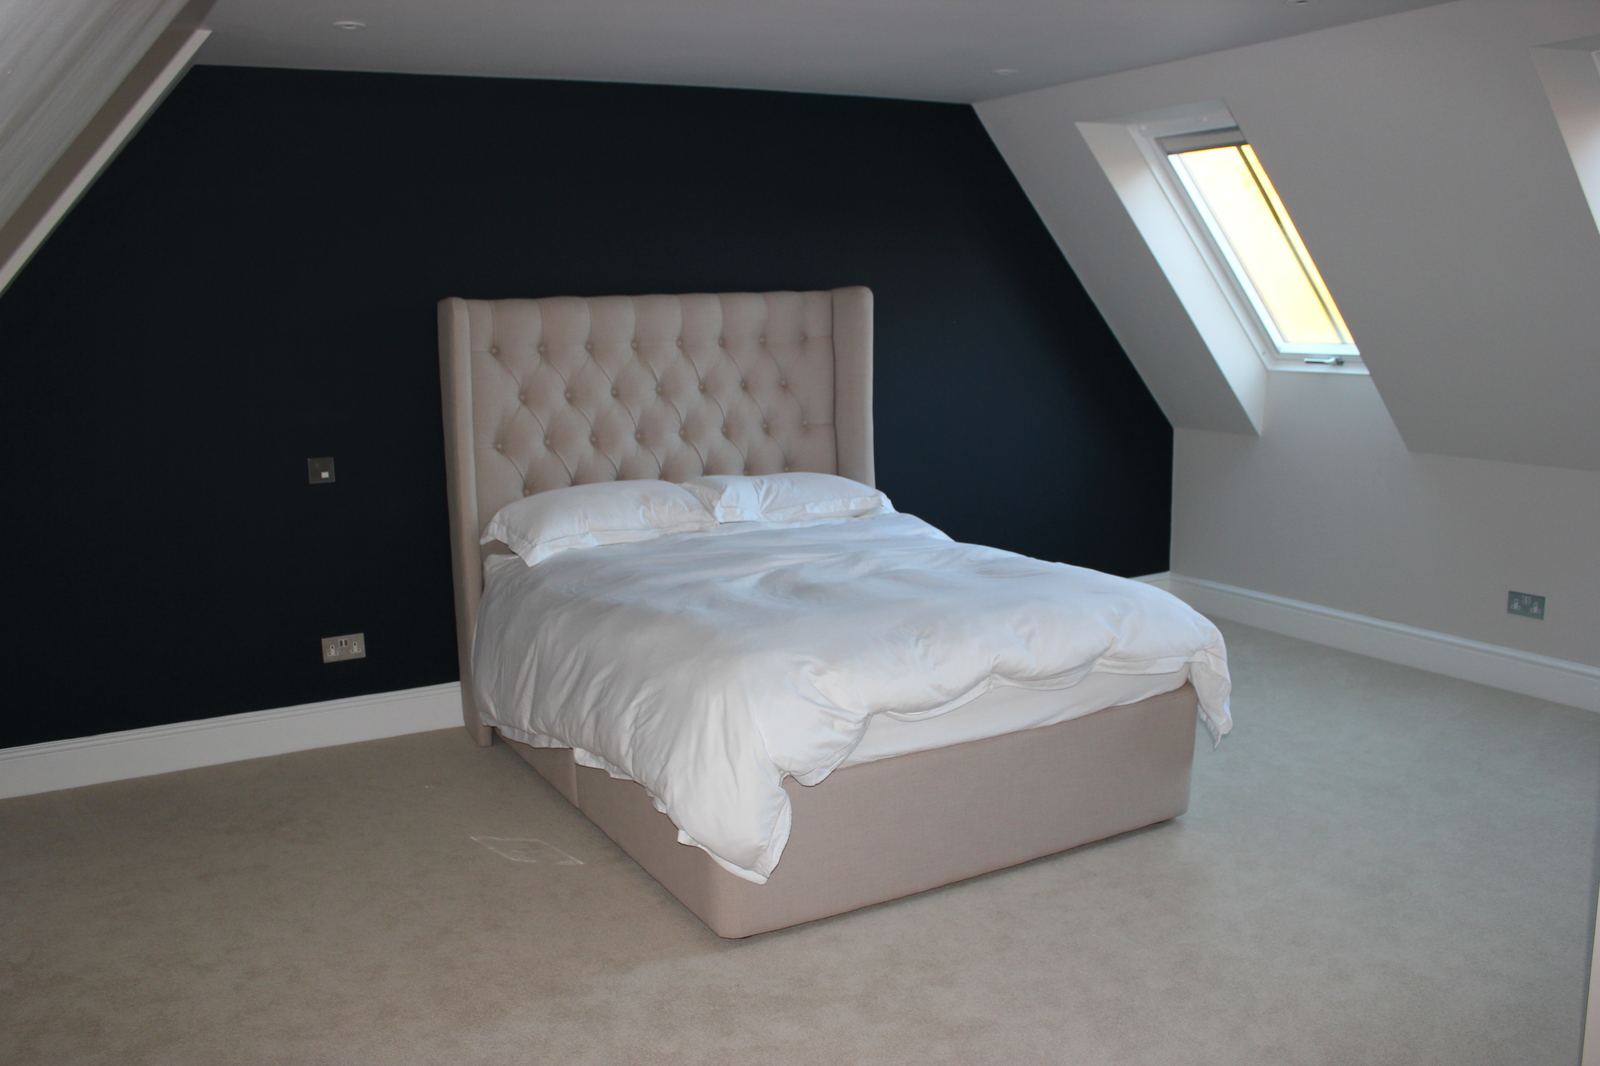
Having a loft conversion is a great way to add extra living space to your home. However, there are some things you should know before you begin. For instance, you should check with your neighbour to see if they have any objections. If they have objections, you can try to work with them to find a solution that will work for both parties.
Party wall agreement
Whether you're a homeowner looking to build a loft conversion or you're a landlord looking to convert a spare room into a bedroom, a party wall agreement can protect your interests and the interests of your neighbours. However, you'll need to follow the correct procedures.
The best way to understand the requirements is to read the Party Wall Act. It applies to any building work that will affect a shared wall. In short, a Party Wall Agreement is required for all work that will affect the shared wall of two properties. It provides a framework for resolving disputes and gives you the chance to avoid disputes in the future.
The Party Wall Act requires you to serve a notice to your neighbours before you begin any work. The notice should give your neighbours the chance to object. Depending on the type of work you are doing, you may need to serve more than one notice. You should also give your neighbours the chance to see and discuss your plans before you actually begin.
If your neighbours agree to the work, you can begin. However, if they object, you may need to hire a surveyor from the loft conversions company We can help you reach an agreement and can also provide a professional opinion on the best way to proceed.
In the event that your neighbours object to your work, you can proceed to mediation. This can be a more efficient and cost-effective way to settle dispute. If you cannot resolve the dispute with mediation, you can consider taking legal action. This may be a costly option.
The Party Wall Act also requires you to serve a notice to your neighbour when you intend to demolish part of the shared wall. If you do not, your neighbour may take legal action. While you're doing this, it's a good idea to take photos of the party wall and the site you're working on to show your neighbours what you're doing.
The Party Wall Act also has a number of other requirements. In addition to the usual notice requirements, you must also serve the same notice to your neighbours two months before you begin your work.
Insulation
Getting a loft conversion can make your home more functional. But there are certain rules to follow to make sure your conversion is successful. You may want to discuss your plans with your neighbours to avoid having any problems.
Loft conversions are usually considered permitted development. But if your conversion includes structural alterations, then your neighbour may have to give their permission. In addition, you will have to follow building regulations to make sure your conversion is safe.
Before converting your loft, you should seek advice from your local planning authority to ensure that you are following the right rules. If you are not sure what you need to do, you can get advice from our architectural team.
Once you have decided on your loft conversion plan, you need to ensure that you are using the right materials. You must also be sure that you have good insulation and that you are installing it properly. You may also need to hire a professional building surveyor from our company.
In the event that your neighbour objects to your conversion, you will need to consider a party wall agreement. This is a legal document that protects your neighbours building rights. It details the terms of the conversion and is signed by both parties.
The Party Wall Act applies to all types of properties. It also provides a framework for preventing and resolving disputes.
If your neighbour objects to your loft conversion, you must discuss the issues with them before serving a party wall notice. This notice will outline your plans and allows your neighbour to raise objections. If you are unable to settle the issue, you may have to take legal action.
Using a party wall surveyor to resolve disputes can be an effective way to avoid costly legal proceedings. The surveyor will assess your situation and provide impartial advice.
If you have used up your permitted development rights, you may have to apply for full planning permission. If you are planning on doing any structural changes to your party wall, you will also need to get written consent from your neighbour.
How to Plan your Loft Conversion
November 28, 2022
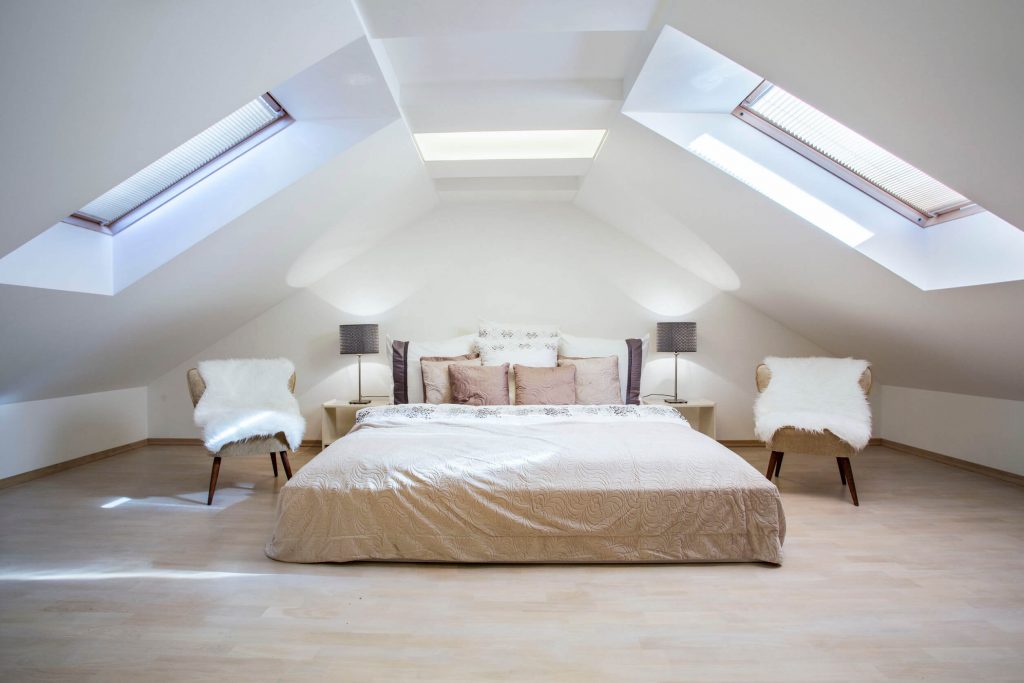
One of the most important things to think about when planning a loft conversion is the design. You should also consider what furniture you'll need to furnish the new space. It's best to shop for items in advance, so you can have them delivered in a timely manner. Lastly, you should consider whether to keep the new furniture in your home or move it into the loft after the conversion is complete.
Planning permission
If you want to convert your loft into a bedroom, you will need planning permission. Although loft conversions are often done without a planning permit, it is a good idea to seek permission from the local authority to protect the value of your property and ensure that any changes do not cause any harm to your neighbors. Generally, a standard loft conversion does not require planning permission as the work is not likely to have a significant effect on the outside of your property and it will not affect the view or space between neighboring properties.
To get planning permission, you must consult with our architect. This will ensure that your conversion will be approved without any complications. You should also discuss the loft extension plans with our qualified architect before you begin the conversion.
Designing a loft conversion
Designing a loft conversion is a great opportunity to create extra space. If you've got a spare room on the second floor, you can turn it into an extra bedroom. However, if you have a narrow space, you'll need to consider other features. Built-in wardrobes and shelves are an excellent way to maximise space. You can also include other features such as a study and laundry cupboard.
Another important aspect of loft conversion design is windows. Ideally, 20 percent of the roof area should be glazed to maximize natural light. The shape of the roof will also affect the positioning of the windows. For example, if your room is long and shallow, it makes sense to have windows evenly spaced along its length, while if it's narrow and deep, you might want to opt for a single large window.
Head height requirements
When planning a loft conversion, it's important to know how high the ceiling needs to be. Generally, the minimum ceiling height is two metres, although this can be reduced to 1.8 metres in the middle and 1.9 metres at the edge. This rule is only applicable to newly-built lofts.
Glazing options
There are many glazing options available for loft conversions. Rooflights are a good choice if you want to flood the attic with natural light. However, they don't allow for optimal views of the surrounding landscape. For this reason, rooflight isn't always suitable for conversions with low head heights. If you want to maximize views, skylights with glass fronts may be the better choice.
If you have a listed building, you'll want to ensure you adhere to building regulations. This may mean using a specific type of glazing. This is particularly important if you want to minimize noise or keep internal condensation to a minimum. This type of glazing can be expensive, so be sure to consider the costs before committing.
Insulating a loft conversion
Insulating a loft conversion is an essential step in any loft renovation project. It will not only keep the space warm in winter, but it will also improve energy efficiency in your home. Insulation also helps to keep noise levels down in the home by dampening outside noise. A skilled Architect will be able to advise you on the best insulation for your conversion.
It is also important to consider the roof of your loft conversion. If it is not insulated well, heat will escape. You should also consider the loft conversion regulations, which have recently become stricter. Older loft conversions are unlikely to meet current building regulations.
What is a Party Wall Agreement?
November 11, 2022

What is a Party Wall Agreement?
A party wall agreement is a legal document that individual landowners enter into with their neighbors. These agreements are often helpful in determining when a building was constructed. They are usually signed prior to construction, but they can be entered into years before a building is constructed.
Disadvantages of a party wall agreement
A party wall agreement is an important document that establishes the relationship between two property owners. It can help limit disputes between the owners of two adjacent properties, and in some situations, it can even prevent lawsuits altogether. The agreement is enforceable, and it binds subsequent owners, too. A party wall agreement is a type of covenant that runs with the land, meaning that future owners are bound to meet their obligations. Moreover, this type of agreement gives future buyers the same rights and burdens as the original owners. Regardless of ownership, the rights and burdens are attached to the property, and a party wall agreement can help prevent conflicts.
The benefit of a party wall agreement
The benefit of a party wall agreement is that it prevents expensive litigation. It defines the rules for maintenance and alterations, and it may include regulations for noise. It may also stipulate a waiting period before alterations are permitted. This way, a property owner will not have to worry about a dispute.
Another benefit of a party wall agreement is that it allows the developer to take into consideration the impact of his building work on adjoining properties. The construction of a building can cause major disruption to the neighboring properties. Not only is this potentially damaging for the adjacent property, but it can also incur additional construction costs and professional fees. Therefore, it is important to use this document before starting any construction.
How to serve a party wall agreement
If you're planning to construct or renovate a building that shares a party wall with your neighbors, you need to follow the steps outlined in the Party Wall Act to make sure that all parties are aware of the project. A Party Wall Act notice must be served at least one month before the start of construction or demolition. Depending on the type of work, you may need to give more than one party notice to your neighbors.
It is important to remember that a party wall agreement is a legal document that both parties are legally bound to. It is designed to minimize the chance of future disputes. It can also cover issues such as access to the other unit and repairs. It is vital that the agreement be filed in the real property records of the county, which makes it legally binding.
It is important that you provide your neighbors with the necessary information and architectural drawings. It is also important to note that you can't carry out any work without their written consent. Providing them with the required information and drawings may help you resolve the dispute. It's also a good idea to explain your plans in person to avoid surprises.
Service of documents by hand may be preferred by the owners of adjoining properties. While the Party Wall Act specifies that it must be served personally, this may not be the best option for some neighbors. Serving documents by hand adds a personal touch to the legal process and may even be preferred by those whose relationships with their neighbors are cordial.
What are the benefits of a Loft Conversion
November 9, 2022
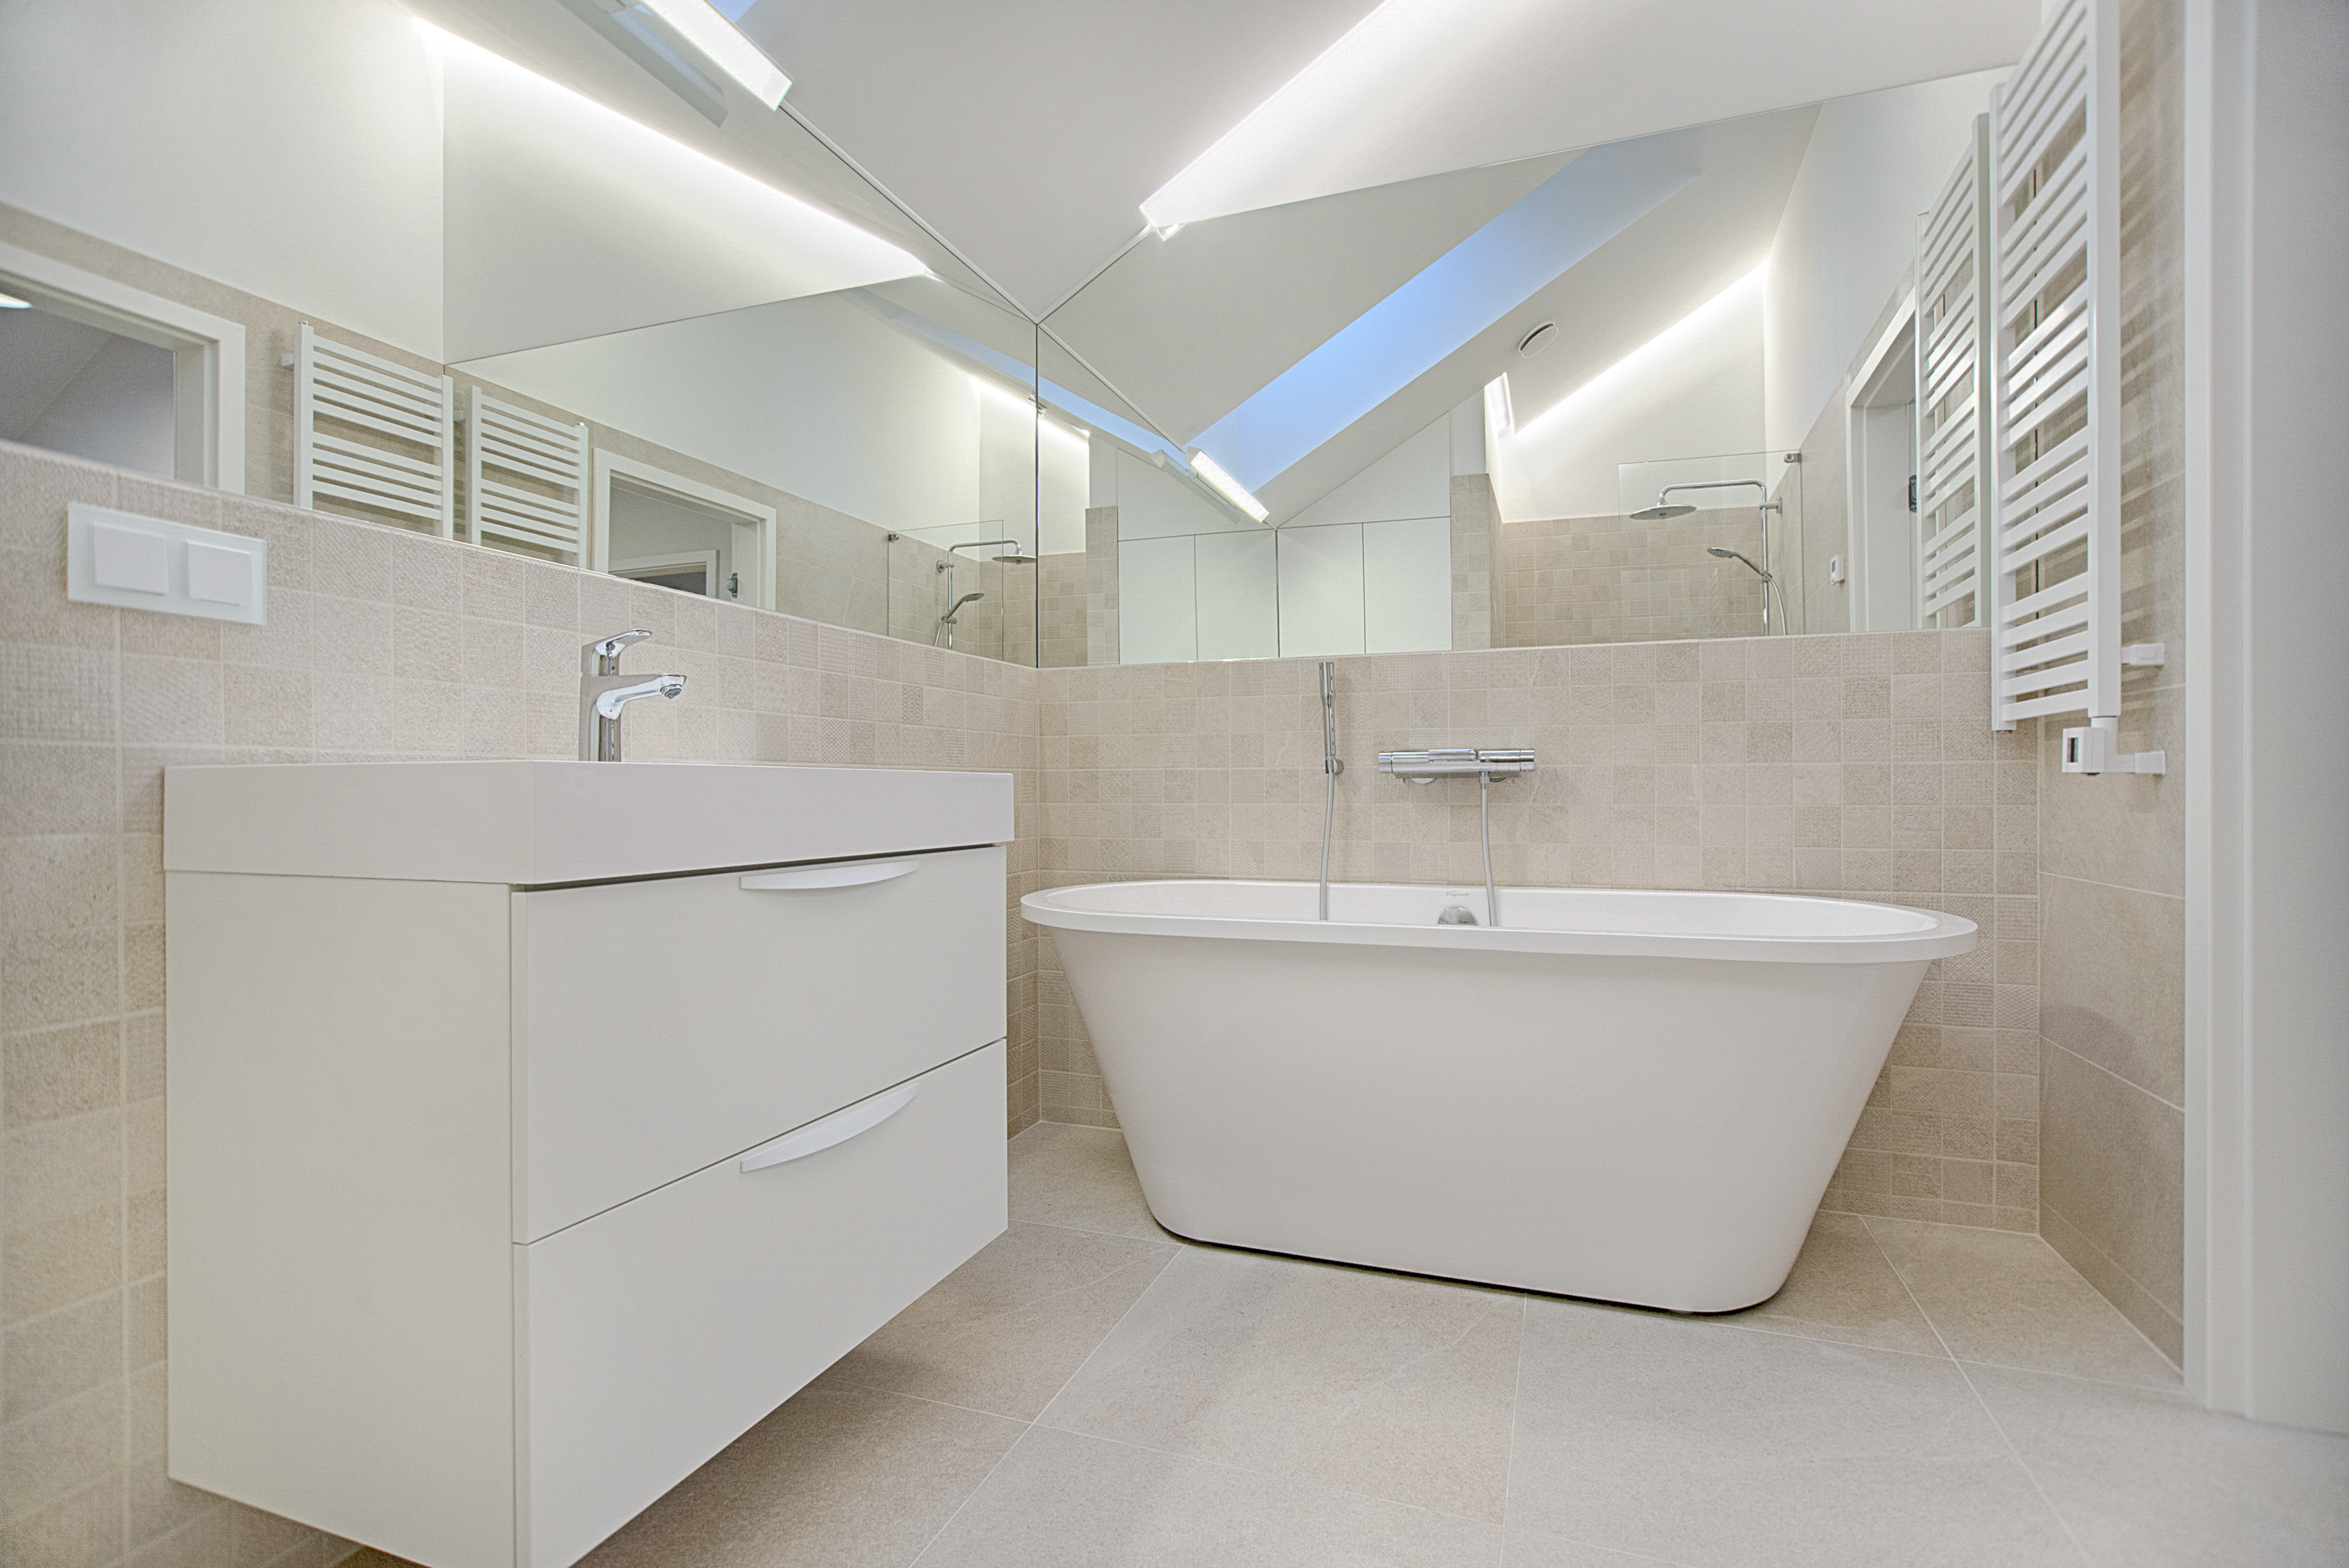
Benefits of a Loft Conversion
You can increase the value of your home by having a loft conversion, and gain an extra living area. You also can eliminate the hassle of moving house by having additional space. If you are considering a loft conversion, here are some things you should know. You may want to de-clutter your loft and make more use of it.
Common uses of a loft conversion
There are many common uses for a loft conversion, including a bathroom. Adding a bathroom to your home can not only make it more comfortable, but it can also add value to your home. If you are considering a loft conversion, consult an expert to find out if it is possible to add an extra bathroom.
A loft conversion can add value to your home and can make it more energy efficient. The extra insulation helps to reduce your utility costs. There are several different types of loft conversion, including dormer conversion, hip-to-gable conversion, and gable conversion. Dormer conversions are the most common, and they typically feature dormer windows. In addition to adding space to your home, a dormer conversion is a good option if you have a house with a traditional roof structure.
Loft conversions also have many other advantages. They can increase the value of your home, as the addition of a bedroom and bathroom can increase the value of your home by up to 21%. They also help to reduce your energy bills and carbon footprint. Additionally, many buyers will prefer a home that is energy efficient.
Increase in value of your home
A loft conversion is an excellent way to increase the value of your home. Not only does it provide additional space, but it also allows for natural light through roof windows. Having a double bedroom and bathroom in your loft can make your home more sellable. It can even help you make money if you plan to rent out the additional space.
Before undertaking a loft conversion, make sure you have the proper planning permission. This will ensure that you can carry out the conversion legally, which will help increase the value of your home. You should also make sure that your conversion does not clash with other properties in the neighborhood. A loft conversion can add between 10 and 15 percent to the value of your home.
Many homeowners use a loft for different purposes, including bedrooms, home offices, gyms, and games rooms. The extra rooms can increase the value of your property, while the work itself is relatively inexpensive. In fact, some homeowners find that their loft conversion can increase the value of their property by as much as 20%.
Adding extra living space
One of the benefits of a loft conversion is the extra living space it can give you. It is also an excellent way to increase the value of your property. It can give you a second bedroom, or a larger kitchen. You can work from home, or simply enjoy a more spacious environment.
If you have a growing family, a loft conversion can be a great way to create more space without having to move. A loft conversion can also provide extra storage space. This extra space can be used to store winter decorations or even seasonal equipment. In addition, it can be used as a home office.
Eliminating the hassle of moving house
Getting a loft conversion can save you the hassle of packing up and moving house. It is a cheaper alternative to selling your house, and the extra space will also help you save money on Stamp Duty and other expenses. The process of conversion takes very little time, and the inconvenience you experience is minimal. It may require some inconvenience on your part, such as short-term disruption to your daily life, but it will be less troublesome than moving house.
Loft conversions can also help you save on energy bills. You can also make use of the space for storage. There are many options for storage, including storage units larger than your current loft. Storage is also a great way to keep items out of sight but accessible when you need them. In addition, most loft conversions do not require planning permission and fall within Permitted Development Rights, making the process a quick and hassle-free process.